
Examples Using Rectangle Groups
On this page you will find practical examples of rectangle groups shown through image sequences. As taught on the previous page, the rectangle groups use the narrow, square or wide qualities of SubRectangles to detect the shot label or range of possible shot labels.
To scroll through the images in each sequence you have three options. You can drag or swipe the images left or right to control the fade in and fade out from image to image. You can also click or tap the left and right arrows for a 2-second fade delay between images; or click or tap the dots below the images.
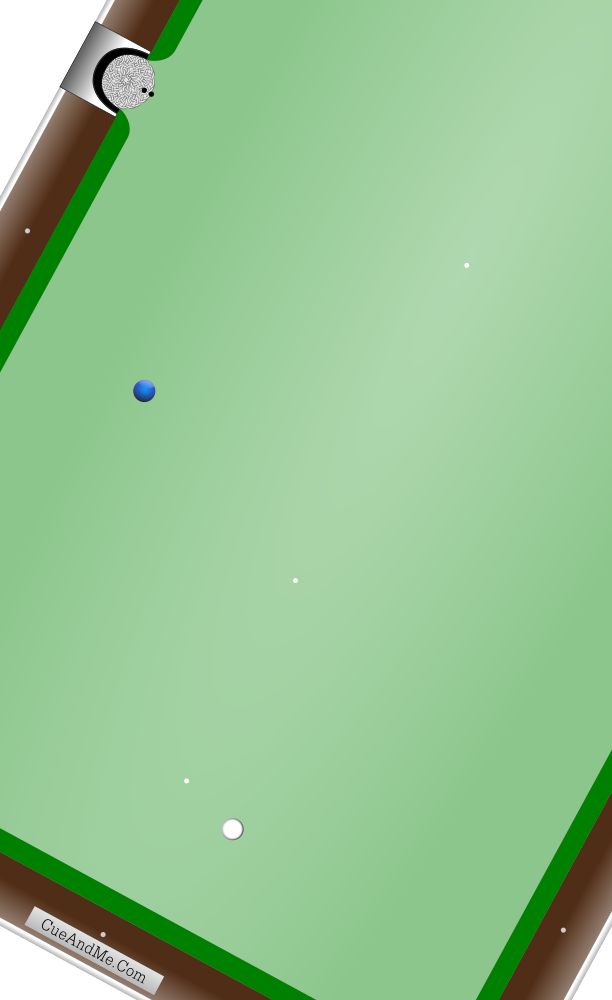
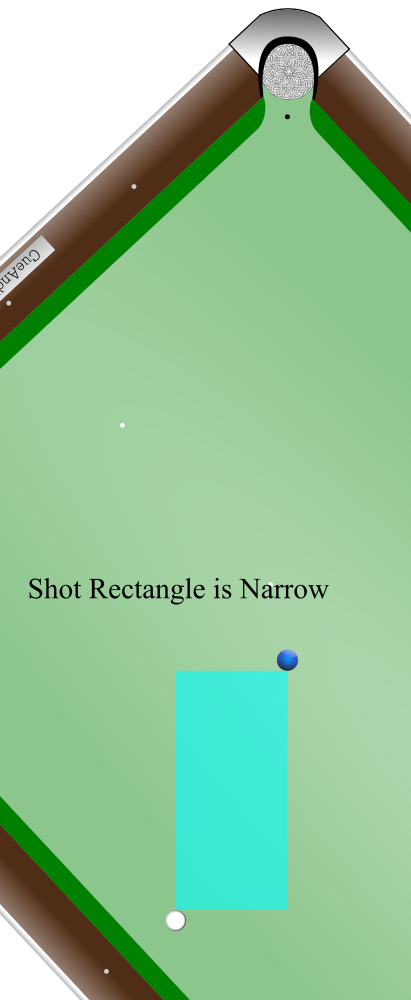
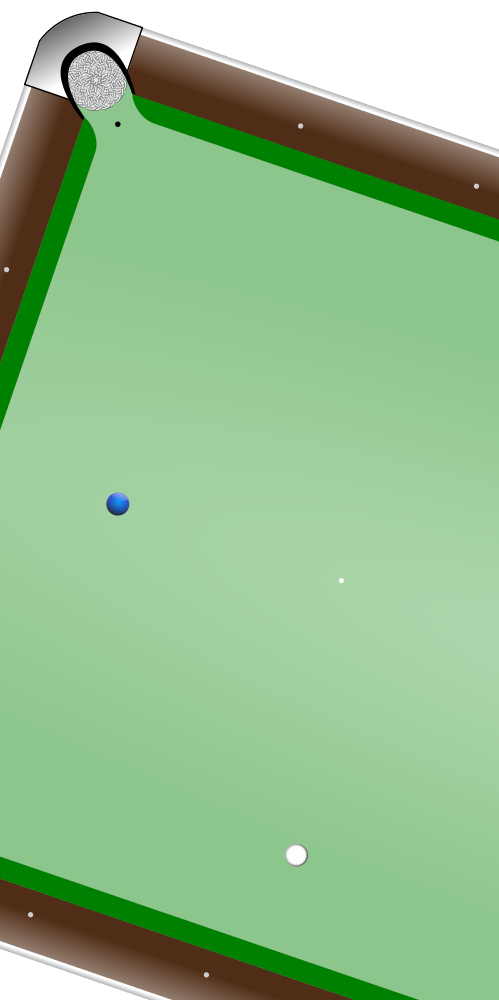
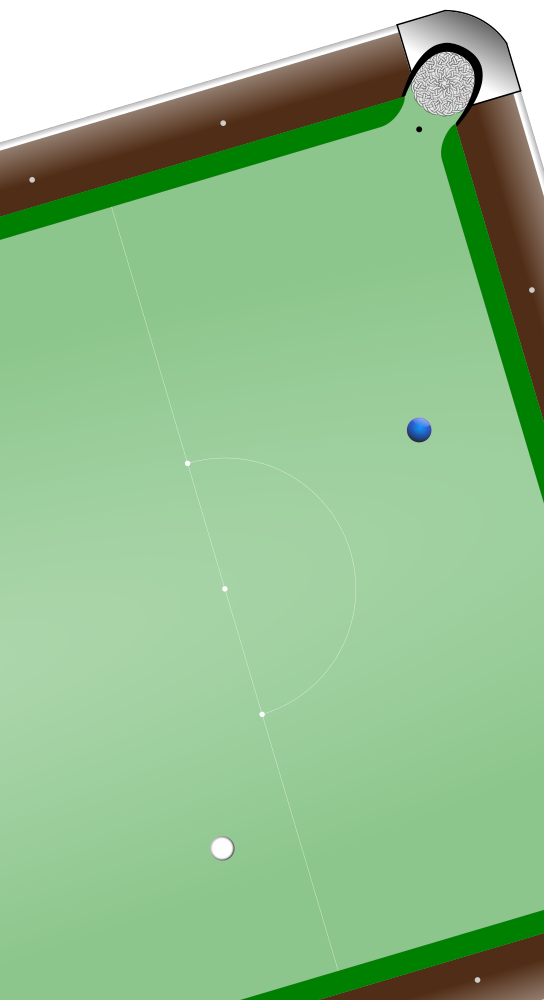
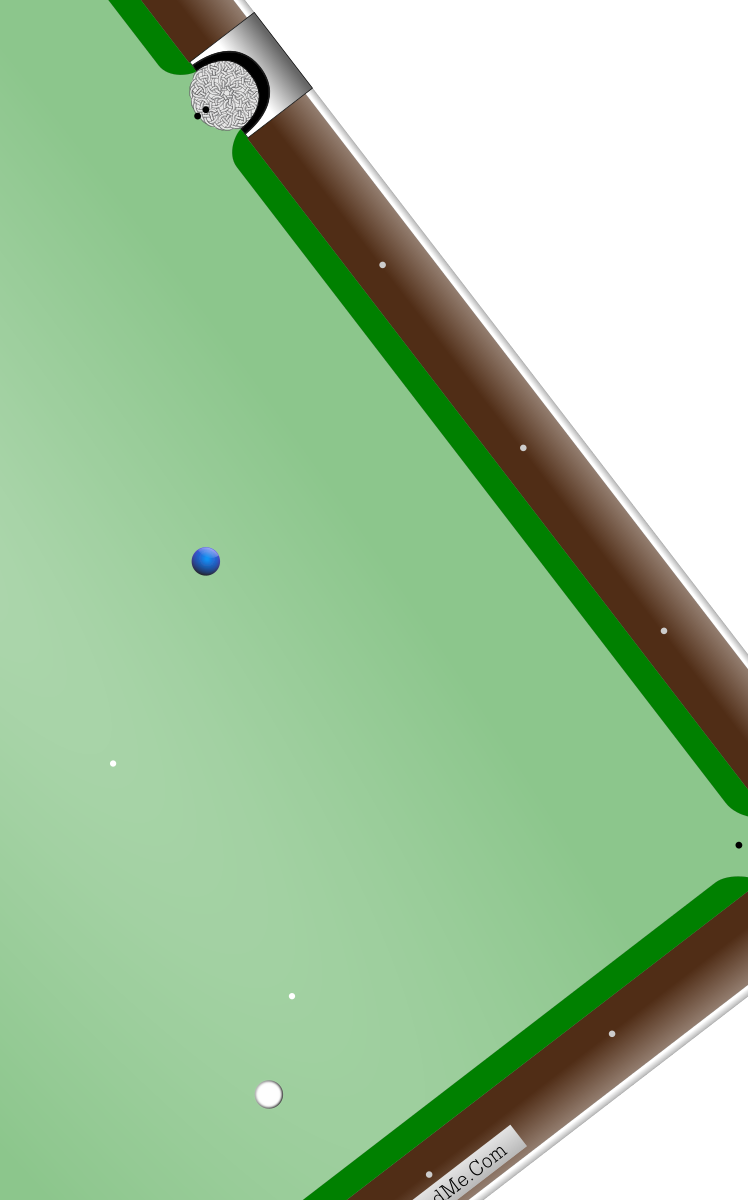
The first image in each sequence shows only the shot elements of the current shot setup—the cue ball, object ball and pocket.
These examples can be used as practice. Before scrolling to the next image in a sequence, what angle or aim does it look like to you? Don’t expect to be perfect, but try to apply SubRectangle widths to detect the shot label or range of shot labels for the given shot setup.
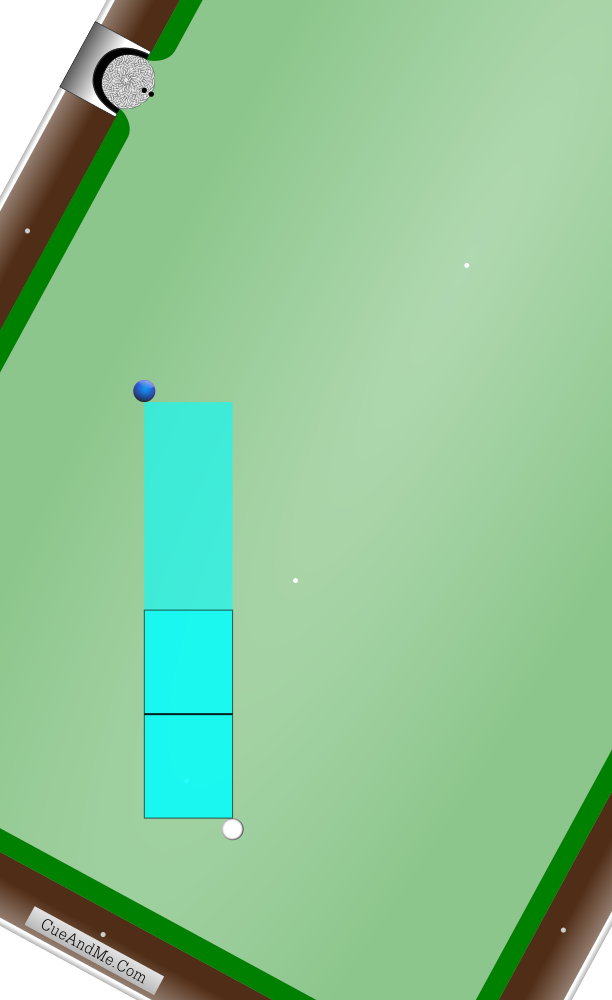
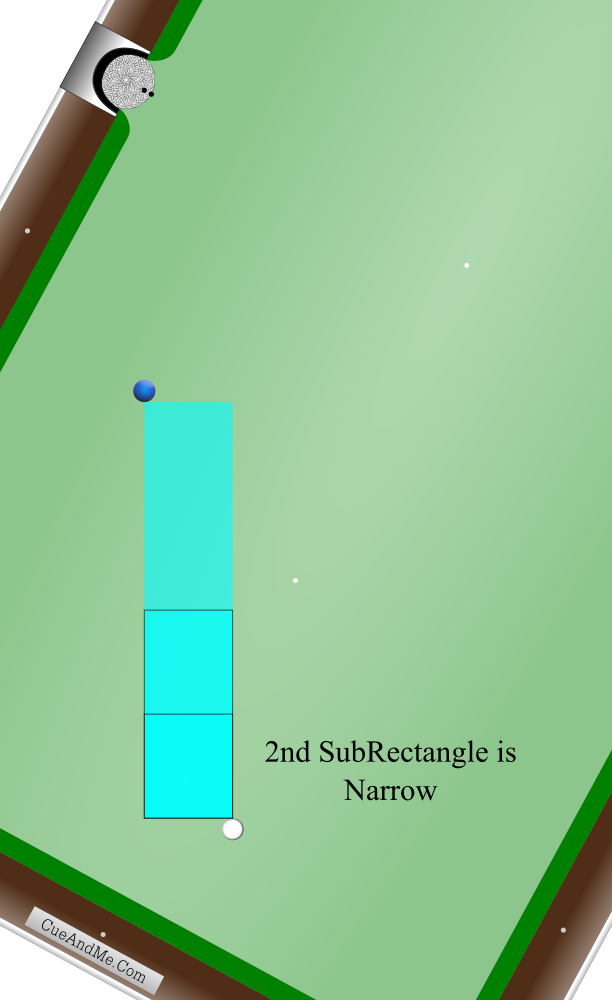
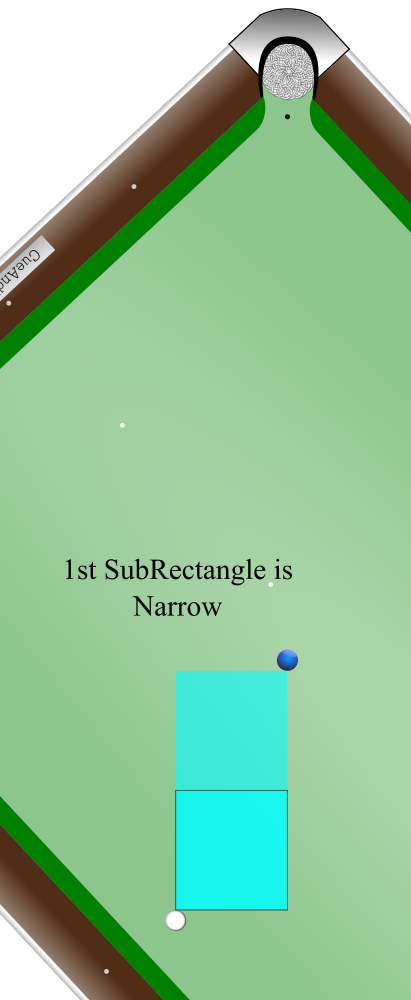
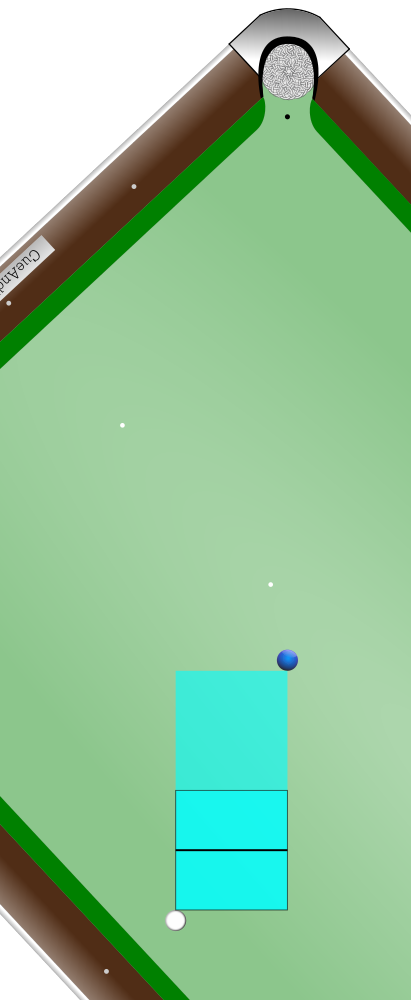
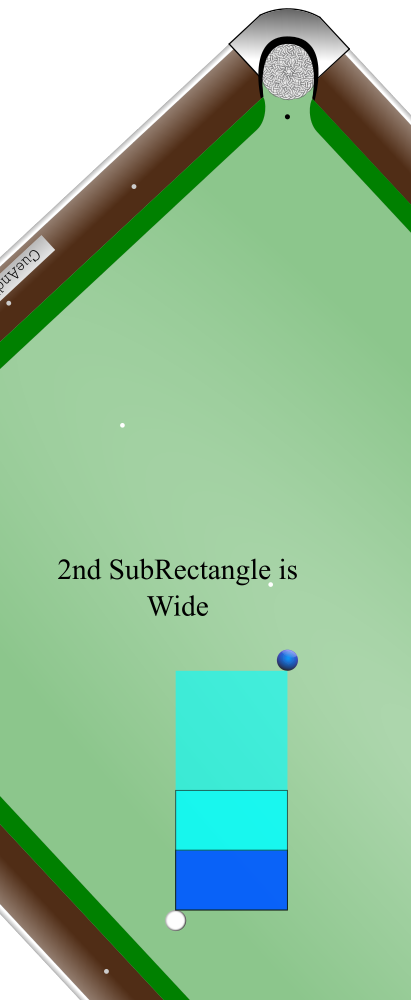
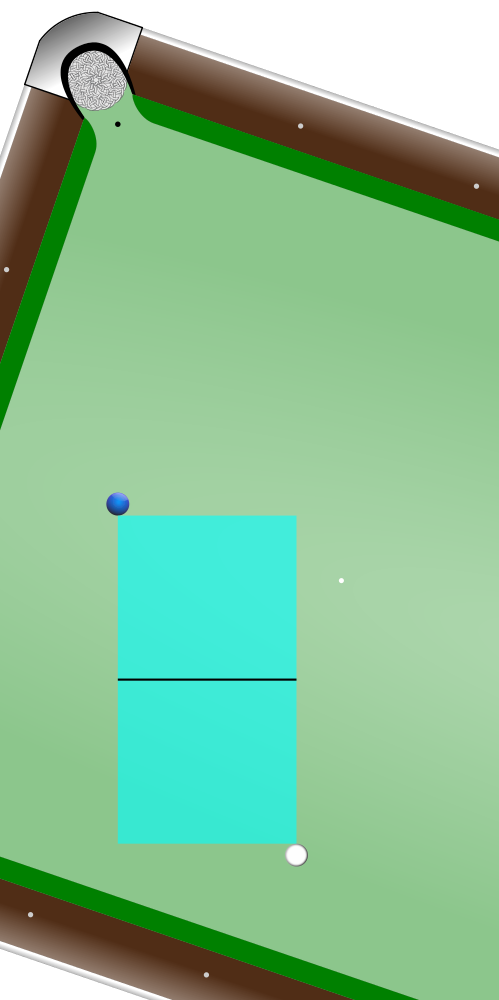
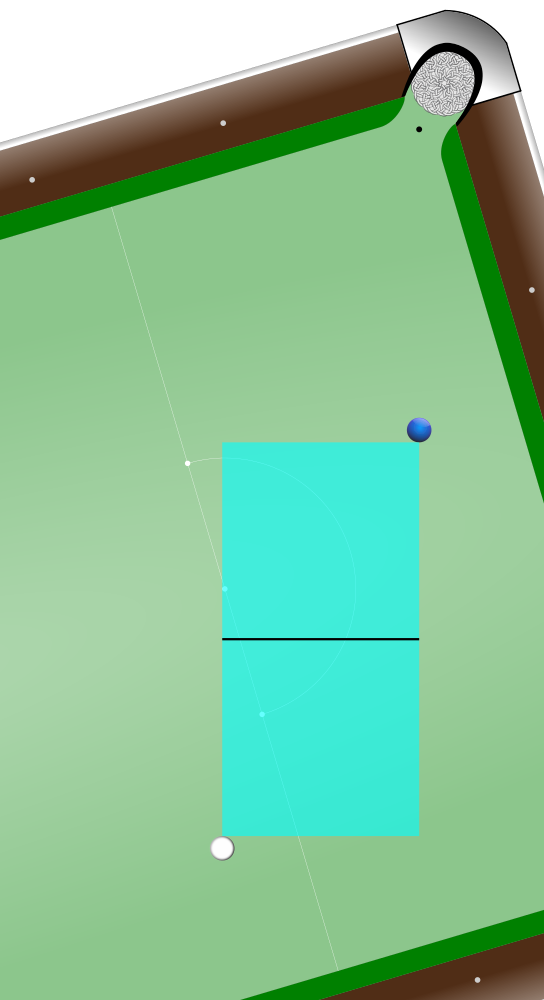
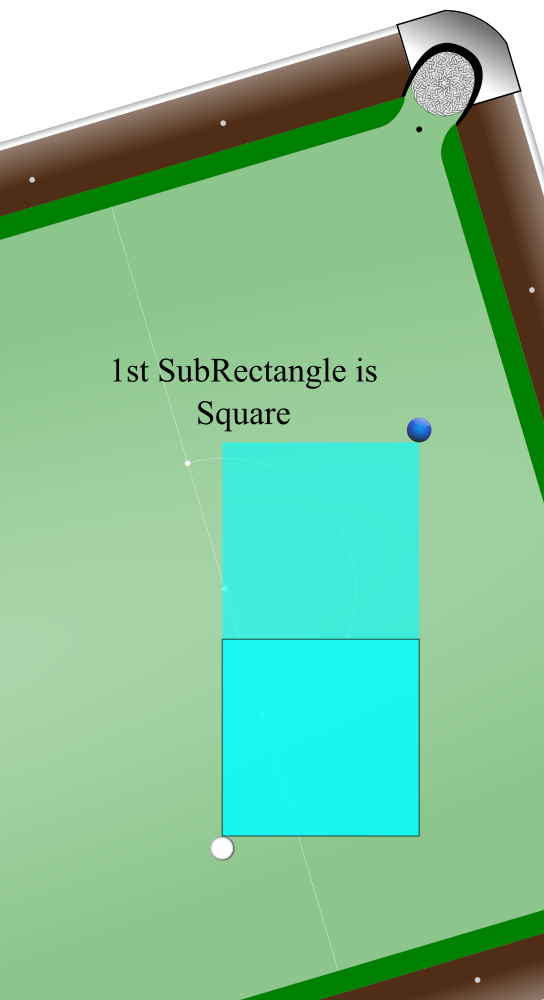
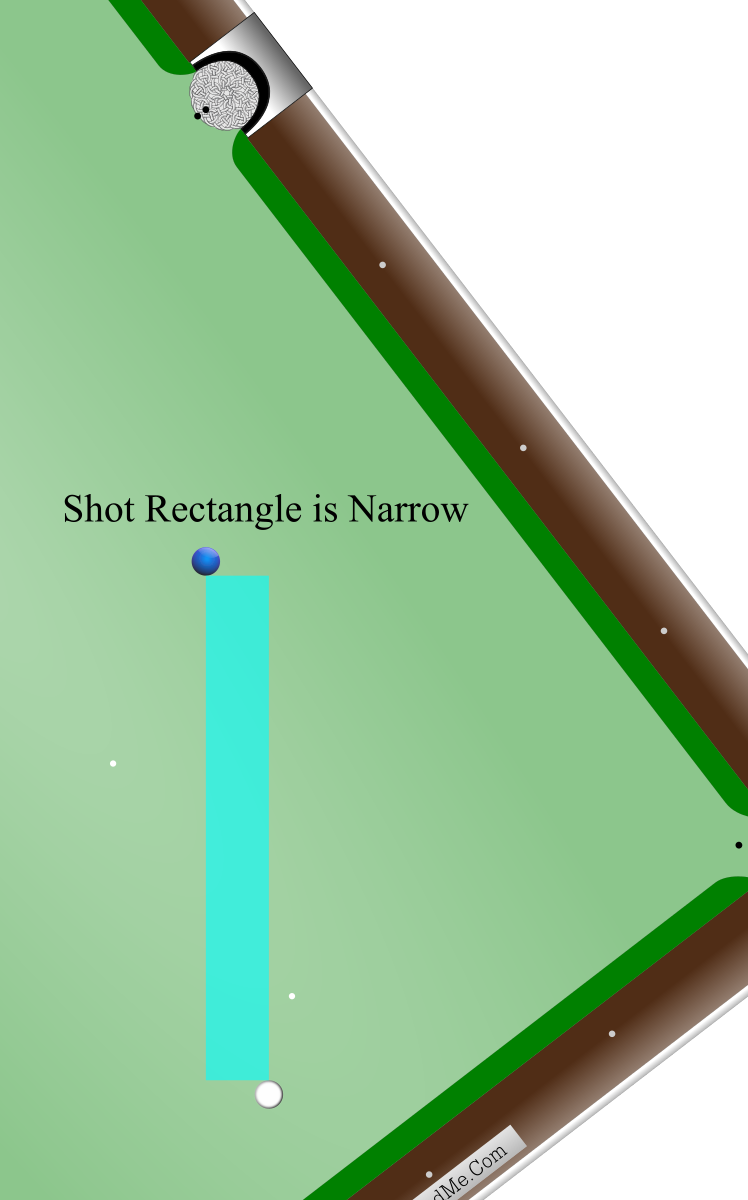
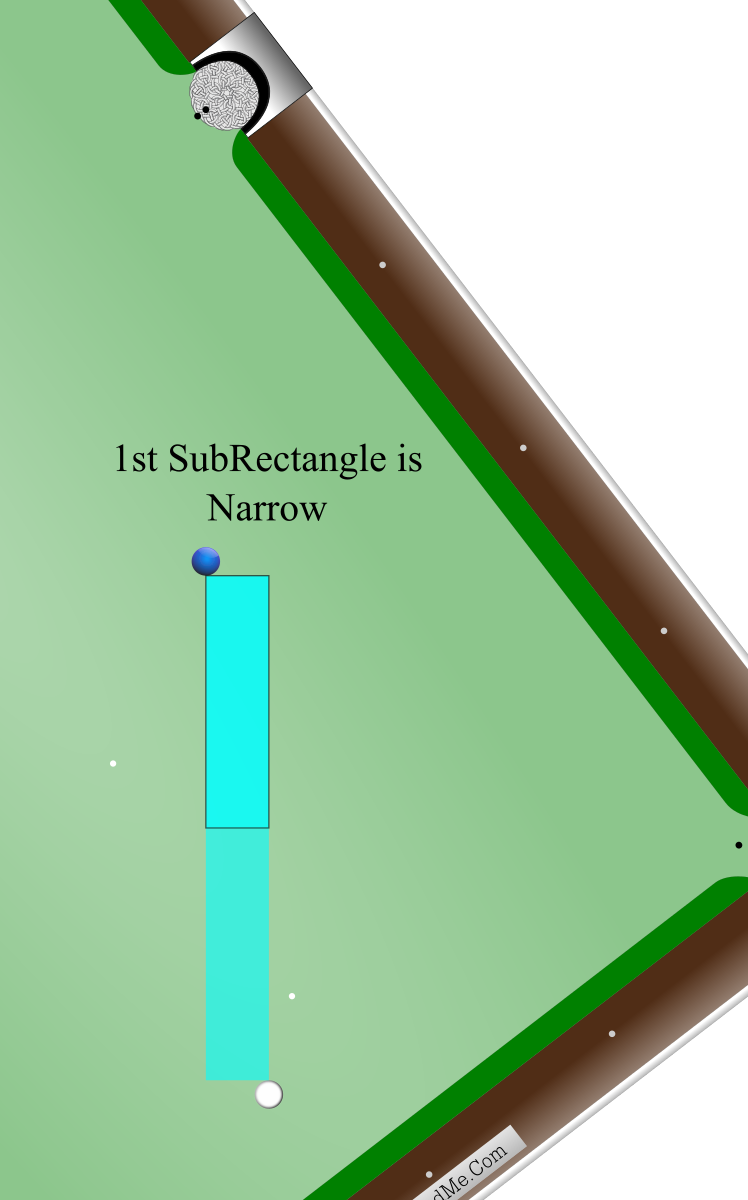
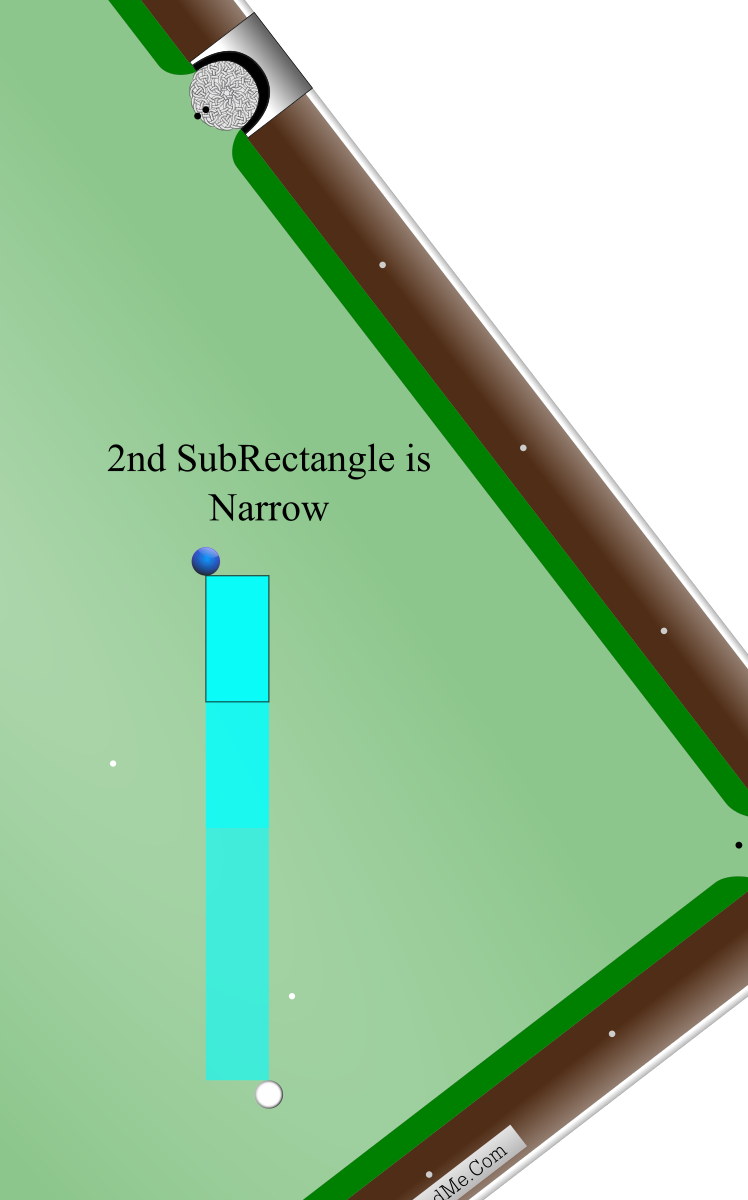
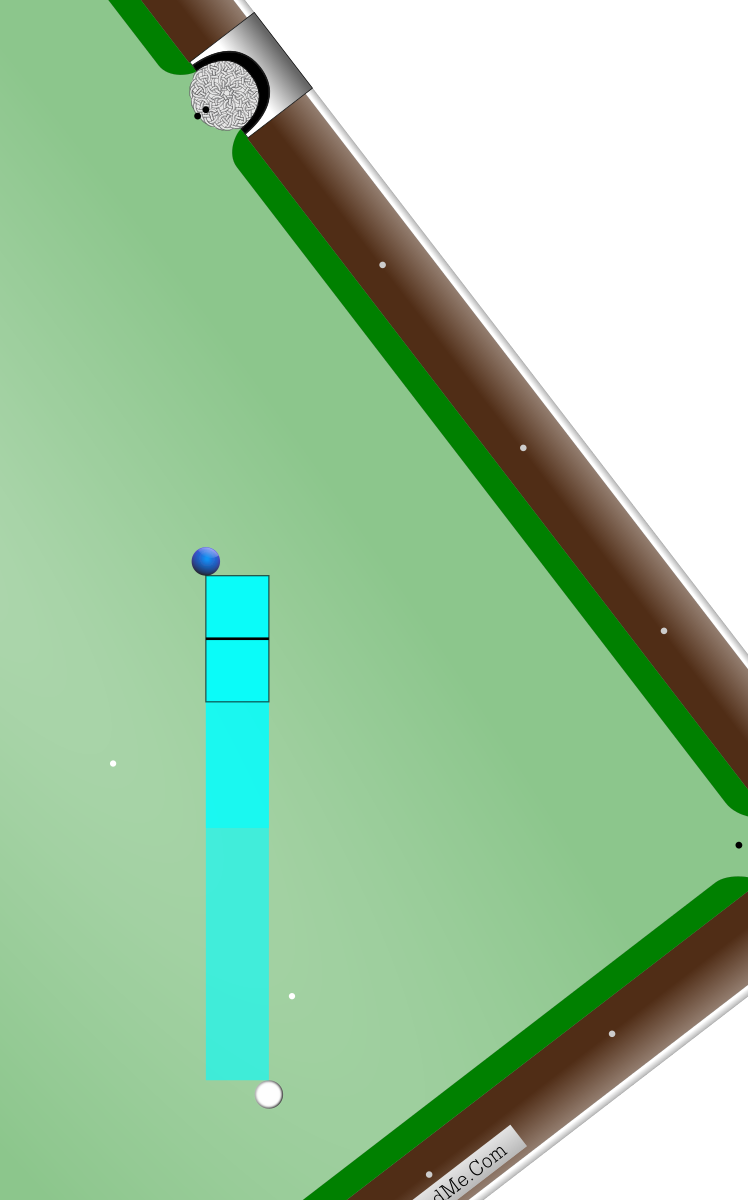
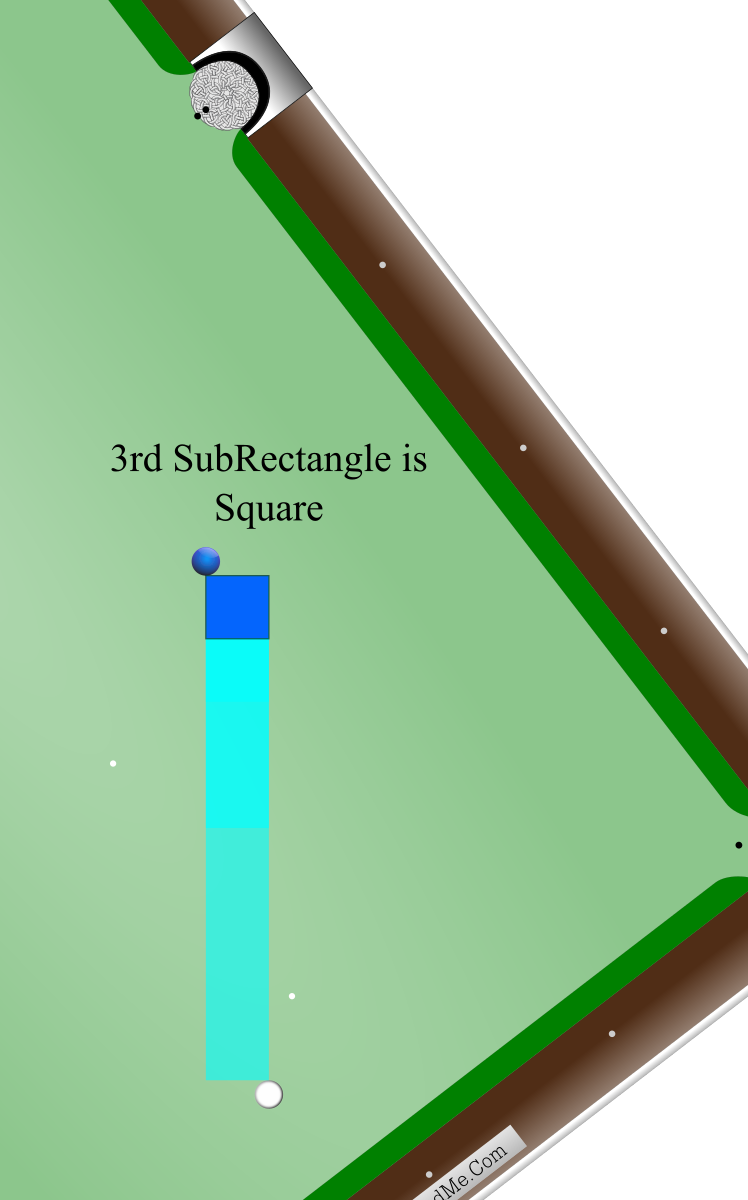
Each new image shows the shot rectangle and subsequent SubRectangles being split in half until the final SubRectangle’s width quality is either square or wide.
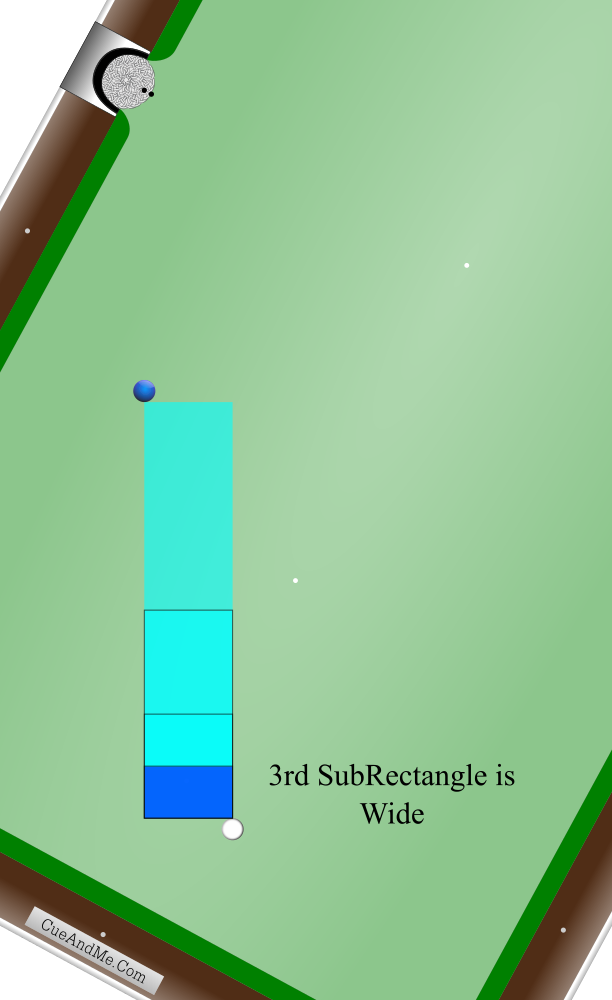
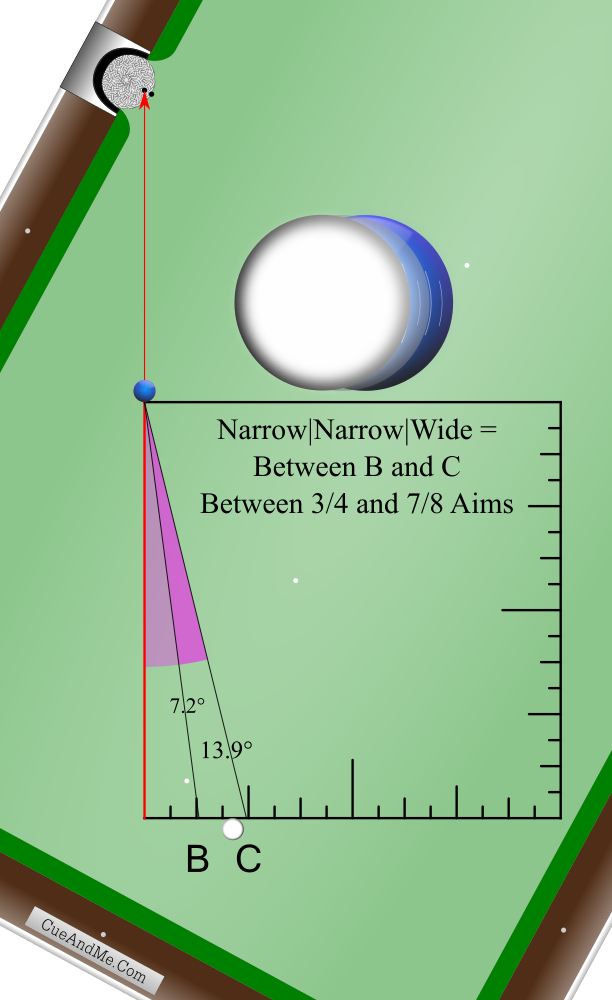
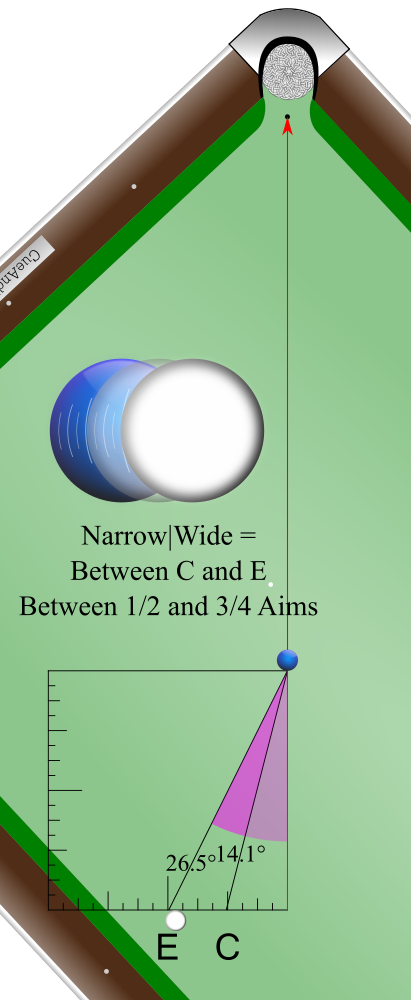
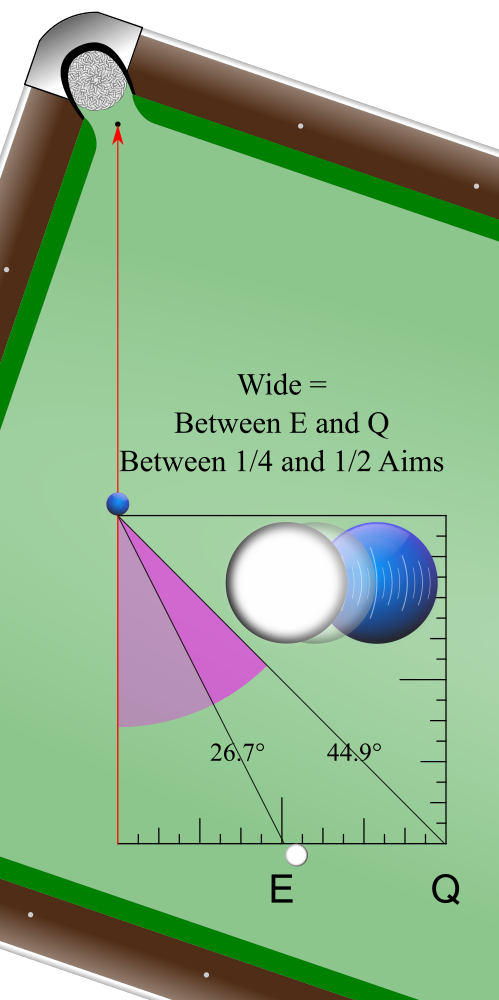
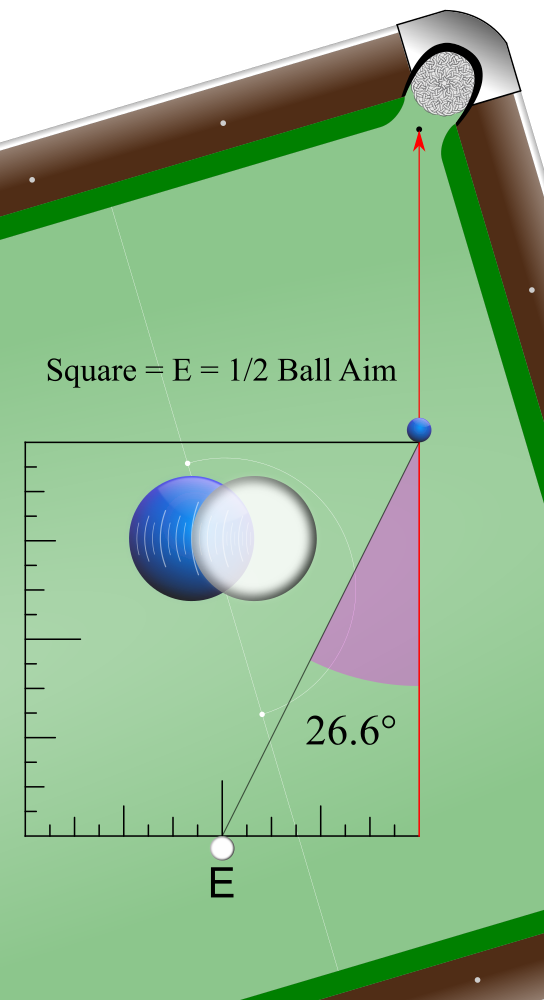
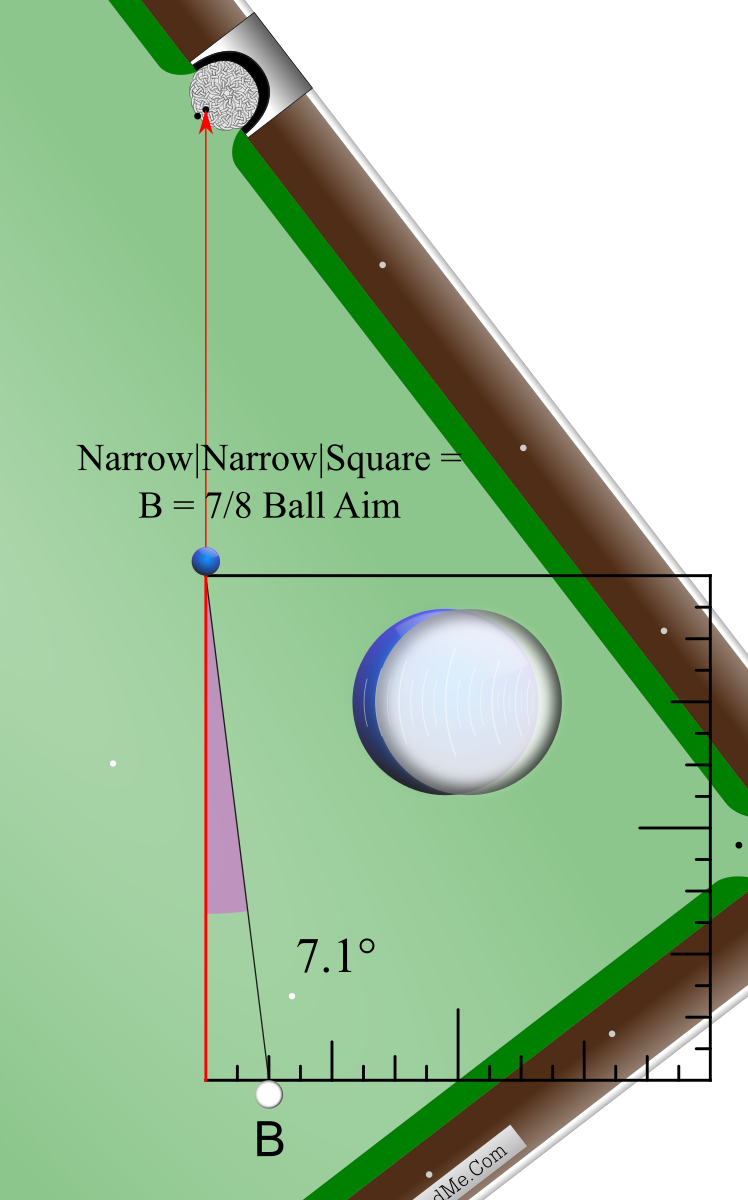
The final image reveals the rectangle group’s width sequence, the shot label or range of possible shot labels, the angle or angle range measurement, the corresponding ball fraction aim or range of possible aims, and the Master Square.
Notice how a single line drawn across the middle of a shot rectangle can immediately determine whether a shot is just below, just above, or exactly an ‘E’ 1/2-Ball shot.
Example 1


Example 2


Example 3


Example 4

Example 5


More examples will be added to this page as I find time to create them. Thanks for your patience.
