The Master Square, shot rectangles and patterns apply 2-dimensional geometry, yet we live in a 3-dimensional world. The ability to study a shot from a bird’s eye view above the table isn’t often possible. When cue ball and object ball are both close to the cushion we can sometimes lean over the table for a downward view and see virtually no skewing of the geometry. But most of the time, we are looking from our personal eye height at various angles downward and across the plane of the playing surface, and for this reason we have to learn how to adjust for the skewed perspective of lines, squares, and rectangles viewed from these angles. Different conditions skew the perspective differently. Learning how to adjust for each comes with practice.
We are always experiencing this skew of geometry without giving it any thought. Viewing a rectangle such as a window frame from a perspective other than directly in front of it visually alters the relationship of the rectangle’s sides and interior angles. We don’t normally notice this, because a lifetime of viewing objects from different perspectives informs us that the window is still a rectangle. But if we were to align one side of a face-on portable reference to one side of the window, at least two sides wouldn’t match up.
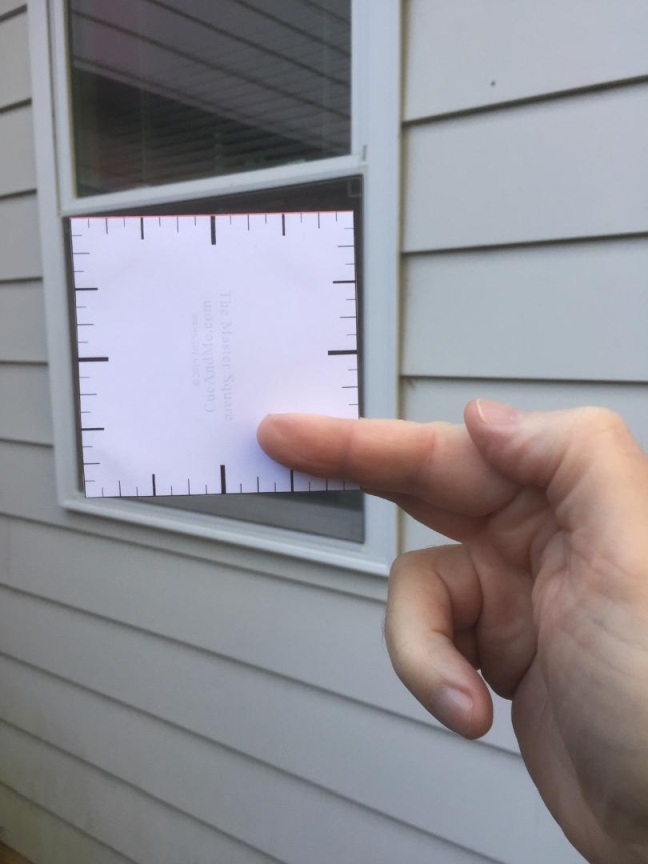
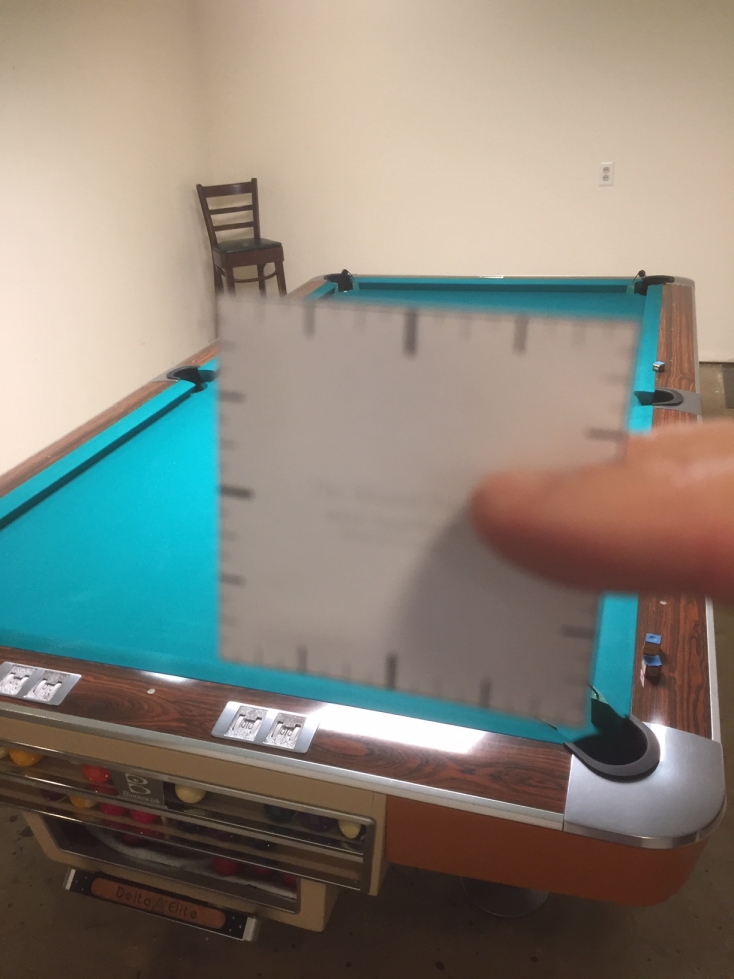
An example is the pool or snooker table itself. We know it’s a rectangle, but we’re never in a position to truly see it as the rectangle it is. No matter where we stand, it always appears skewed. To see this, hold the chalk bottom or portable Master Square so that it is face on rather than parallel to the table bed, and match one of its sides to one side of the table. You’ll see that there is always at least one side of the table that is not parallel to the reference square.
In the image below, the left side of the table doesn’t match up.
We have rarely if ever had to rely on the geometric integrity of a visually skewed object, but for the Angle Detective shapes and patterns to be as accurate and effective as possible, we must acknowledge this phenomenon. The best way to learn how to adjust for skew is to use the printable portable Master Square or bottom square of the chalk cube as a reference during practice.
First visualize and apply the various Angle Detective methods to the shot you are practicing, and before shooting check your work against the Master Square or chalk’s bottom square. Doing this for shot after shot, you will quickly learn when and how to adjust for skew.
Different viewing heights, eye to cue ball distances, and cue ball to object ball distances all require at least slight adjustments for the most accuracy.
The distance between the cue ball and the object ball is an important consideration if we wish to be our most accurate.
0° to 90° is the theoretical maximum angle range for cut shots to the left or to the right. However, as the distance between cue ball and object ball decreases, this range shrinks. Mathematically, the relationship of angle range to ball distance is represented by arccosine(D/d), where D is the ball diameter and d is the distance between ball centers.
Example:
A pool ball’s diameter is 2.25 inches. When the cue ball is resting against the object ball, the distance between the centers of the balls is 2.25” which equals the ball diameter of 2.25”. In this situation, the range of angles available is at its minimum of 0° being that arccosine(2.25/2.25) = 0°. In other words, no matter what direction we send the cue ball, there is only one direction available for the object ball to travel.
However, if the balls are a great distance from one another, the range approaches the full theoretical 90°. So if the pool ball centers were 100 inches apart, the available angle range would be arccosine(2.25/100) = 88.7°. In this case the cue ball is able to contact the object ball anywhere from full in the face, resulting in a shot angle of 0°, to ultra thin, resulting in a shot nearly sideways at 88.7°.
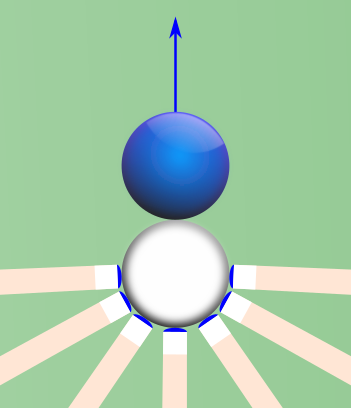
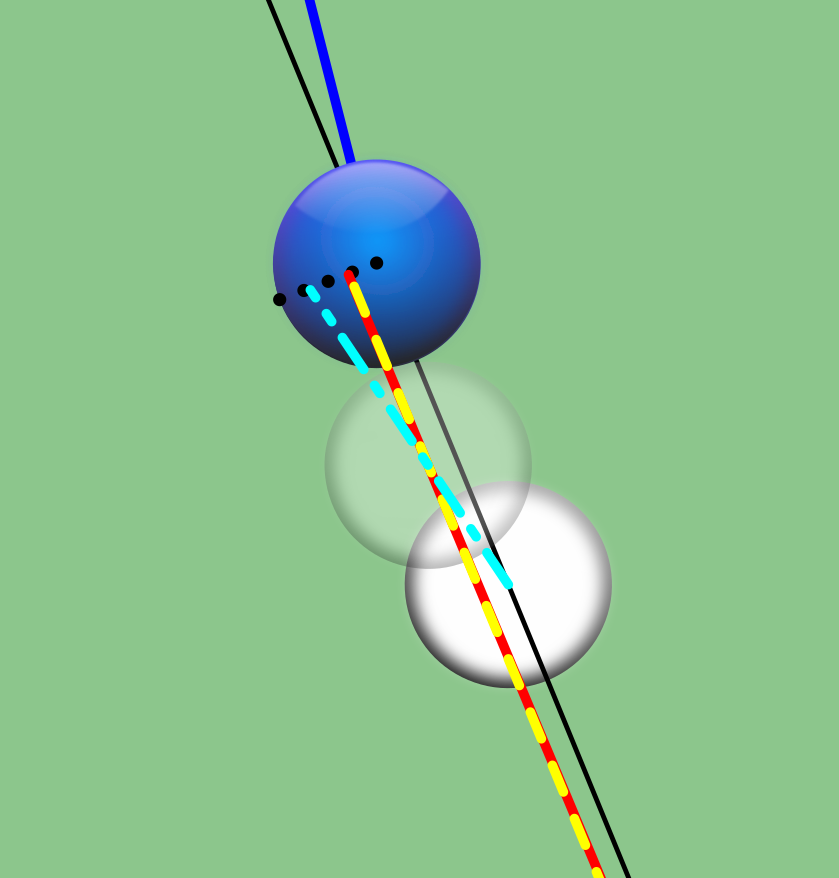
Aside: Below is a close up of the cue tip to cue ball contact extremes for this 100 inch ball distance.
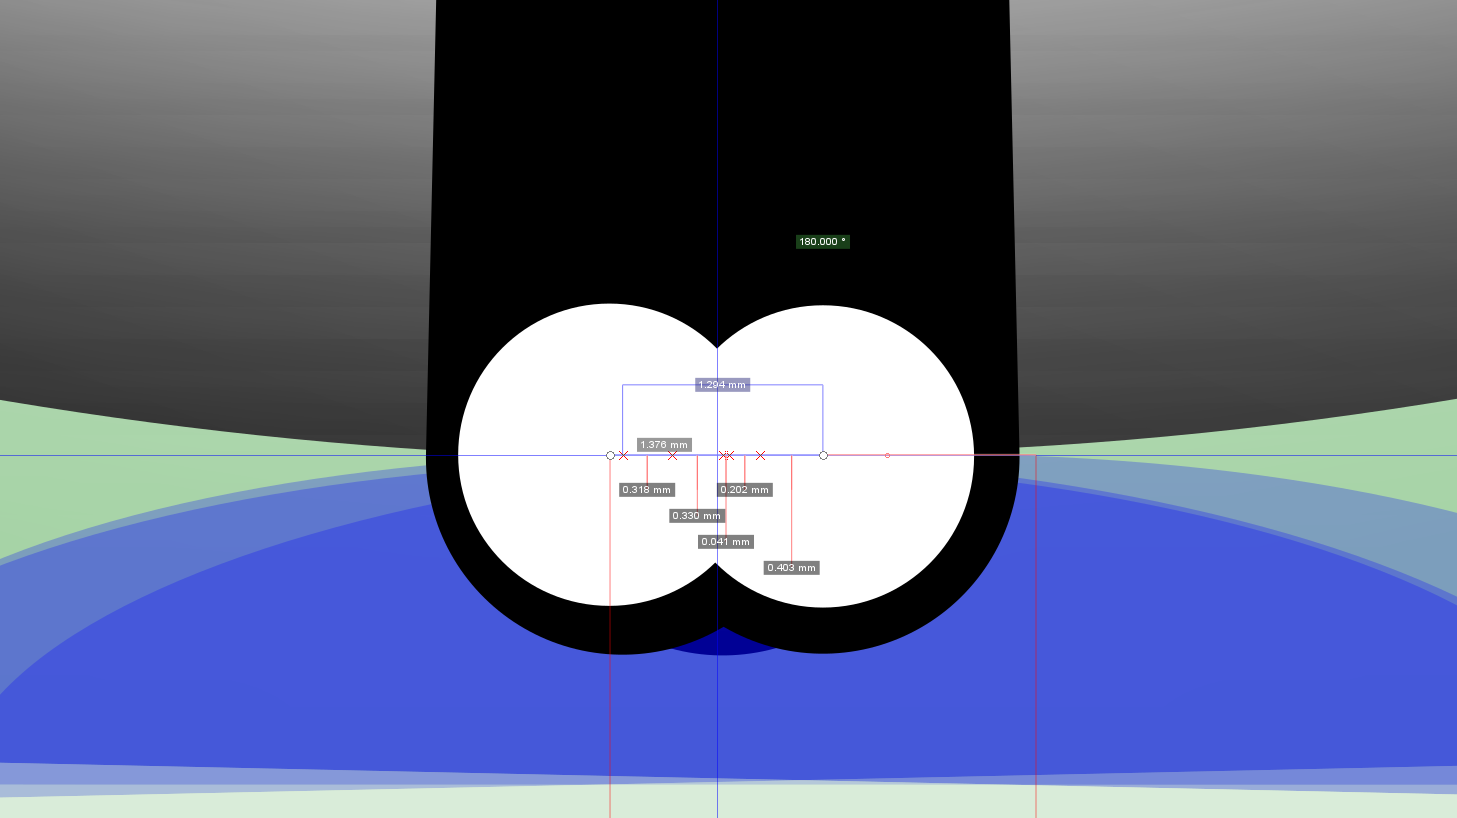
Notice that we have a paltry 1.3 millimeters of left-to-right cue ball equator surface area to play with for the range spanning an extreme cut to the left to an extreme cut to the right. This means that we have only half of that area to work with—0.65 millimeter—between the ‘A’ to ‘U’ extremes for either a cut shot to the left or a cut shot to the right! Fortunately this surface area range increases as the ball distance decreases, but it reveals just how precise and accurate we must be when aligning our eyes and cues for long shots.
The angle range to ball distance relationship also causes close ball setups to require larger and larger aim adjustments.
Example:
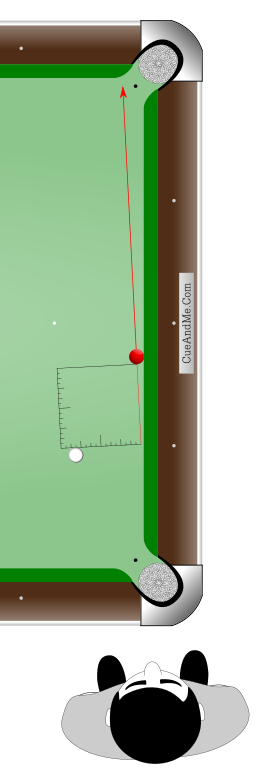
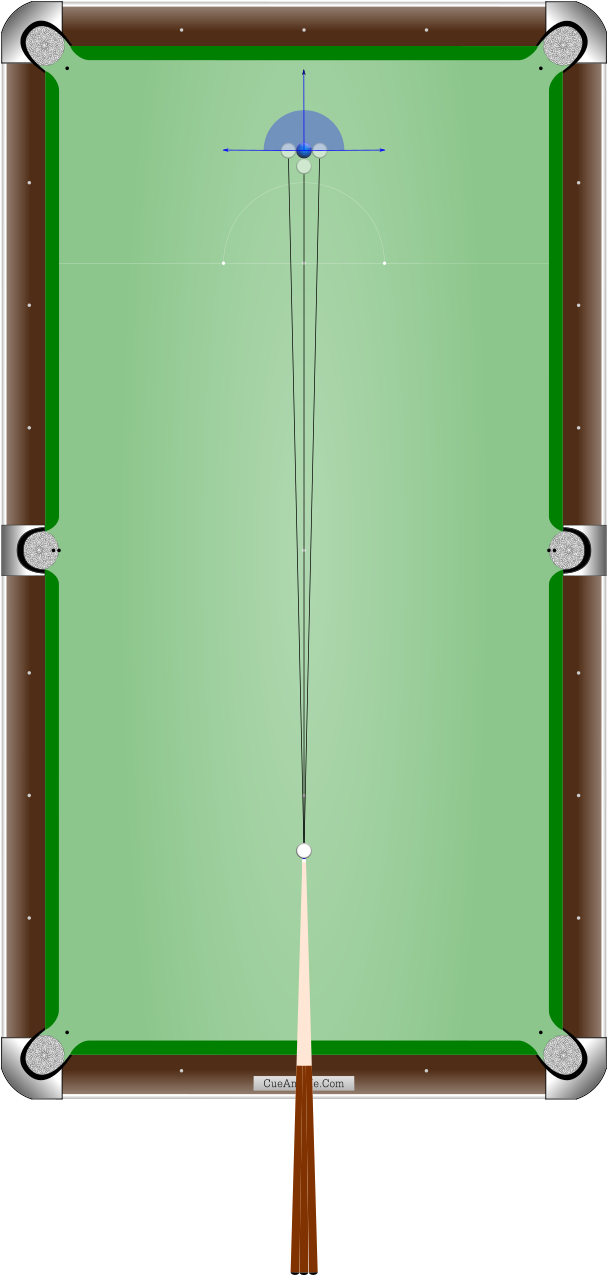
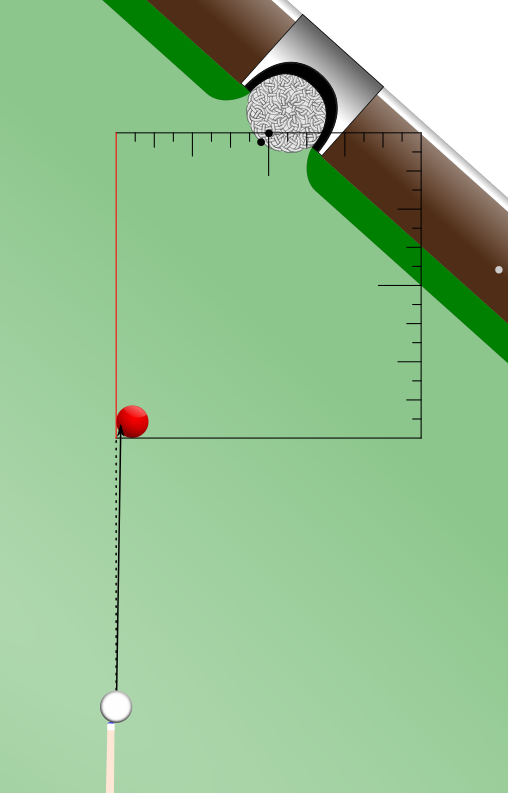
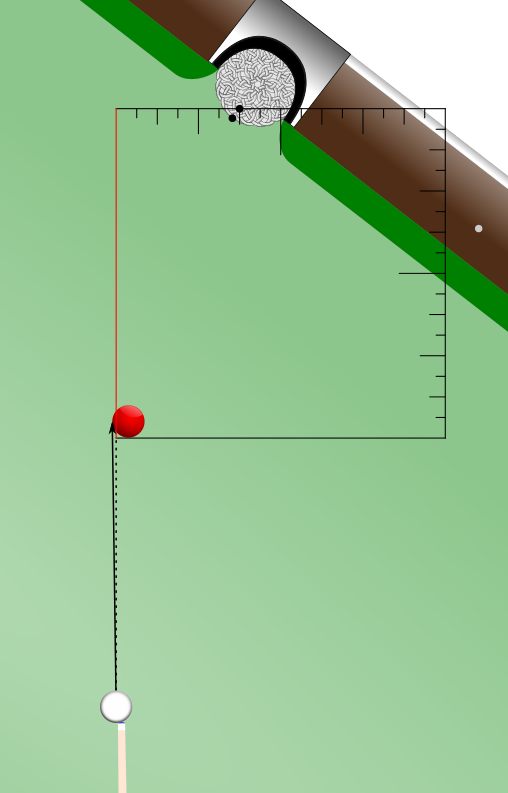
We can vividly see this by placing 3 cue balls at different distances from an object ball on a line that points barely to one side of a pocket. A full-ball 0° ‘A’ aim on the object ball would obviously miss the pocket by exactly the same margin for all 3 cue balls.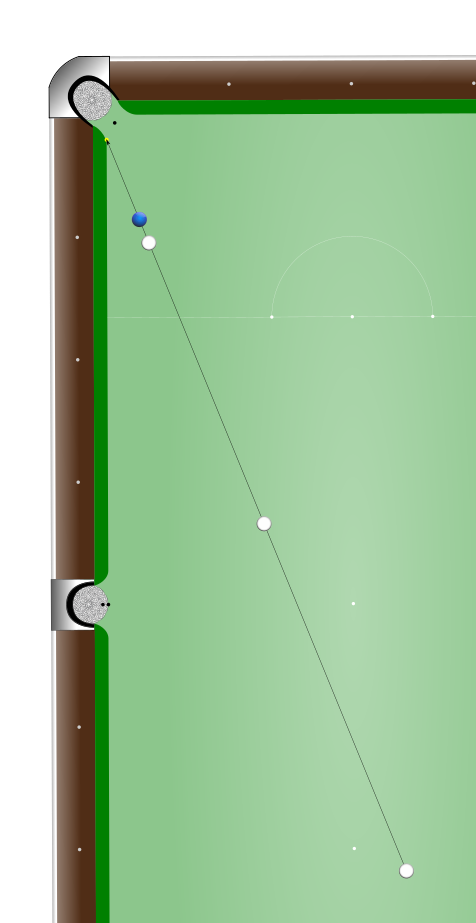
However, the adjusted aim that would result in successfully potting the object ball is different for each of the cue balls. At first glance all 3 shots appear to have a potting angle very close to 0°, but appearances can be deceiving when looking solely at ball centers.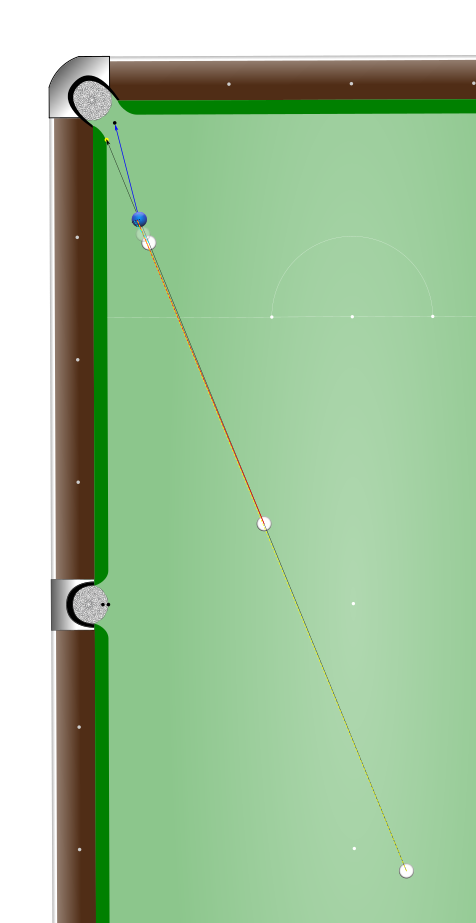
For the furthest cue ball, the necessary adjustment from the ‘A’ aim to the potting aim is slight.
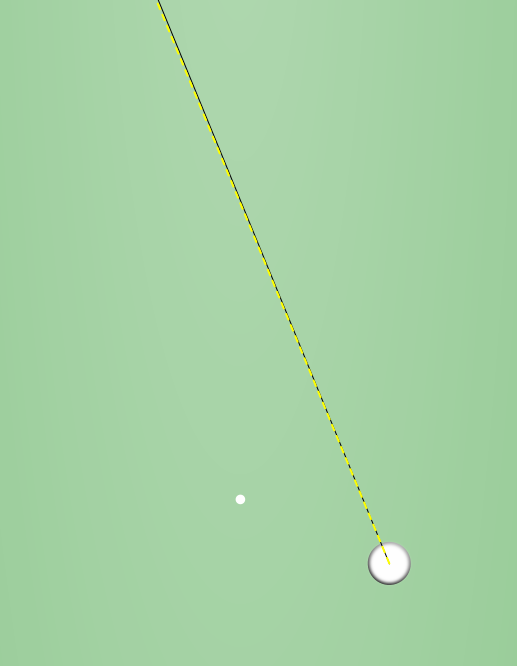
For the middle cue ball, just a touch more adjustment is necessary.
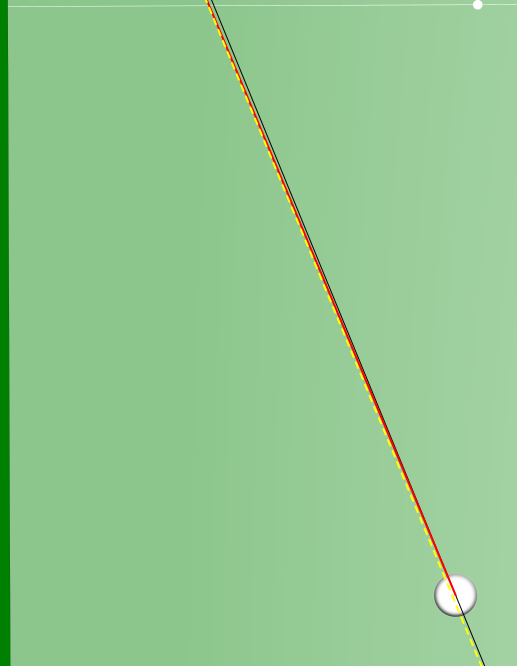
For the closest cue ball, the adjustment is extreme.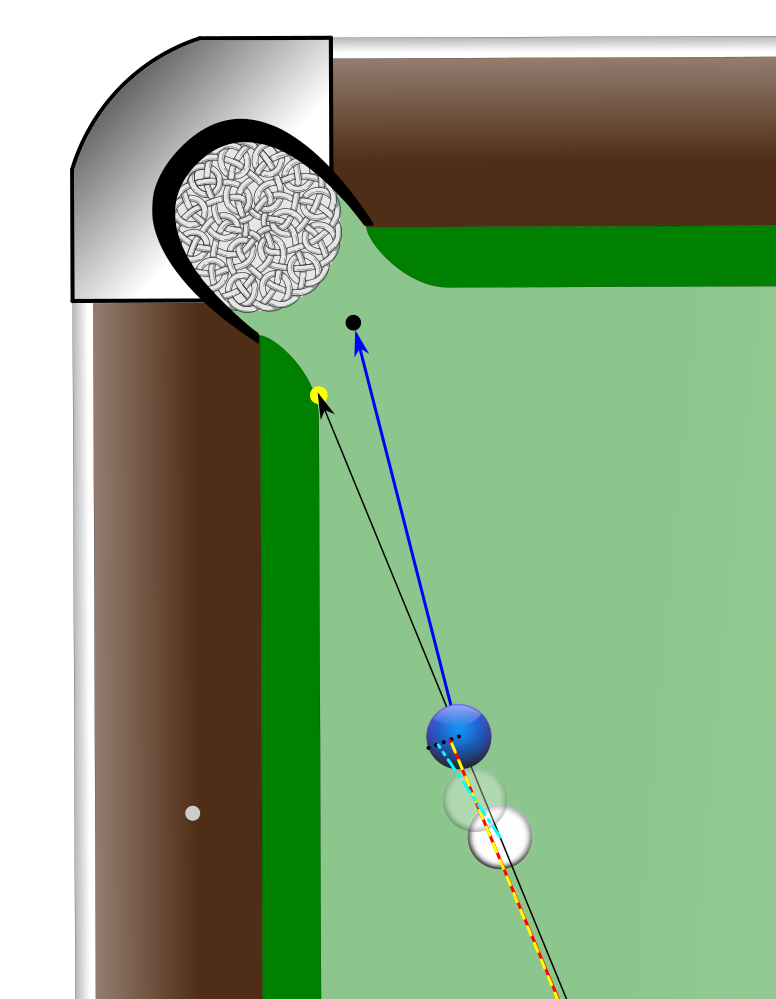
The middle and furthest cue balls required an adjustment from ‘A’ to about ‘B+’, but the closest cue ball required an adjustment from ‘A’ to about ‘D-’.
Ball distance also has an effect on whether we can use ball centers for determining Angle Detective labels. The labels are most accurate when using ball contact points, but very often we can get away with using ball centers, resting points, or other nearby locations.
However, as the balls get very close to one another it becomes more essential (if in Position 1) to hover directly above and use contact points when detecting shot labels. Alternatively, we can use the Position 2 variations which are self-correcting.
Is there a distance beyond which we can use ball centers rather than contact points without any adjustment? Yes, but this distance depends upon factors that influence how far from the perfect angle we can stray yet still make the pot. As a general rule, I would suggest the following:
As long as the table has fairly receptive pockets, there is little need to adjust a label derived from ball centers to a thinner aim if the cue ball to object ball distance is greater than the object ball to center pocket distance.
Ball distance adjustments are covered in detail on the next page.
Striking the cue ball to either side of the vertical center creates side spin that can transfer to the object ball, throwing the object ball off of its normal release line. The degree to which an object ball diverges from the normal release line depends upon several factors, and the precise adjustments can only be learned through practice. But the main thing to keep in mind is that below a certain speed, left sidespin can throw an object ball to the right of its normal release line and right sidespin can throw an object ball to the left of its normal release line.
Outside spin is side spin applied to the cue ball that can increase the shot angle. For example, if our current shot has a shot label of ‘E’ and we want to apply outside spin, we must aim according to a lower shot label such as ‘D’ to allow for the spin to throw the object ball onto the higher ‘E’ release line.
Inside spin is side spin applied to the cue ball that can decrease the shot angle. For example, if our current shot has a shot label of ‘D’ and we want to apply inside spin, we must aim according to a higher shot label such as ‘E’ to allow for the spin to throw the object ball onto the lower ‘D’ release line.
Top and bottom spins can also affect the normal release path of the object ball. There will be drills and games in the Training section to help you discover the effects of various spins for yourself.
It is often easier to visualize patterns and rectangles when the object ball rests against a cushion, because the cushion is very near and parallel to the release line. Position 1 is a great fit for rail shots, but there are a couple of things to keep in mind.
One thing is that when a ball rests against a cushion, its equator actually extends slightly beyond the cushion, tucking underneath the cushion nose.
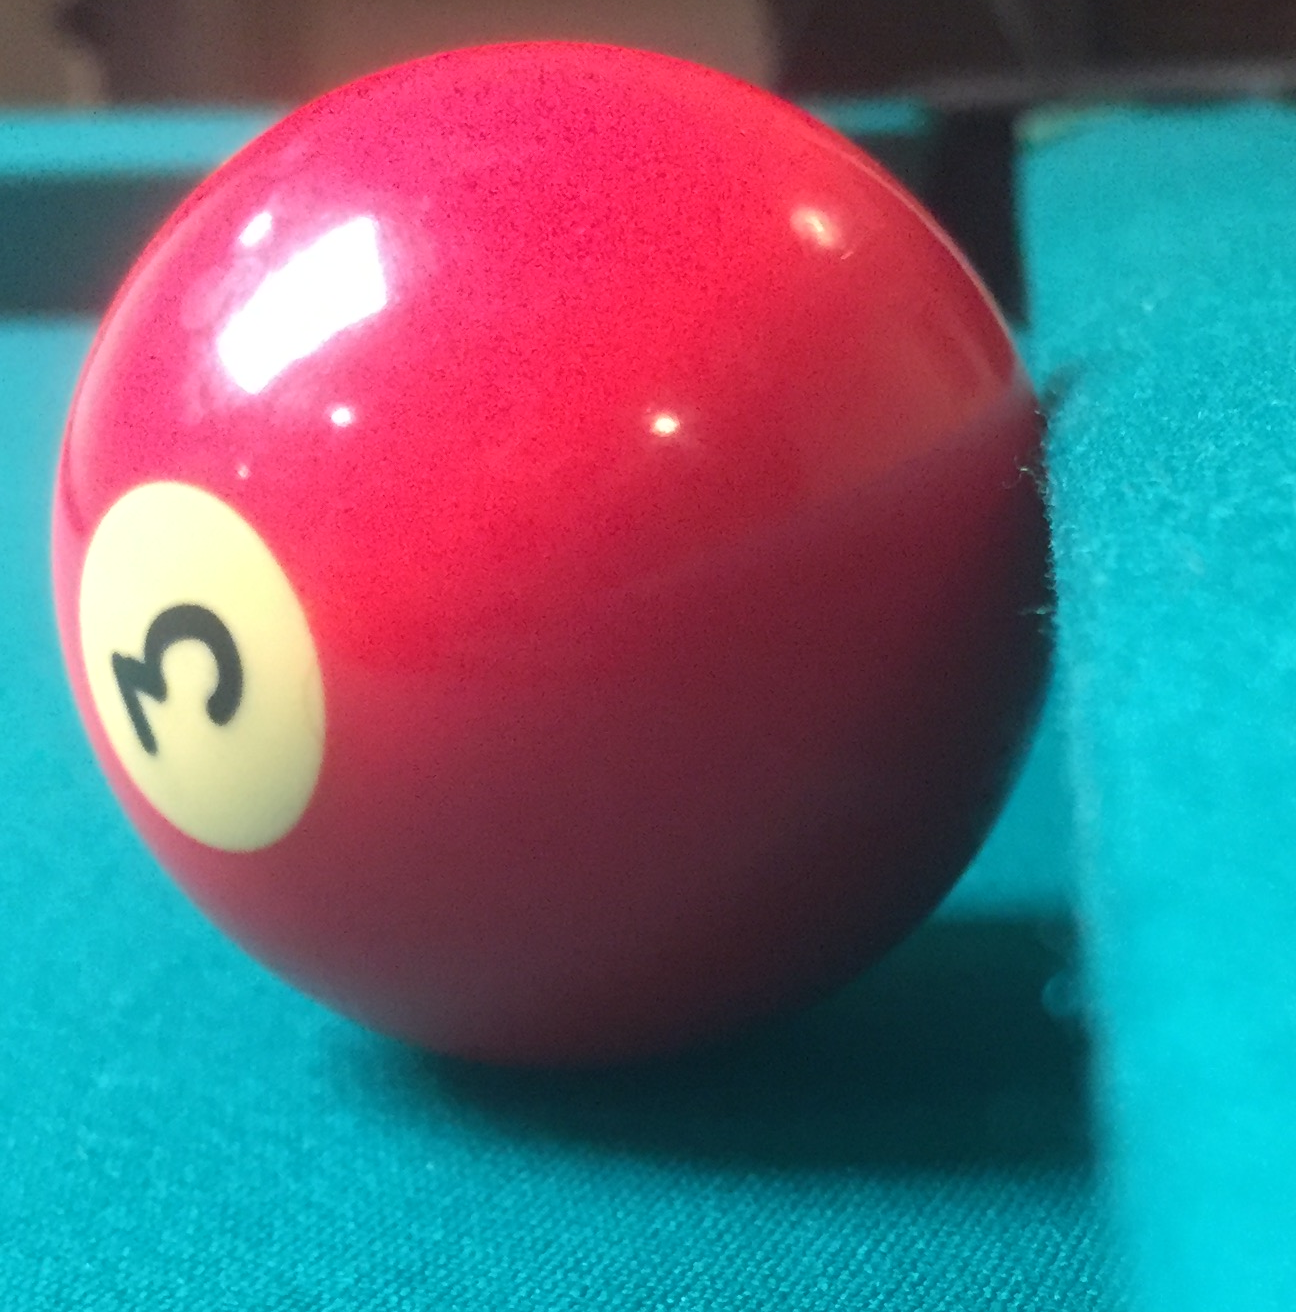
Another is that a rail shot has less room for error than an ordinary shot being that there is no room available on the cushion side of its travel path toward the pocket.
If we don’t adjust for these factors when applying the Angle Detective methods, we will repeatedly arrive at shot labels that undercut the object ball, sending it rebounding off of the cushion. So the main thing to remember for shots along a cushion is to overcut them at least a bit. In Angle Detective terms, this means applying a slightly higher shot label to the shot than the one we find via the patterns or other methods.
Another way to adjust is to simply use a target further from the cushion than the pocket center before applying your preferred Angle Detective method. The shot label would then slightly and appropriately over-cut the shot.