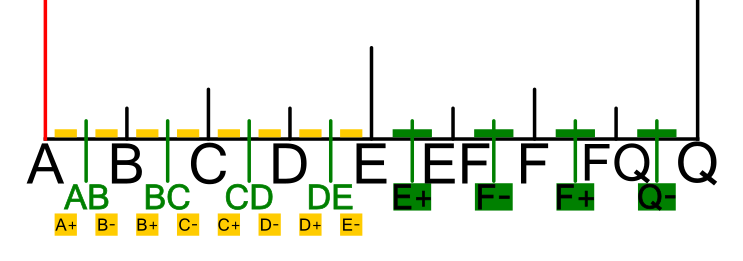
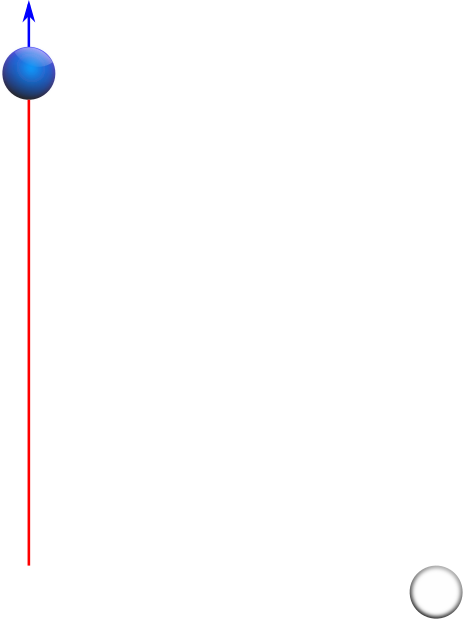
Before building a fence, we must carefully survey the land. By using our shot setup elements—cue ball, object ball, pocket, release line and shot line—we can find the hidden geometry that marks our property lines.
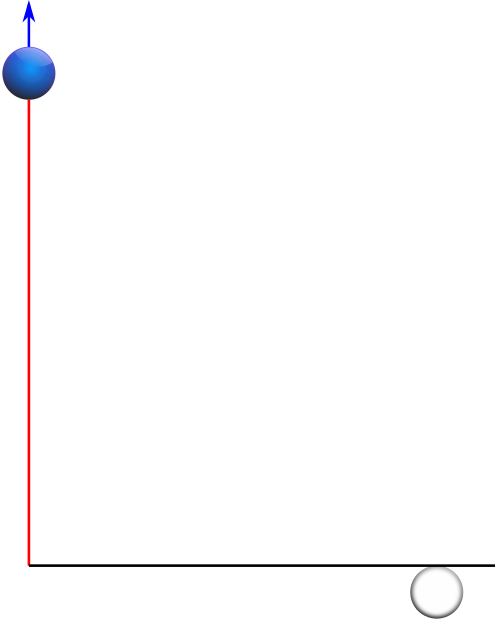
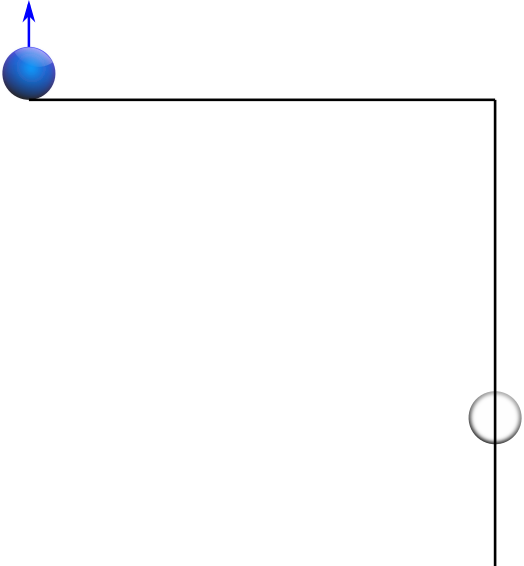
Side 1: We do not yet know its final length, but let’s begin by making the extended release line one side of our rectangle.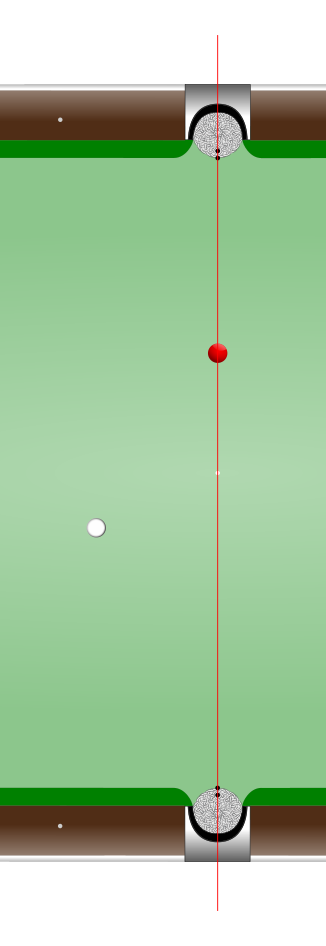 Side 2: Recall the line we drew earlier that revealed the cue ball’s contact point? It is parallel to the release line and runs through the center of the cue ball. We do not yet know its final length, but let’s make this line the rectangle’s side that lies opposite our release line.
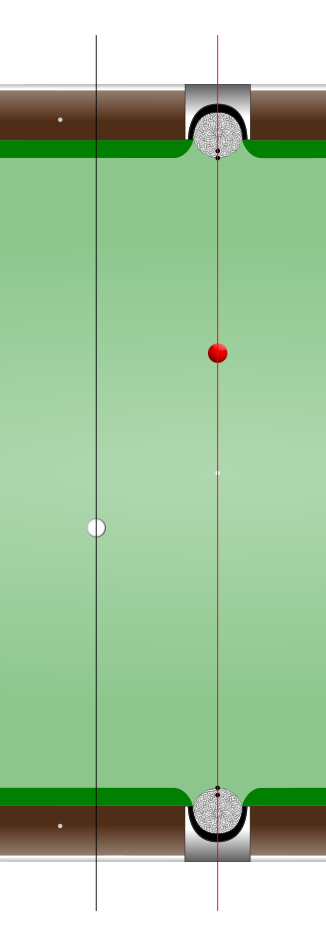 Sides 3 and 4: Now that we have two parallel sides of undetermined length, we must determine those lengths by finding the corners of our rectangle. The object ball and the cue ball are two of those corners. More accurately, the contact points on the object ball and cue ball are the points through which the remaining two sides can be drawn to finish our rectangle. Drawn perpendicular to the existing sides, one side is drawn through the object ball’s contact point, and the other side is drawn through the cue ball’s contact point.
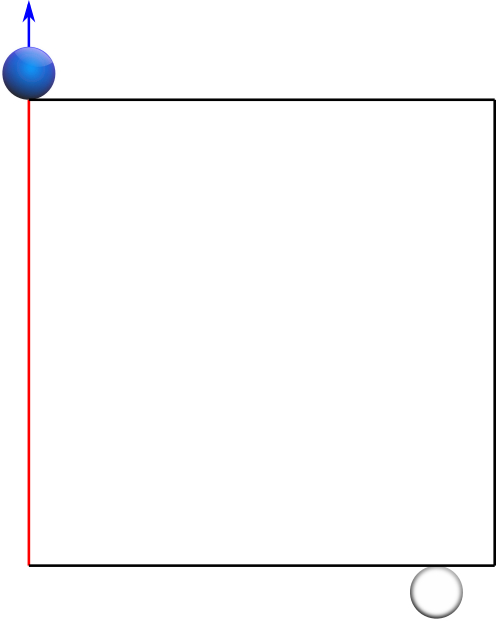
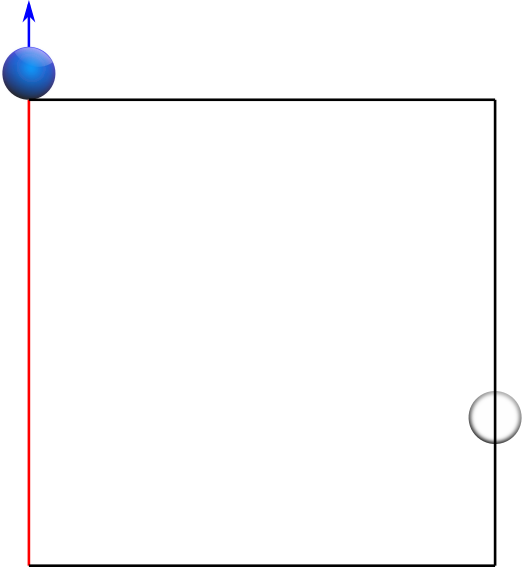
 We have completed our new fence. Built from the elements of this particular shot setup, this rectangle and this rectangle alone has the unique relative proportions that apply to this particular shot setup. No other rectangle would fit.
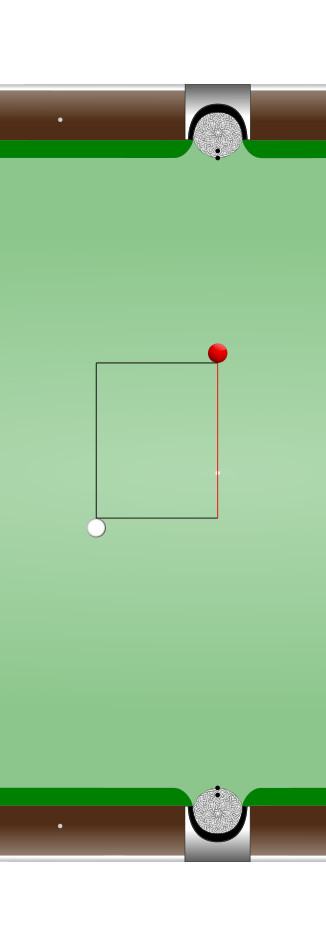
If we add the shot line to this new rectangle, we see that the 90° angles at two of the rectangle’s corners are split into two new angles.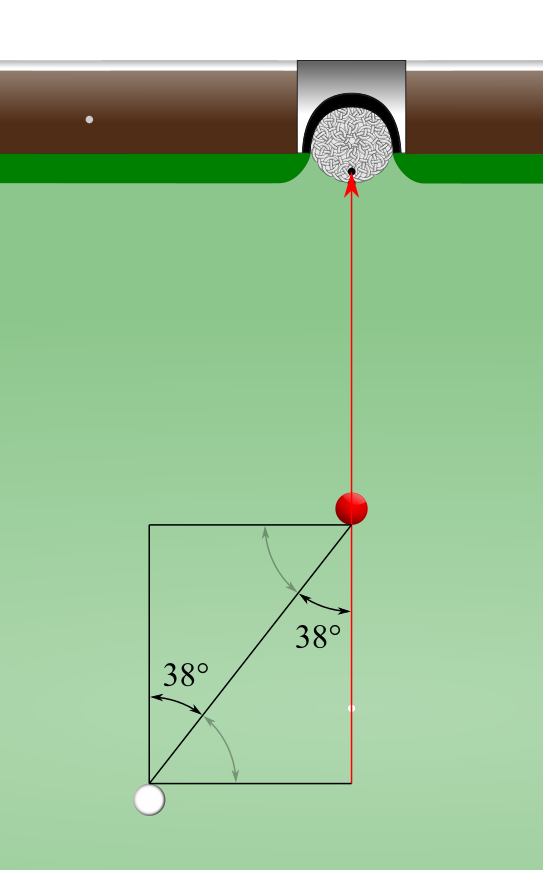
It probably comes as no surprise that two of these new angles happen to be our shot angle. Therefore, the unique rectangle built from the elements of any shot setup also contains the shot angle of that shot setup.
What this really means is that if we can somehow recognize the proportional differences of the structural elements from rectangle to rectangle, and if every unique rectangle contains a unique shot angle, we would then have new tools that could help us to accurately determine any shot angle from any shot setup.
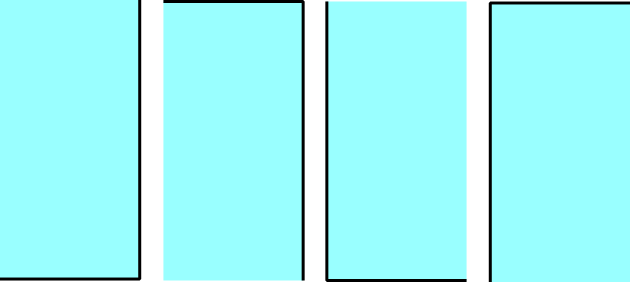
Every rectangle is special and we should love them all. Nonetheless, we are going to play favorites. The rectangles with proportions easiest to recognize will be used as references for comparison to all other rectangles.
Since opposite sides of any rectangle are equal in length, we really only need two adjacent sides to determine a rectangle’s proportions. Any two adjacent sides form an “L” shape.
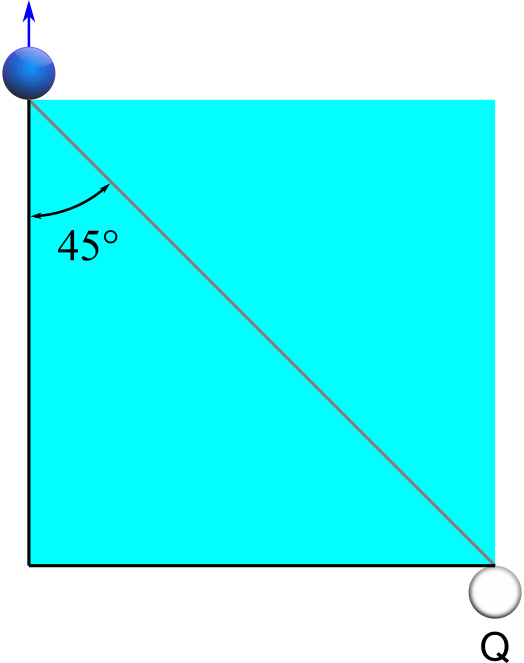
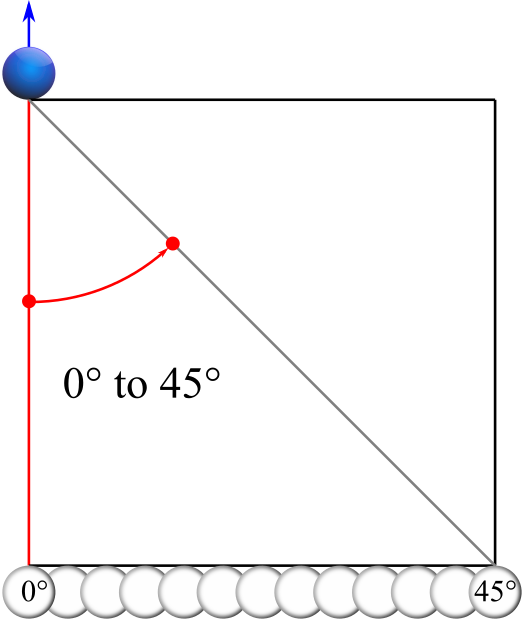
Our most important reference rectangle is the square. When two adjacent sides are of equal length, the shot angle contained within is 45°. I will explain later why I am assigning letters to each reference rectangle, but for now just accept that we will label this reference rectangle ‘Q’.
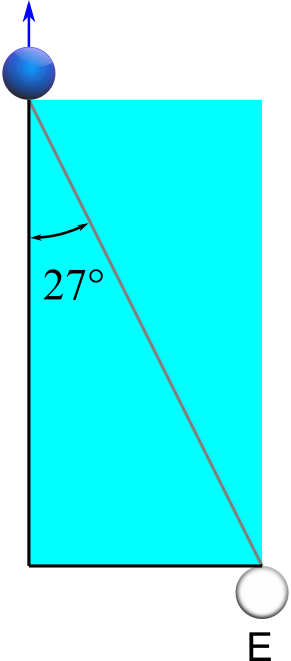
Our second most important reference is the rectangle where one side is half the length of its adjacent side. This rectangle can be built from 2 stacked squares or half of one square. This rectangle contains a shot angle of 27°, and we will label it ‘E’.
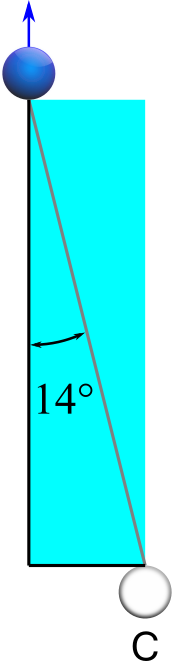
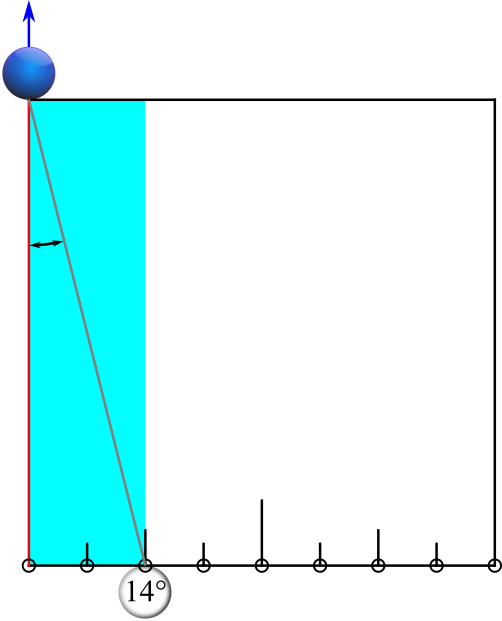
Our next most important reference is the rectangle where one side is 1/4 the length of its adjacent side. This rectangle can be built from 4 stacked squares or 1/4 of one square. This rectangle contains a shot angle of 14°, and we will label it ‘C’.
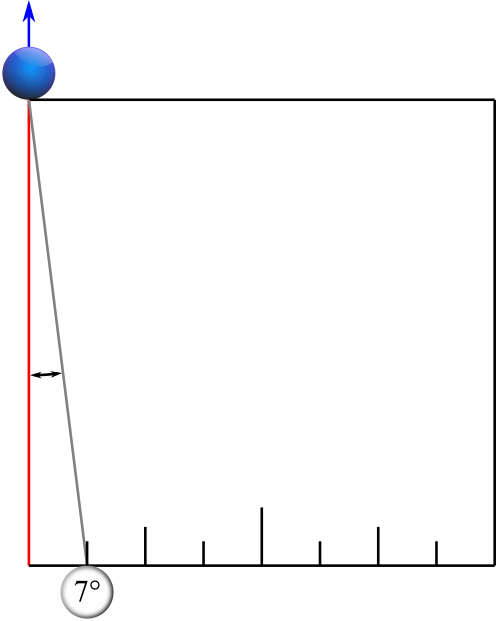
Our next most important reference is the rectangle where one side is 1/8 the length of its adjacent side. This rectangle can be built from 8 stacked squares or 1/8 of one square. This rectangle contains a shot angle of 7°, and we will label it ‘B’.

Also important are reference rectangles built from other reference rectangles:
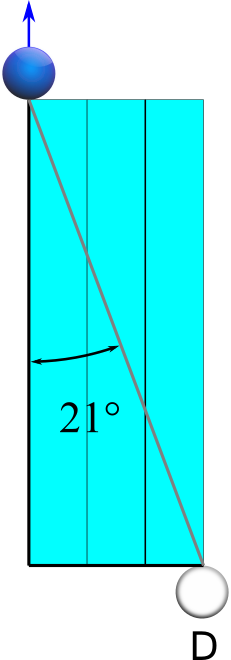
The rectangle where one side is 3/8 the length of its adjacent side can be built from 3 side-by-side ‘B’ rectangles or 1 ‘C’ rectangle plus 1 ‘B’ rectangle. This new rectangle contains a shot angle of 21°, and we will label it ‘D’.
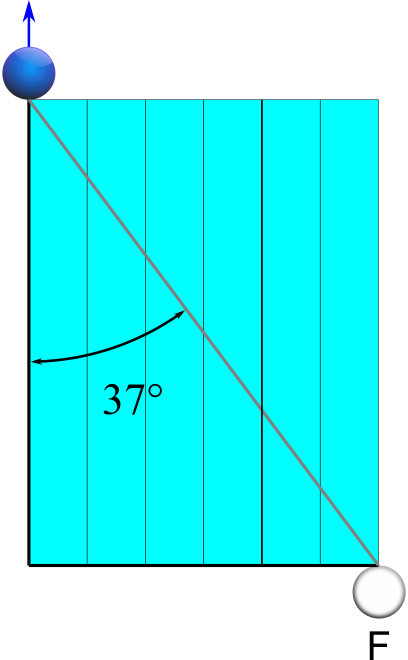
The rectangle where one side is 6/8 (or 3/4) the length of its adjacent side can be built from 6 side-by-side ‘B’ rectangles or 1 ‘E’ rectangle plus 1 ‘C’ rectangle. This new rectangle contains a shot angle of 37°, and we will label it ‘F’.
There are a few more reference rectangles that are important, but we will look at them later.
Although each shot has a corresponding rectangle, there exists a square that encompasses all of these unique rectangles and can be drawn for all shots. Let’s see how it works.
There are two ways to draw The Master Square, and which of the two ways works depends upon the cue ball’s position relative to the object ball.
Note: This is still theory and we are laying the groundwork for the Application and Training sections, so we are using the exact contact points to show the accurate geometry. This precision will rarely be necessary once we apply the various methods that are covered in the other sections to our games.
First Method
The first way to draw The Master Square is to draw a straight line along the release line starting from the object ball’s contact point and stopping when it is directly across from the cue ball’s contact point. This line is what we will refer to as the “near side” of The Master Square, and since a square has 4 equal sides, the remaining 3 sides will be the same length as this near side. (Throughout the Angle Detective instruction, the near side of The Master Square will always be colored red.)
From where we ended the near side line, we will now draw a second line of the exact same length at a right angle in the direction of the cue ball’s contact point. This will be the “bottom side” of The Master Square.
By the time the full length of this bottom side has been drawn, the line will have either met with the cue ball’s contact point or not reached it. If the bottom side has met with the cue ball’s contact point, the remaining two sides of The Master Square—the “top side” and the “far side”—are of little importance and can be drawn quickly without precision.
However, if the bottom side’s full length has not reached the cue ball’s contact point, we will start over and use the second way of drawing The Master Square.
Second Method
The second way to draw The Master Square is to draw a straight line perpendicular to the release line starting from the object ball’s contact point and stopping when it is directly above the cue ball’s contact point. This line will be the “top side” of The Master Square, and the remaining 3 sides will be the same length as this line.
From where we ended the top side line, we will now draw a second line of the exact same length at a right angle straight down towards the cue ball’s contact point. This will be the “far side” of The Master Square.
By the time the full length of the far side has been drawn, the line would have met and passed through the cue ball’s contact point. The remaining two sides—the “near side” and the “bottom side”—are of little importance and can be drawn quickly without precision.
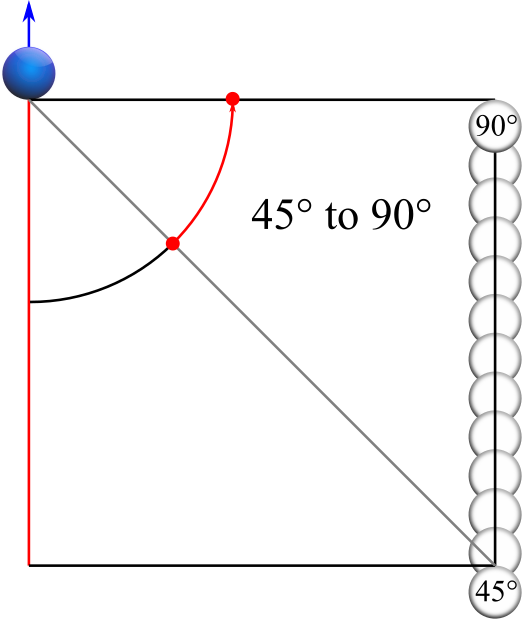
The first way of drawing The Master Square works for all shot angles equal to or less than 45°.
The second way of drawing The Master Square works for all shot angles equal to or greater than 45°.
Once the Master Square has been drawn, we look to the cue ball. Where the cue ball happens to be resting along one of the sides of the Master Square tells us a great deal about the shot. This is because all shot rectangles, and therefore all shots, are contained within the Master Square.
Examples:
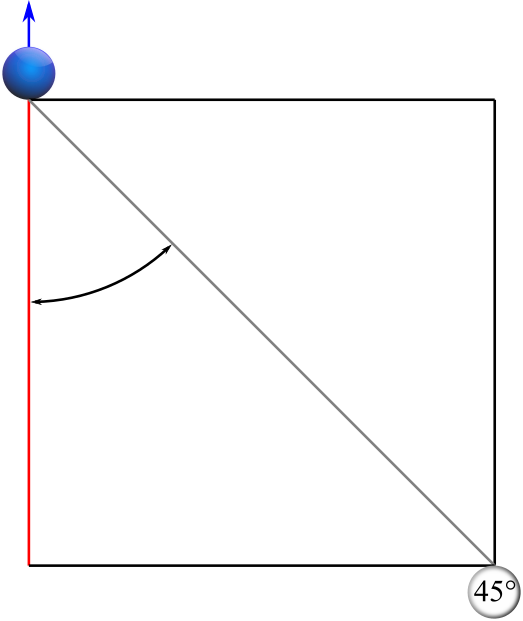
If the cue ball happens to be resting at the far end of the Master Square’s bottom side or the bottom end of the Master Square’s far side, the shot rectangle is a perfect square, and the shot angle is 45°.
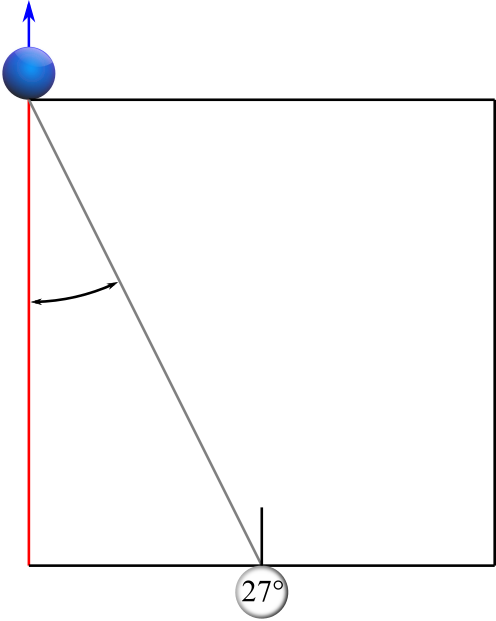
If the cue ball is resting halfway along the Master Square’s bottom side, the shot rectangle is the rectangle where one side is half the length of its adjacent side, and the shot angle is 27°.
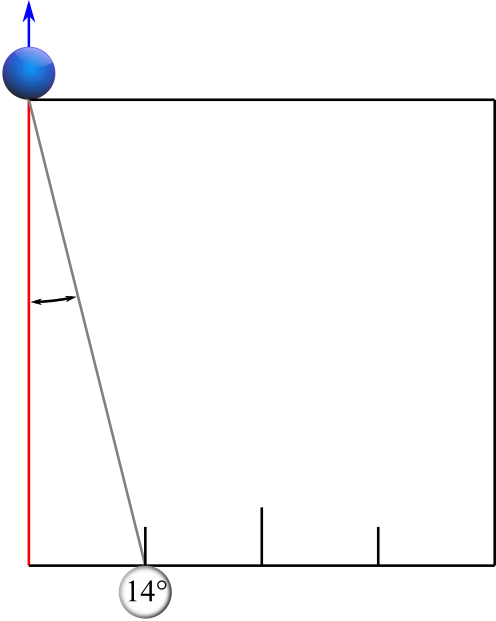
If the cue ball is resting 1/4 of the way along the Master Square’s bottom side, the shot rectangle is the rectangle where one side is 1/4 the length of its adjacent side, and the shot angle is 14°.
If the cue ball is resting 1/8 of the way along the Master Square’s bottom side, the shot rectangle is the rectangle where one side is 1/8 of the length of its adjacent side, and the shot angle is 7°.
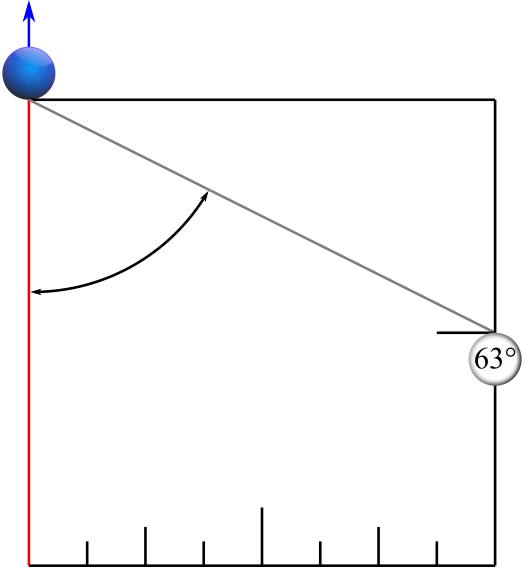
If the cue ball is resting 1/2 of the way down the far side of the Master Square, the shot rectangle is a rotated version of the rectangle where one side is half the length of its adjacent side, and the shot angle is 63°.
Every shot angle we will ever need to play is contained within the Master Square and its interior rectangles (or L-shapes), and later in the Application section we will learn the many practical methods of using the inherent geometry of the Master Square to determine any shot angle we face.
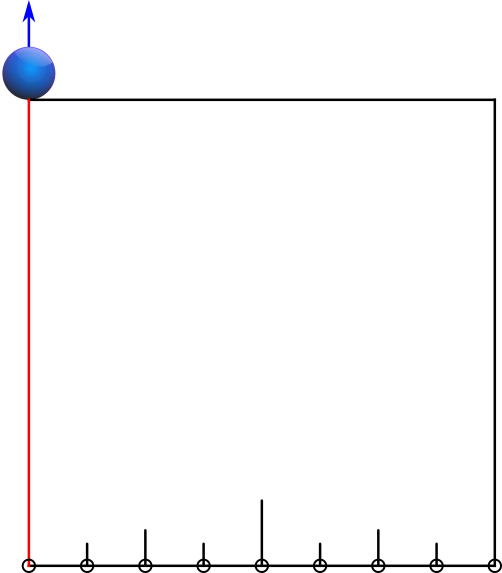
The sides of The Master Square can be divided evenly to find as many references shots as we wish, and those references can be organized using labels. Choosing to divide the bottom side into eighths, we arrive at 9 evenly spaced points.
Each one of these points marks where the cue ball’s contact point would lie on a reference rectangle. Therefore, each point corresponds to the unique interior shot angle of that reference rectangle.

Since the vast majority of shots we play are between 0° and 45°, we will focus on these shots for now. Mastering this range would be enough to make any player a sharpshooter. Even so, we will address the shots that are over 45° later on.
Since remembering and reciting angle measurements (or ball fractions, which will be explained shortly) would be cumbersome, I feel it appropriate to label reference shots and their corresponding aims using letters of the alphabet. For pool players, letter labels also help to keep from confusing reference shots with numbered pool balls.
You can change the labels to anything you’d like, but for now we will use the following letters to label the 9 evenly-spaced Master Square bottom side reference points and their corresponding reference rectangles:
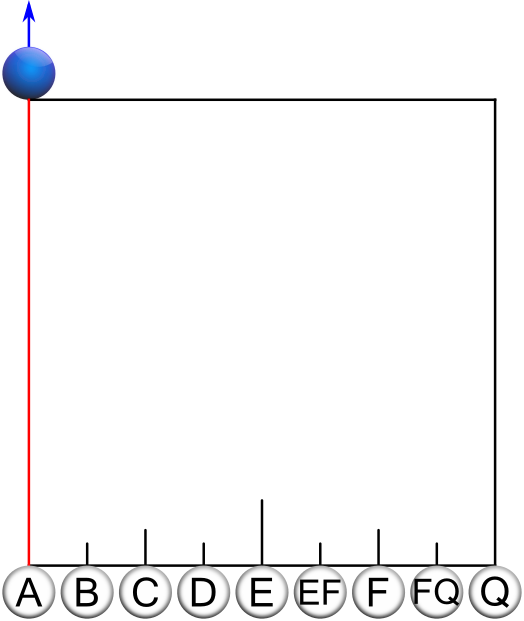
The reference rectangles and angles that correspond to each of these Master Square reference points use the same labels. Later we will learn the unique aims that match each reference point and rectangle, and the aim that matches each reference will be labeled with the same letter.
Notice from the chart above that none of the angles for these reference shots are more than 7° away from an adjacent reference angle. Also notice that the angles closest to the 45° ‘Q’ corner (where The Master Square’s bottom and far sides connect) have the smallest measurement gaps from reference to reference. For example, ‘F’ is only 5° away from ‘FQ’, and ‘FQ’ is only 4° away from ‘Q’.
Remember that these are references. They are not meant to cover all shots but rather to be used as landmarks between which we can find all other shots and adjust our aims for them.
However, the 6° and 7° gaps between our ‘A’, ‘B’, ‘C’, ‘D’, and ‘E’ references are a bit large, so let’s narrow these gaps by adding four “in-between” reference shots. We do this by dividing The Master Square’s bottom side into sixteenths rather than eighths for the section between ‘A’ and ‘E’.
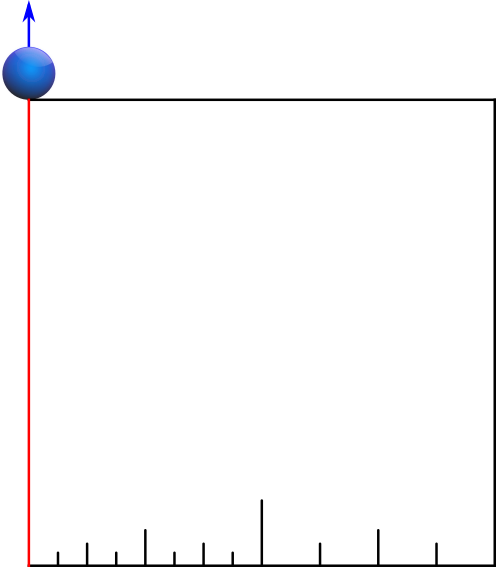
We will label these new references using the following method: Any point on the Master Square positioned midway between two single letters will be labeled as a combination of those two letters. We already see this with ‘EF’ and ‘FQ’, but let’s add the remaining four which are ‘AB’, ‘BC’, ‘CD’, and ‘DE’.
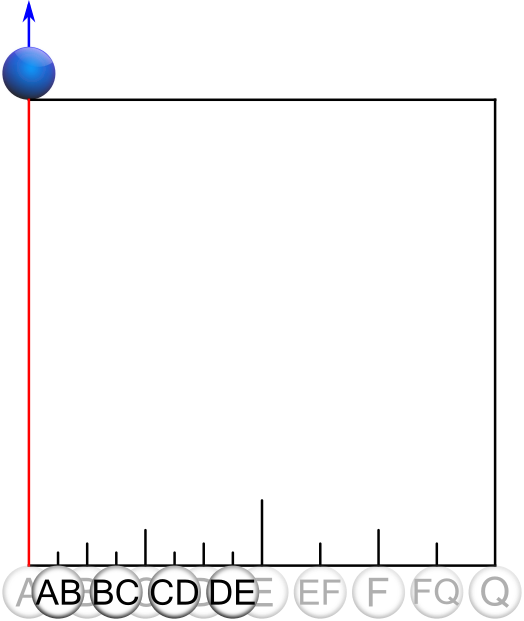
Now that we have 13 labels for 13 references, we can use plusses and minuses to work between the references when playing any shot we face. By splitting the gaps evenly between the 13 references, we end up with 25 shots at our disposal to cover a 45° range. Imagine recognizing a shot’s angle within 2° and also knowing precisely where to aim that shot. This is the confidence we are trying to build.
So any point on The Master Square that lies between a one-letter reference shot and a two-letter reference shot can adopt a “+” or a “–” symbol.
For example, if the point lies between ‘A’ and ‘AB’, the shot can be called ‘A+’. If the point lies between ‘AB’ and ‘B’, the shot can be called ‘B-‘. So from ‘A’ to ‘B’, we end up with 5 shots labeled ‘A’, ‘A+’, ‘AB’, ‘B-‘ and ‘B’ covering a 7° range. These 5 shots narrow the 7° range to an average of only 1.4° between each shot.
A, A+, AB, B-, B cover a 7° range
B, B+, BC, C-, C cover a 7° range
C, C+, CD, D-, D cover a 7° range
D, D+, DE, E-, E cover a 6° range
E, E+, EF, F-, F cover a 10° range
F, F+, FQ, Q-, Q cover an 8° range