
The standing positions are the foundations for our patterns. Now that we know precisely where to stand and place our eyes, we can begin building our patterns upon that important foundation. Like a map to a treasure, our patterns guide us along paths to uncover the angle and aim for any shot we may face.
There are many paths to the same destination. All of the patterns work, but depending upon the situation some may be more helpful than others, so it is a good idea to try them all and discover for yourself which are most helpful under which circumstances.
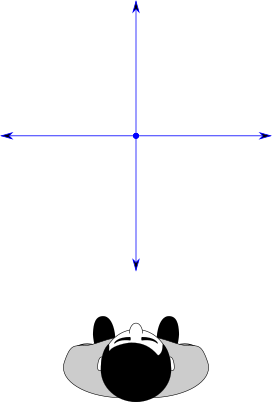
Drawing or visualizing the patterns doesn’t require much skill. All we need to be able to do is draw straight-ish lines in four directions while retaining a basic awareness of their lengths as we draw them. These four directions are directly towards us, directly away from us, 90° to the left, and 90° to the right.
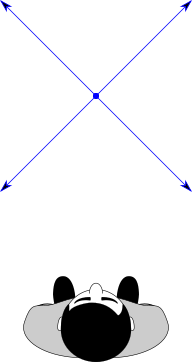
There are also optional patterns that require us to draw 45° lines in any of four directions—towards us to the left, towards us to the right, away from us to the left, and away from us to the right.
All lines must be drawn on a plane that is parallel to the playing surface or on the playing surface itself. We don’t have to be great at drawing or visualizing, but more precision does lead to even more accuracy. As you practice and use the system, you will almost certainly become more and more accurate.
It is time to learn the patterns. Each pattern is built from very simple lines drawn in a sequence. The destination at the end of each sequence either reveals the shot label directly or leaves you between reference labels from which the shot label can be easily extracted.
Since all of the patterns we will cover are derived from the inherent geometry of the Master Square, the Master Square is truly the master of all patterns.
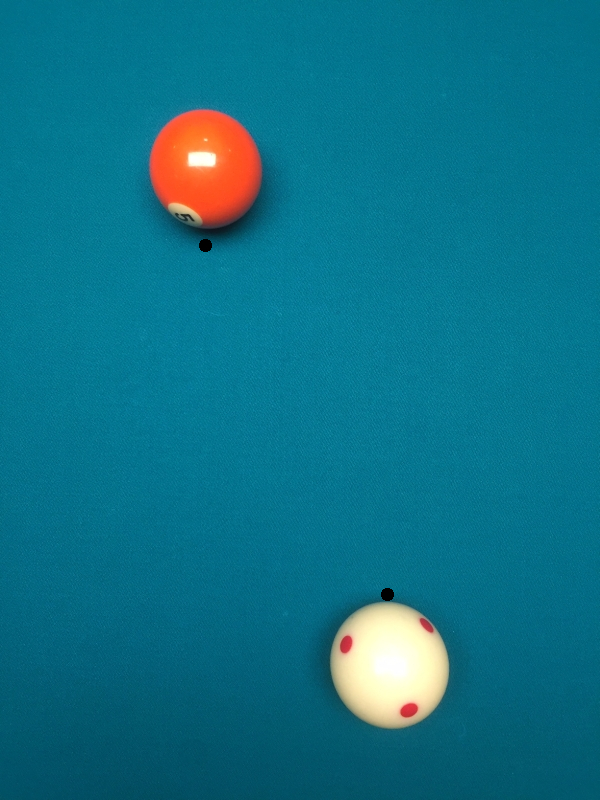
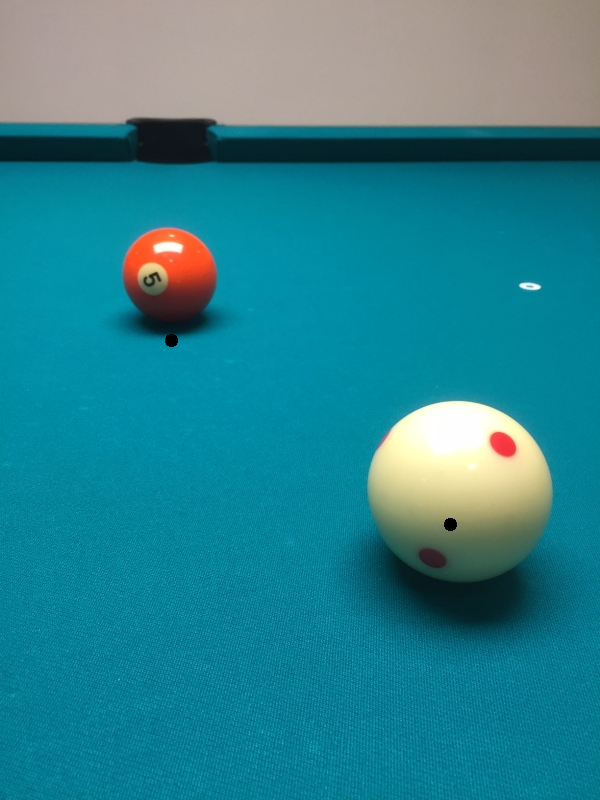
As explained in the Theory section, the Master Square touches and is constrained by the object ball and cue ball contact points. Although the contact points would be the ideal boundaries to use when drawing the pattern lines, it is usually sufficiently accurate to use the centers or tops of the balls or their resting points on the cloth.
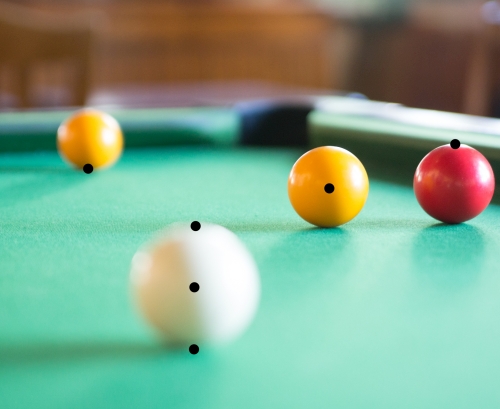
Edges of ball shadows are great choices as well. For example, from Position 1, the object ball shadow edge that is closest to us and the cue ball shadow edge that is farthest from us conveniently rest almost perfectly below the balls’ contact points. This allows us to visualize drawing directly on the cloth.
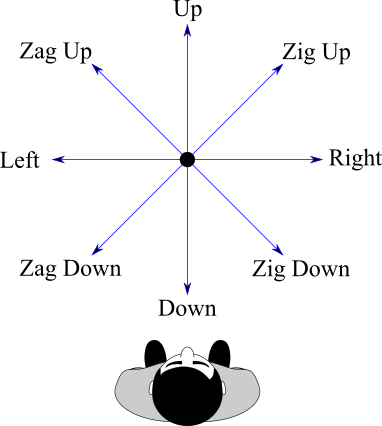
For the sake of simplicity and consistency from pattern to pattern, the lines will be named as follows:
Line drawn away from us: Up
Line drawn towards us: Down
Line drawn 90° to the right: Right
Line drawn 90° to the left: Left
Line drawn 45° away from us to the right: Zig Up
Line drawn 45° towards us to the right: Zig Down
Line drawn 45° away from us to the left: Zag Up
Line drawn 45° towards us to the left: Zag Down
To save space, all pattern sequences shown will be for shots that cut to the right. For cuts to the left, simply swap the Lefts and Rights.
Important:
When drawing a line, its length should be the same length as the previous line in the sequence unless the line is shown in all capital letters or is specified to be “½” length. The ½ length specification always applies to the length of the previous line. A Zig, Zag, or any line displayed in all capital letters is to be drawn until it intersects one of the sides of the Master Square. Although the first line in any sequence is not capitalized, it is understood to be a line that should be drawn until it intersects one of the sides of the Master Square.
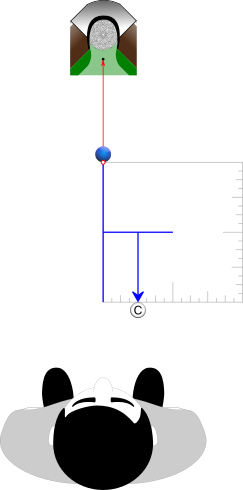
For example a Position 1 sequence of “Down, ½ Up, Right, ½ Left, DOWN” translates to:
Down – Draw a line towards you starting at object ball that stops when it is 90° across from cue ball.
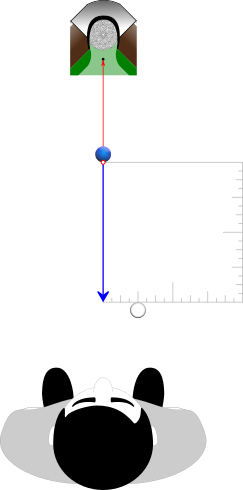
½ Up – From there, draw a line away from you until it is ½ the length of the previous line.

Right – From there, draw a line 90° to the right that is the same length as the previous line.

½ Left – From there, draw a line 90° to the left until it is ½ the length of the previous line.
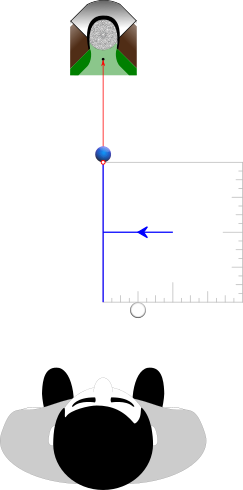
DOWN – From there, draw a line toward you until it is either 90° across from or touches the cue ball.
As we follow a pattern’s sequence, we land upon one or more shot labels along the way. “Destinations” are shot labels listed in the order that they are contacted from first to final destination.
With practice you’ll get better and faster at drawing the lines, but take your time in the beginning. Draw the lines slowly and meticulously, and retrace as many times as necessary before moving on to the next line.
“Air-draw” the patterns with a finger to start. Eventually, you should be able to draw the lines and find the destinations using only your eyes.
