Aiming Revisited
I want to return to aiming for a moment, because what we recently learned about rectangles can now be applied to an optional way to aim. Did you know that there are rectangles on the object ball? Well, it may take some imagination, but they are there.
Standing in Position 2 and looking at the object ball as if it were a 2-dimensional flat circle, we can find these rectangles.
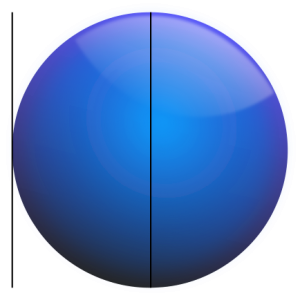
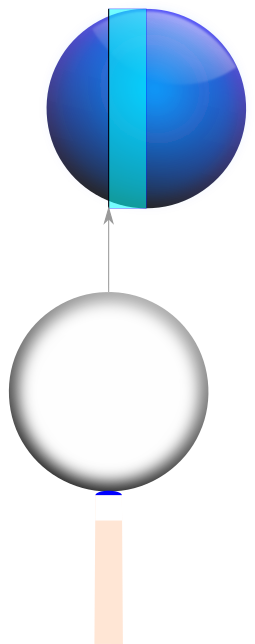
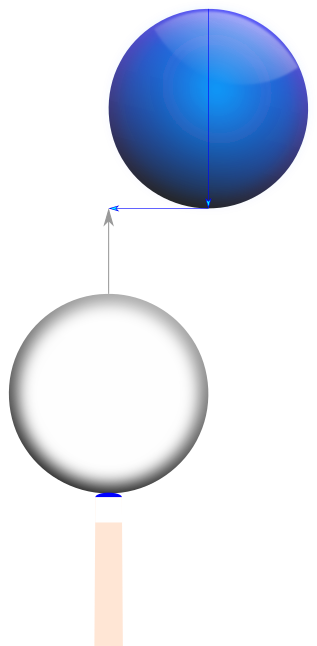
First we draw a vertical line up the middle of the object ball from its resting point on the cloth to its top. This line will represent the near side of all of our “on-ball” rectangles.
Next, let’s draw another vertical line the same length at the left edge of the object ball starting from the cloth and drawing upward. This line will represent the far side of one of our on-ball rectangles.
We can draw the bottom and top sides to finish the rectangle.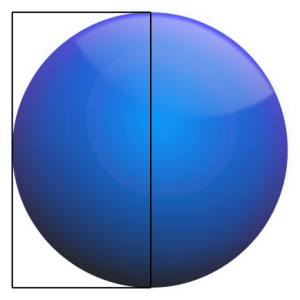
So what have we just accomplished? Notice the proportion of this rectangle. Its near or far side is twice the length of its bottom or top side. What reference rectangle do we know that has this unique proportion?
Yes. The ‘E’ rectangle. And where on the object ball did we draw the far side of this on-ball rectangle? We drew it at the edge, which also happens to be the aim for an ‘E’ shot.
So…
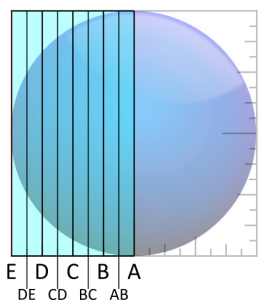
The far side of the ‘E’ on-ball rectangle is also conveniently the aim for an ‘E’ shot rectangle. Interesting! But does this work for other shot labels? Yes, but not for all. It works for shot labels from ‘A’ through ‘E’, and here’s why.
We know that the shot rectangles from ‘A’ through ‘E’ are what make up the near half of the Master Square. We also know that a circle fits perfectly inside of a square, and therefore the half circle that makes up one side of the object ball would fit perfectly into one half of a square. Given this, the proportions for all on-ball rectangles from ‘A’ through ‘E’ must remain intact.
The on-ball aims conveniently match the on-ball rectangles, because reference aims just happen to be fairly evenly spaced in the same way that reference rectangles are evenly spaced.
The on-ball vertical center line is not only the near side of all on-ball rectangles but also the ‘A’ straight shot aim. The aim for ‘C’ is midway between the aims for ‘A’ and ‘E’. The aim for ‘D’ is midway between ‘C’ and ‘E’. The aim for ‘B’ is midway between the aims for ‘A’ and ‘C’. The aim for ‘BC’ is midway between ‘B’ and ‘C’. And so on.
Let’s learn how to apply this new information.
Rectangle On-Ball Transfer
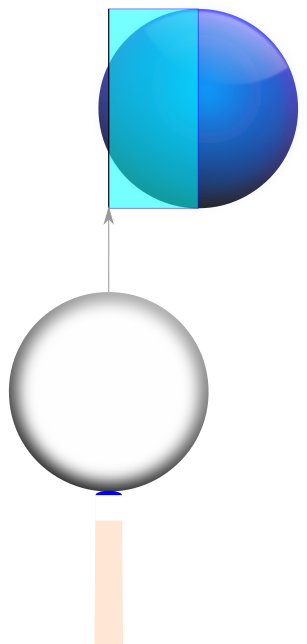
Using the Rectangle On-Ball Transfer technique and good visualization skills obviates the need to determine the shot label for any shot with an on-ball aim, i.e., shots ‘A’ through ‘E’. We simply transfer the larger shot rectangle onto the object ball to create a proportionally matched on-ball rectangle, and then we aim at its far side.
From Position 1, we look at the rectangle formed by the cue ball and object ball.
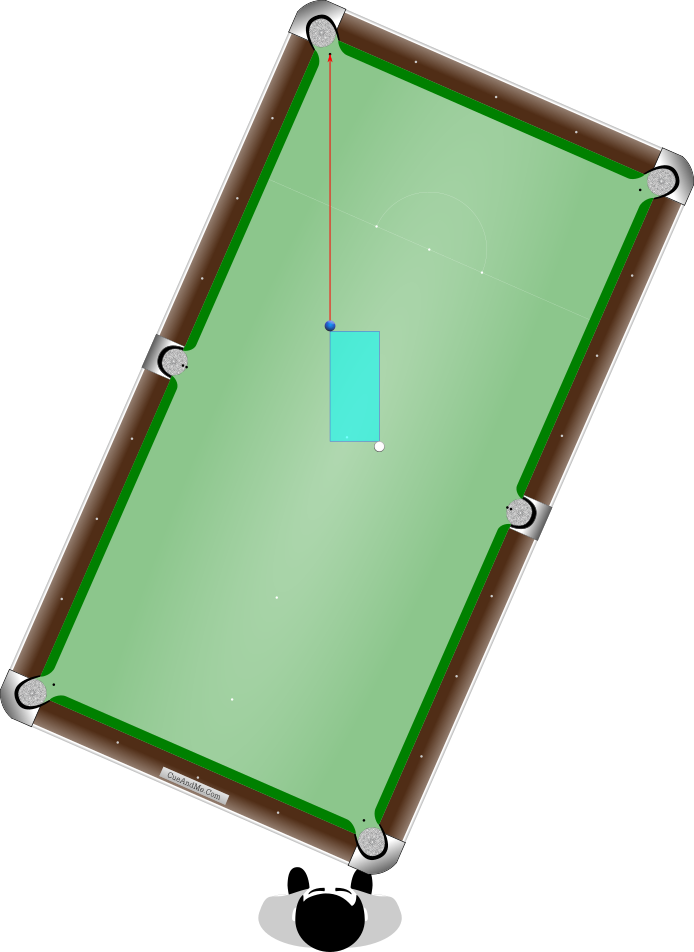
Holding that rectangle in our mind’s eye, we walk to Position 2 and fit the rectangle onto the object ball with its near side at the vertical ‘A’ center line. Wherever the far side lies on the object ball becomes our aim.
Or from Position 2, we look at the rectangle formed by the object ball and pocket.
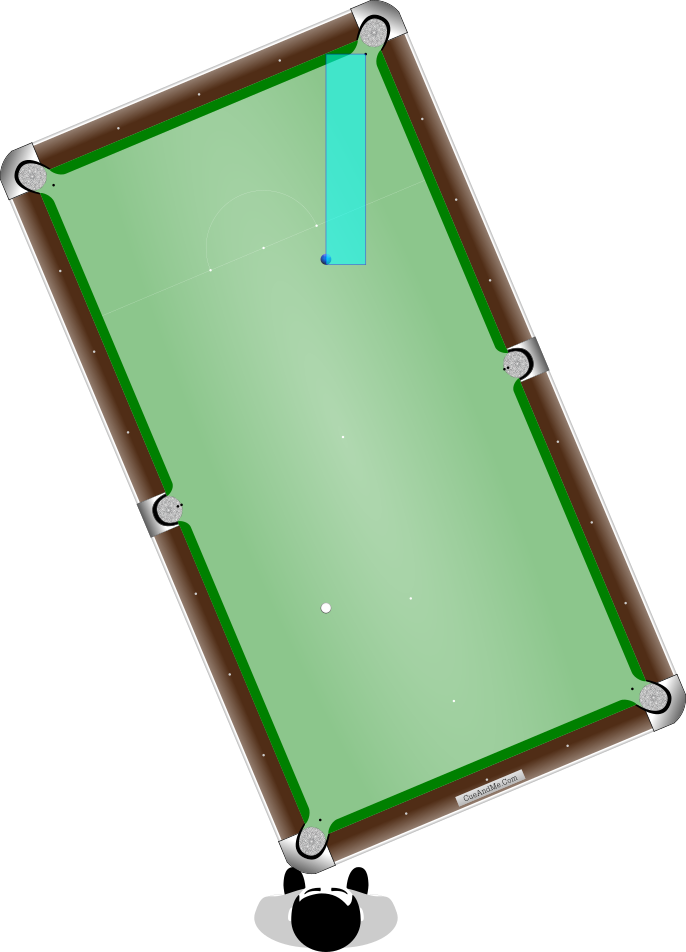
Holding that rectangle in our mind’s eye, we fit the rectangle onto the object ball in the same way and aim at its far side to shoot.
To check our work before shooting, from Position 2 we can go back and forth from the on-ball rectangle to the shot rectangle to see if they match up. As we learned with Position 2 variations, to be more precise the shot rectangle should not be drawn from the object ball center but from the on-ball aim.
L On-Ball Transfer
This is similar to the rectangle on-ball transfer, but we instead transfer a simple L-shaped pattern onto the object ball. This can be done from either Position 1 or Position 2, but it is best suited for Position 2.
From Position 2, we draw a line that is parallel to the Master Square’s near side in the DOWN direction from the pocket center until it is directly across from the object ball.
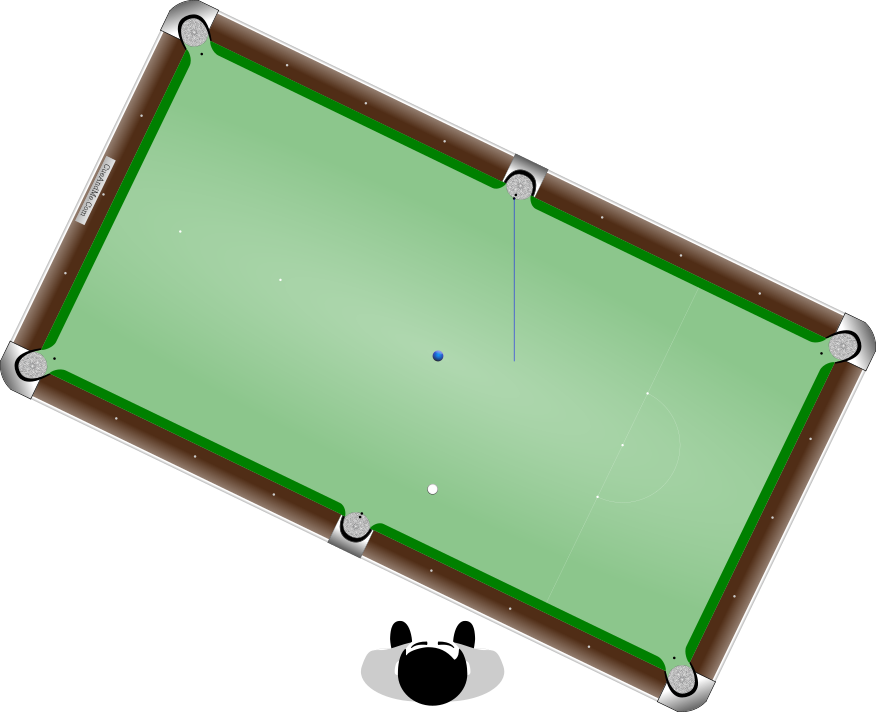
We then draw a line LEFT stopping at the object ball.
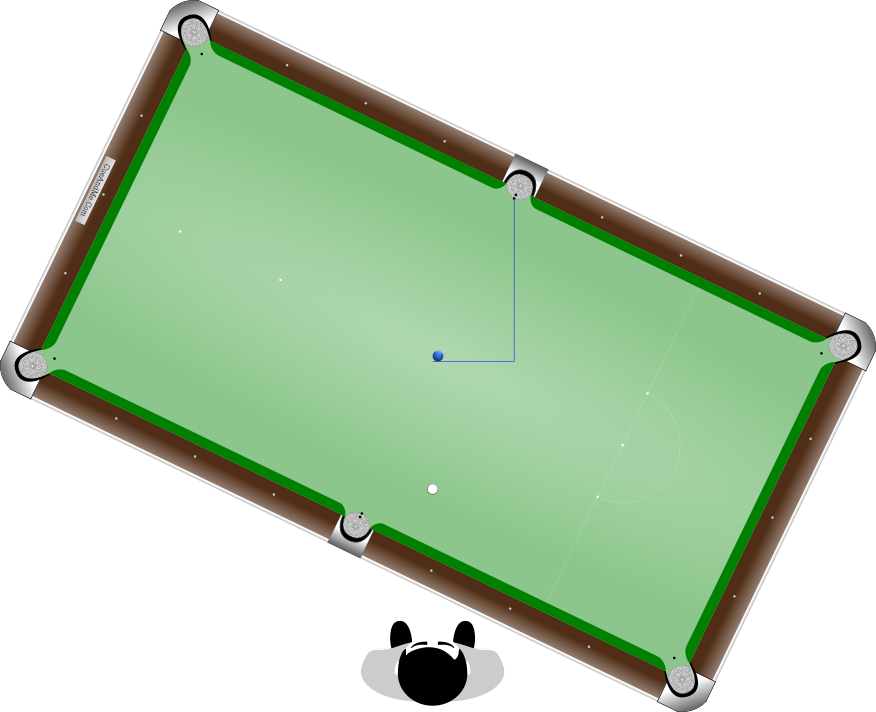
As we are drawing we are also trying to visualize and remember both lines and the second line’s proportion to the first line.
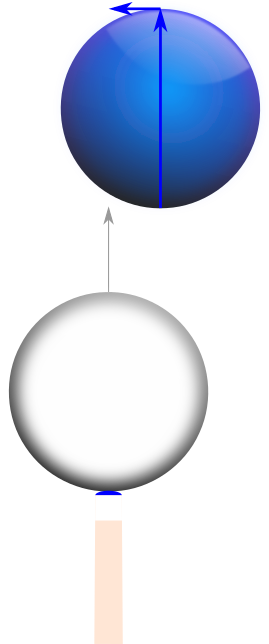
To transfer, we start at the object ball’s top center and draw the first line DOWN to its resting point on the cloth. We then draw the second line LEFT along the cloth until it proportionally matches the original. Where the second line stops is our aim for the shot.
Or from Position 1, we draw a line that is parallel to the Master Square’s near side UP from the cue ball until it is directly across from the object ball. We then draw a line LEFT stopping at the object ball.
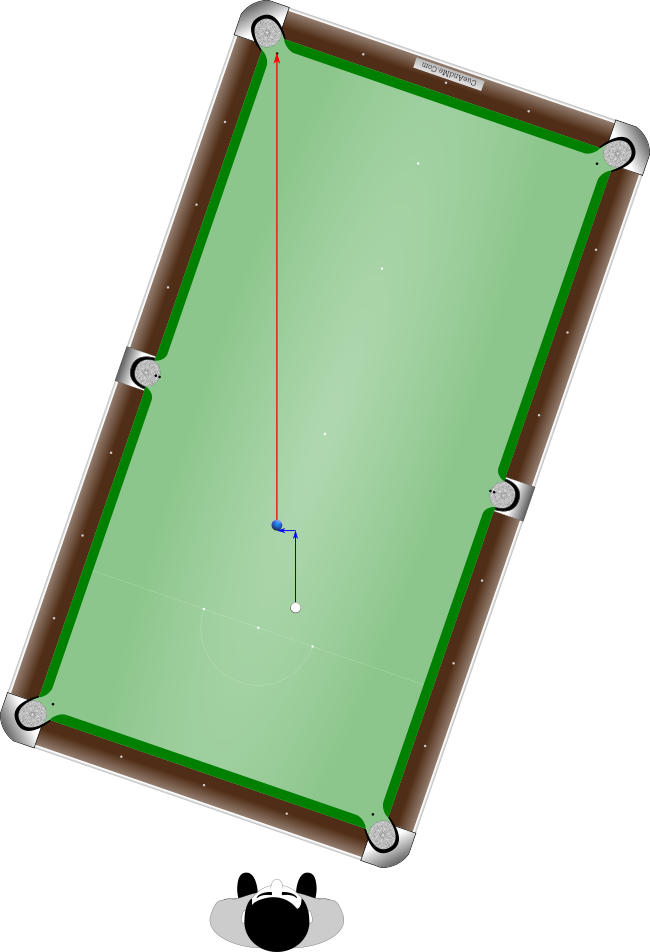
Then we walk to Position 2 and draw UP and LEFT to transfer the L-shape onto the object ball. Where the second line ends is our aim for the shot.
