
The overwhelming majority of shots in snooker and pool are made up of only three elements: one cue ball, one object ball and one pocket. The infinitely varying relative positions of these three elements are what create the countless shots we face throughout our playing years. Fortunately, the technically infinite can be organized into the practically few.
To begin reducing the infinite into a more digestible number, let’s have a look at the geometry of any single shot. For the time being we will ignore the real world effects of friction. Friction will be covered later.
Choosing a pocket as the destination for an object ball immediately delivers geometry to a shot in the form of a straight line drawn from the center of that pocket through the center of the object ball and beyond. We will call this the “release line.”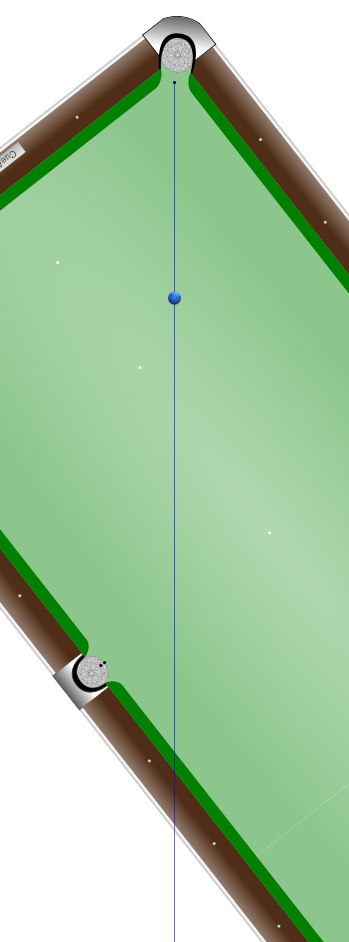
Where the cue ball happens to rest in relation to the object ball and the release line delivers more geometry to a shot. We can draw a straight line from the center of the cue ball, wherever it happens to rest, to a point on the release line exactly one full ball’s diameter behind the object ball’s center. We will call this line the “shot line.”
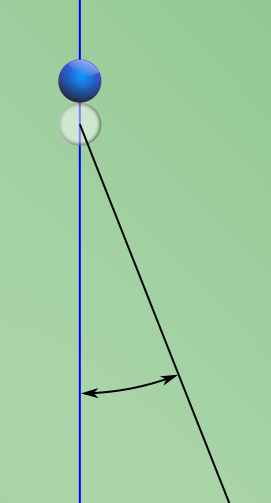
An acute angle is created by the intersection of release line and shot line. We will call this the “shot angle.”
Although we derived this shot angle from the relative positions of one particular cue ball, one particular object ball and one particular pocket, the very same shot angle can be applied to countless other shot setups.
For example, if we were to move the cue ball anywhere along the shot line or an extension of the shot line, it would result in the very same shot angle.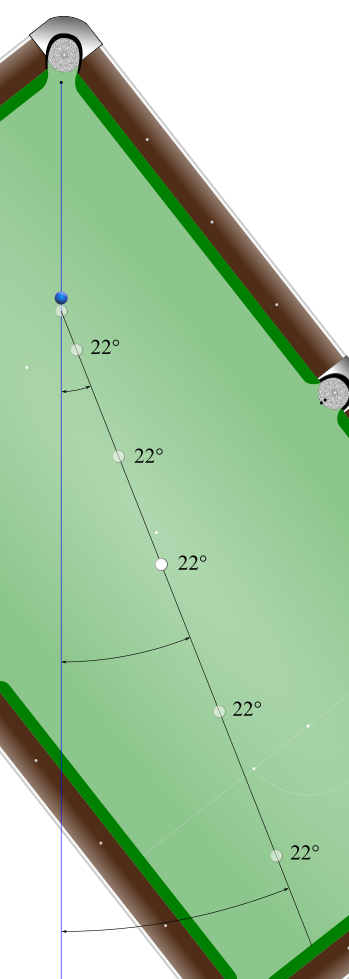
We could also change the pocket-to-object ball distance, and as long as the pocket remained on the same release line, we would also have the same shot angle.
What these examples teach us is that we can group and organize shots by their shot angles, because the distance between the pocket and object ball doesn’t matter, and the distance between the object ball and cue ball also doesn’t matter. What matters is the acute angle created at the intersection of the release and shot lines.
Whether the cue ball is 10 feet or 10 millimeters away from the object ball, how we aim and align for a particular shot angle will always be the same. Fortunately, we can rely on this truth for as long as we play cue sports.![]()
We saw how the intersection of release line and shot line reveals the shot angle. Well, the same shot angle can be found nearby.
Starting from the pocket, if we draw the release line through and beyond the object ball’s center to its equator, we locate the object ball’s contact point. This is the tiny point on the rear surface of the object ball that the cue ball must strike in order to pot the object ball in the chosen pocket.
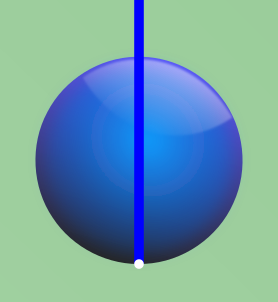
If we then draw a line that is parallel to the release line that also passes through the center of the cue ball at the height of its equator, we locate the cue ball’s contact point.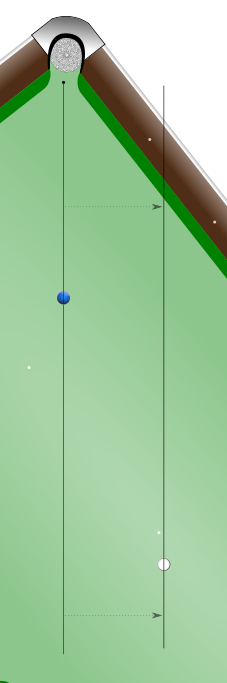
This contact point, which lies on the front surface of the cue ball, is what must strike the object ball’s contact point in order to pot the object ball in the chosen pocket.
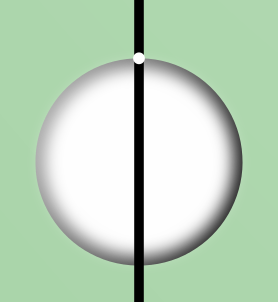
And if we draw a straight line from the cue ball’s contact point to the object ball’s contact point, this line would be parallel to our original shot line and could also be called the shot line. The only difference is that this new shot line traces the path traveled by the cue ball’s contact point rather than the path traveled by the cue ball’s center.
From here on, the term “shot line” will be referring to this alternative shot line.
Note: You may be wondering why any more work would be necessary if the shot line is already known, but please bear with me. At this stage I am only presenting the geometry and theory behind the Angle Detective system. The system does not require you to know the shot line. Instead, it helps you to detect it.
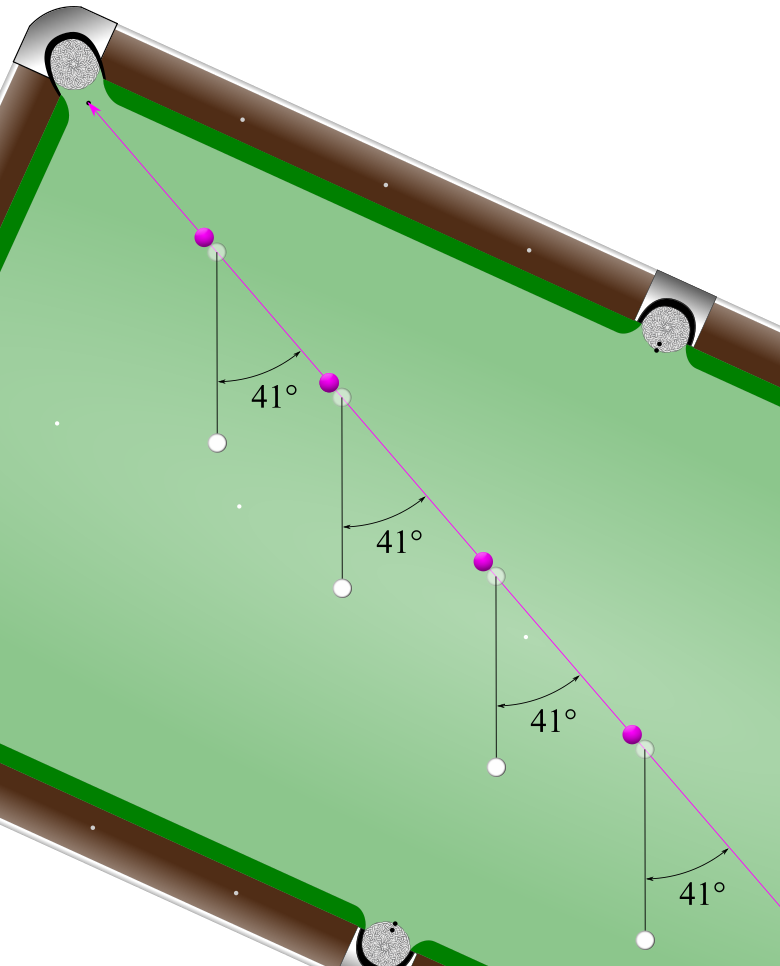
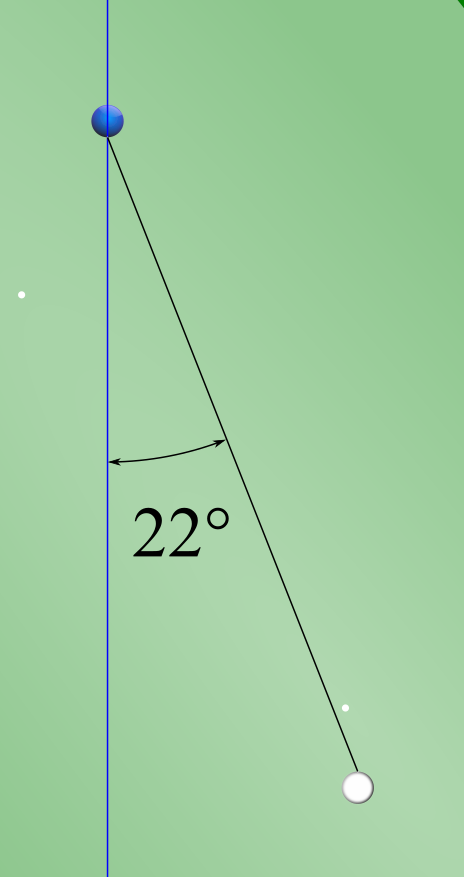
It is a rule of geometry that opposite angles created by two intersecting lines are of equal measure. Therefore, if we extend the shot line beyond where it intersects with the release line, we discover our shot angle’s identical twin. It has the same measurement and therefore offers us another location to find the shot angle for any shot.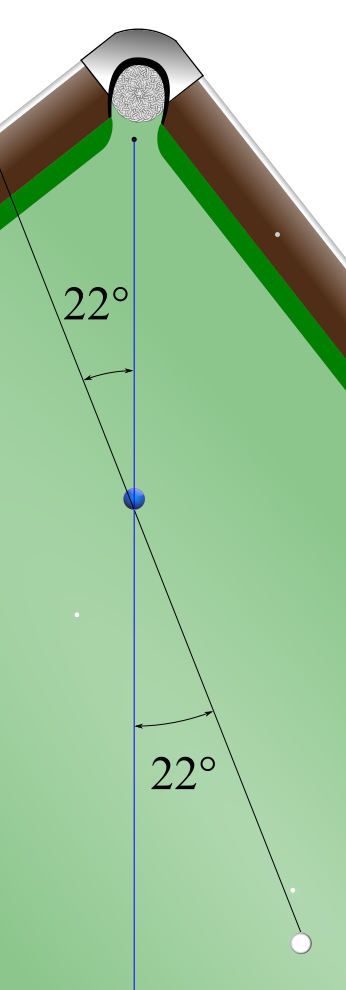
The release line and shot line can be extended an inch, a foot, or well beyond the table and even through the walls and over the hills and meadows.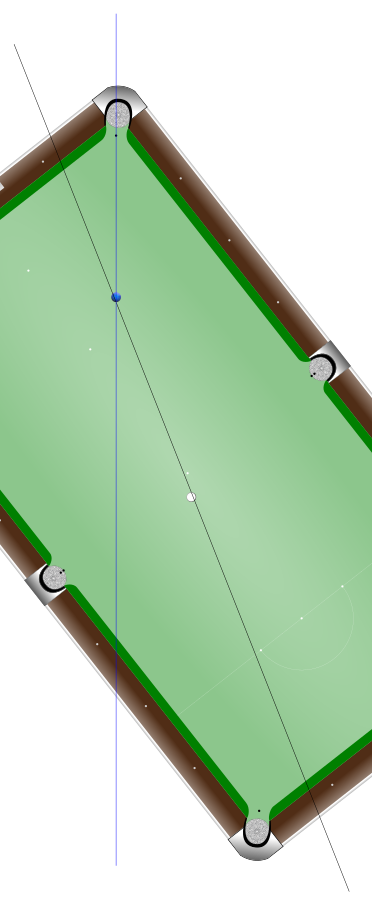 The angle is the angle, and it doesn’t change no matter how long or short we make these lines. This is a good thing. It is comforting to know that a shot setup contains one single steady angle that can be relied upon.
Unfortunately, it isn’t easy to determine an angle’s measurement just by visualizing two intersecting lines. Yes, we can sense whether the angle is less than, greater than or equal to a 90° right angle. We can also divide a right angle into quarters to find 45°, 22.5° and 67.5° or into thirds to find 30° or 60°. This offers us a few reference angles to compare to any shot setup. Finding these reference angles can help, but we can do better.
Soon we will see that hidden in every shot setup lies more geometry to be revealed that can get us much closer to being able to precisely determine any shot angle that we face. And this geometry does not require us to visualize angles but instead allows us to apply very simple techniques, such as simply matching the lengths of lines drawn upward, downward, and to the left and right.
