Drawing and Tracing

To get accustomed to visualizing differently-sized squares, rectangles and patterns from different distances, it is a good idea to practice tracing shapes that are laid out on the table. They can be arrangements of balls or other objects placed on the table, or they can be shapes inherent to the table itself as described under the Rectangles Everywhere heading in the Application section. And since rectangles are almost everywhere, you can even practice tracing anywhere you happen to be, whether or not you are near a table.

Drawing or tracing can be done using just your eyes or with the help of a finger. Simply place or select an object with the shape you’d like to practice and trace it over and over again. You can arrange balls or chalk cubes on the table in the shapes you’d like to practice tracing. Or draw shapes within the given boundaries of an appropriately-shaped object. Stand at different distances and locations to practice tracing the same shapes at different sizes and skews.

Up and Down or Back and Forth

To practice drawing lines as straight as possible, simply trace the same line up and down or back and forth trying not to waver from the reference object.

45°

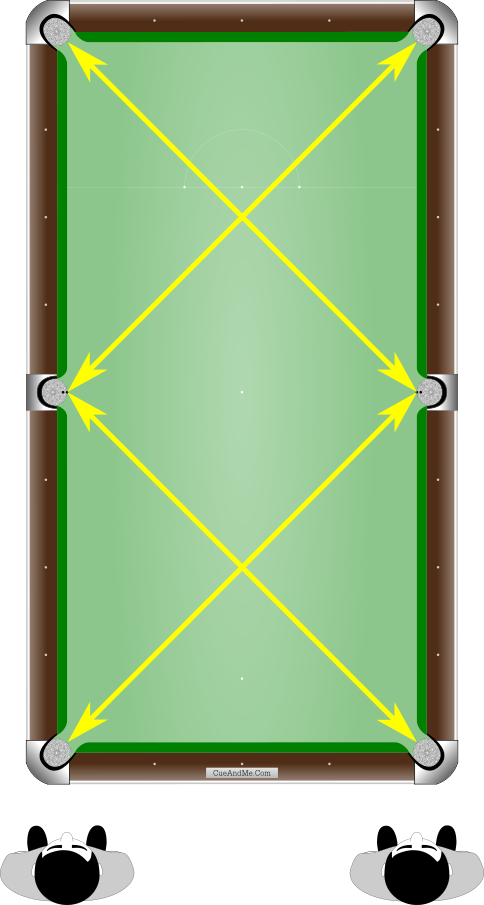
Being able to draw accurate 45° Zigs or Zags up or down can be very helpful. All cushions are angled at 45° when standing at any corner pocket and facing the opposite middle pocket or standing at a middle pocket and facing an opposite corner pocket. Practice tracing any cushion or combination of cushions.


Standing instead so that your view is perpendicular to a cushion, practice drawing from any corner pocket to the opposite middle pocket, since a corner pocket to an opposite middle pocket creates a 45° line relative to any cushion.

Square

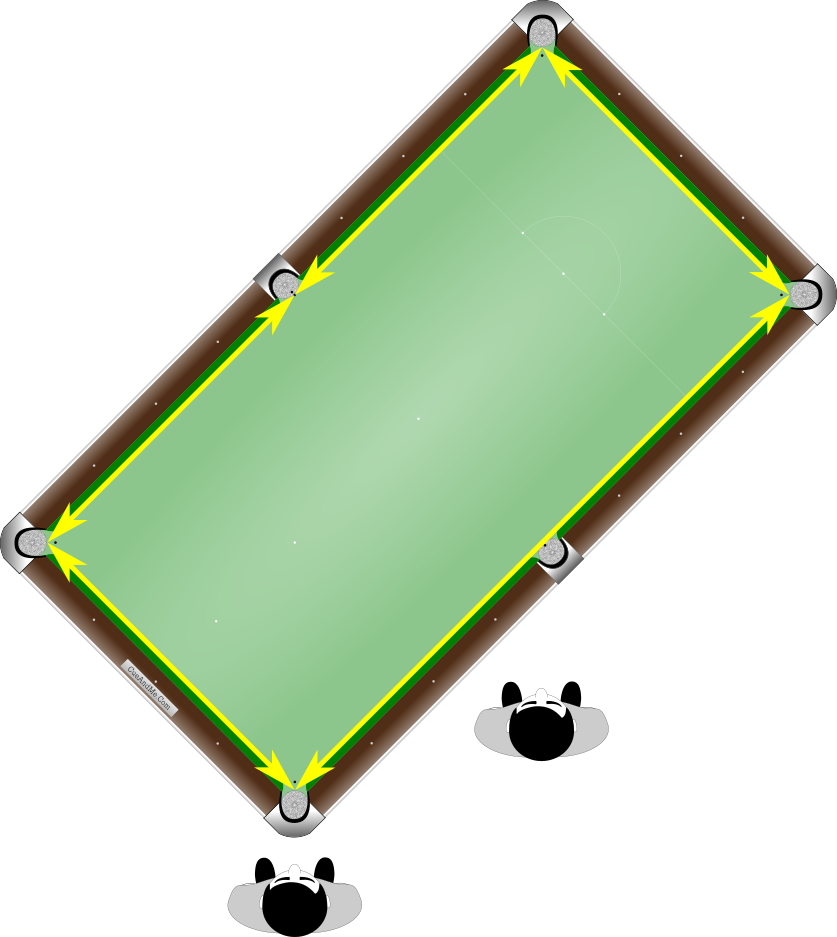
Trace any square inherent to the table or place a square object on the table. Since all patterns are derived from a square, you can practice drawing the pattern sequences within the square object. The two middle pockets and two adjacent corners make up a square, so practice tracing that square or drawing patterns within its boundaries.

L Shape

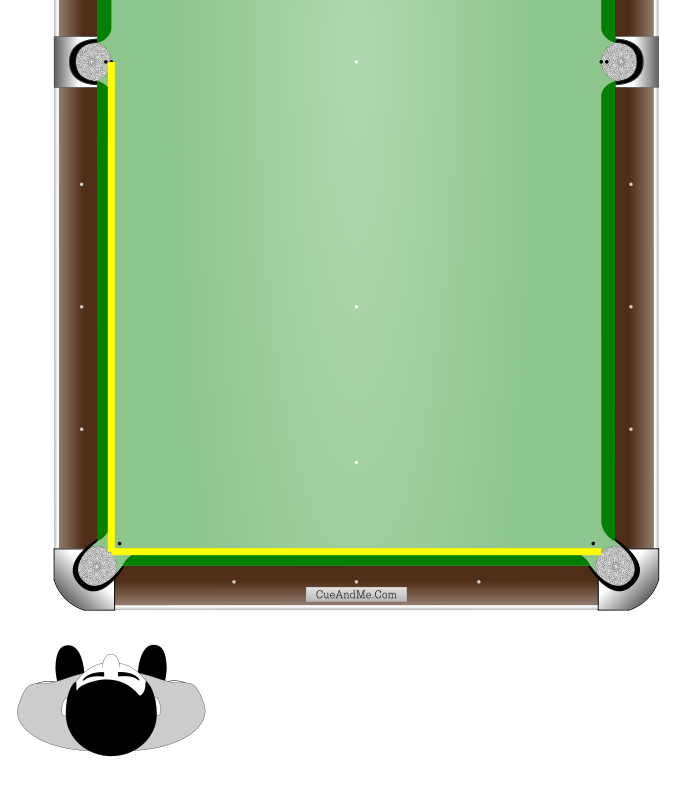
The Angle Detective “L” shape is two equal-length adjacent sides of a square. Repeatedly drawing or retracing the “L” will practice getting your line lengths drawn at right angles to be equal. You can use the cushions adjacent to corner pockets as “L” shapes to trace.

Equal 90° Line

From one of the ends of a single vertical or horizontal line, practice drawing a line of equal length at 90°. This will better your accuracy when drawing pattern sequences.

Miscellaneous

Edge Aiming

Optionally practice the drills and games using edge aims instead of center ball aims. You may find it preferable, especially for thin cuts.

Feel First

To encourage developing feel for the angles, before going through any Angle Detective pattern or other method try standing in different positions behind the cue ball until the shot feels to be the proper aim. Once the aim feels right, decide what Angle Detective label corresponds to that aim. Then go back and use the Angle Detective methods to determine the shot label. Do the two labels match? If not, shoot the “felt” aim to see whether it was your feel or your Angle Detective method that was off.

Thick, Thin or On

Once the shot analyst in you has decided on a shot label and you are in the shot maker position ready to shoot, ask yourself if the aim feels right. If it does, say “On” quietly to yourself, and commit to the shot label’s aim. If it feels too thick, say “Thick”, but commit to the label’s aim anyway. If it feels too thin, say “Thin”, but commit to the label’s aim anyway. Whether or not the ball is potted, this process gives feedback to both your inner shot analyst and your inner shot maker.

Rectangle Recognition

You can practice rectangle recognition anywhere. Just look at any rectangle and first take a quick guess based on your feel for rectangle width. Then test your guess with the patterns or even a small portable Master Square. Then again, for the sake of your sanity and the sanity of those around you, you may think it best to leave the Master Square in your cue case.

Square and Rectangle Visualization

You can also practice visualizing squares and rectangles wherever you happen to be. Choose any two small objects in your view, and imagine that they represent the object ball and cue ball or the object ball and pocket. Then visualize a shot rectangle or a Master Square that is sized and placed perfectly within the “contact points” of these two objects. When visualizing the square or rectangle, be sure to tilt it as necessary so that it lies along the same plane as the objects. You can practice your patterns using these small objects as well.

You can even use any two small objects to practice visualizing the SubSquares and SubRectangles that lie within their shot rectangles.

THANK YOU!

Thank you for reading. I know it was a lot to digest, but I hope you felt that your time was well spent. I also hope that you try and apply the Angle Detective methods to your game. Please report back your findings. I believe that with the help of the worldwide community of active cue sport enthusiasts, the Angle Detective system can continue to evolve.

Although I’ve put a lot into developing it, I am one person with one perspective. I imagine that thousands of players, all bringing their unique perspectives and using and testing the Angle Detective methods can offer significant improvements. This is one of the reasons I wanted it to be a donation-based release. I want as many people as possible to have access to it. The more players using it, the more they can help me to improve it.

If you have any questions or ideas that you think would improve the Angle Detective system, please send me a message through the contact page at https://cueandme.com/contact/.

Whether or not you choose to apply the Angle Detective methods, my sincere wish is that your enjoyment for the game continues to grow.

Take care and thanks again!

Jeff