Now let’s focus on where to aim and send the center of the cue ball in order to pot the object ball in the target pocket. We could alternatively focus on ball edges or ball contact points, but for the sake of simplicity we’ll instead focus on the path traveled by the center of the cue ball.
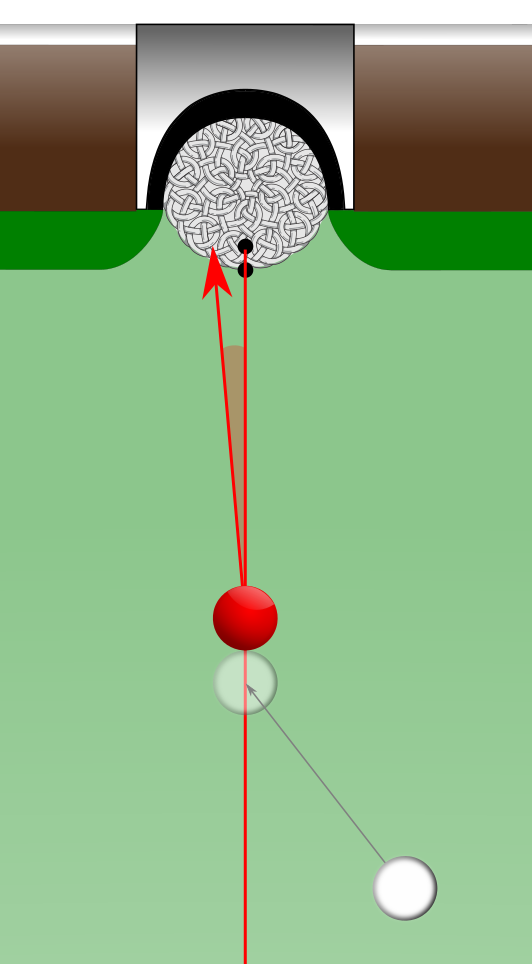
In a friction-free universe, we would attempt to send the cue ball to occupy a position referred to as the “ghost ball.” The ghost ball is an imaginary ball that rests along the release line behind and touching the object ball. In other words, the center of the ghost ball is located on the release line exactly one ball diameter behind the object ball’s center.

Theoretically, if we were to shoot the center of the cue ball to the center of the ghost ball, the cue ball would be in the proper position at collision with the object ball to propel the object ball along the release line toward the target pocket.
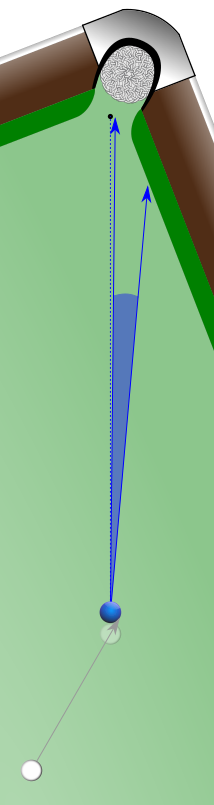
But let’s come back to reality. In the real world, friction can have a significant effect on ball collisions. Under normal conditions, this friction can “throw” the object ball up to 5° off of its theoretical release line.
Different spins, speeds and angles result in different throw effects, but we’ll try to keep it simple for now by recognizing that for any shot angle over 0°, the real world shot angle always measures at least slightly less than the theoretical shot angle.
Fractional aiming is a common shot reference method using what we call “ball fractions.” A ball fraction is simply the fraction of the object ball being horizontally eclipsed by the cue ball when viewed from the 2-dimensional perspective of the shooter. For example, a 7/8-ball fraction means that seven-eighths of the object ball is being obscured by the cue ball at collision. Another example would be a 1/2-ball fraction where one half of the object ball is obscured by the cue ball at collision.
When aimed and shot, each ball fraction theoretically results in the object ball releasing at a specific theoretical shot angle. The most common ball fraction references progress by one eighth of a ball diameter:
Full-ball (total eclipse) = 0°
7/8 = 7.2°
3/4 = 14.5°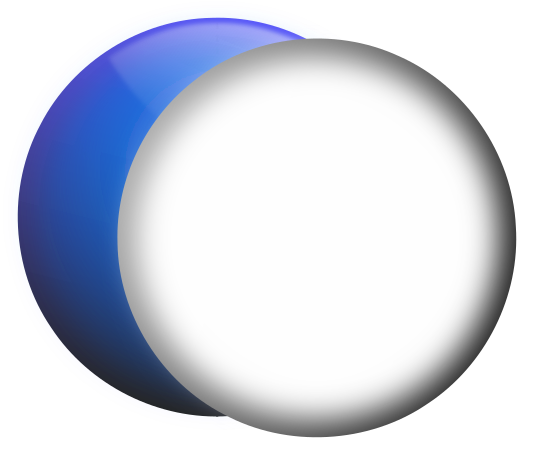
5/8 = 22°
1/2 = 30°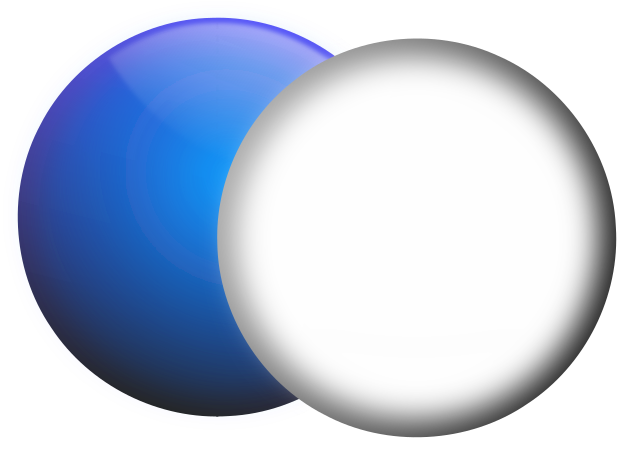
3/8 = 38.7°
1/4 = 48.6°
Notice that the center of the cue ball progresses by one eighth of a ball diameter, starting at the object ball’s center for the full-ball fraction and moving toward and beyond the object ball’s edge for the other ball fractions.
Theoretically, since each ball fraction listed above corresponds to a single shot angle, we can aim the center of the cue ball along a path that would result in the appropriate eclipse for the shot angle we need to play.
However, since adjustments are necessary to accommodate the effects of real world friction, we must acknowledge that theoretical angles are only a starting point. More accurate and practical than associating each ball fraction with a single theoretical angle would be to associate each ball fraction with a “range” of possible angles.
For example, by various alterations of speed and vertical spin on the cue ball, the same 1/2-ball aim can result in the object ball releasing from collision at an angle as low as 25° to nearly as high as the theoretical 30°.
And if we were to include side spin, the angle range of a 1/2-ball aim would be even larger.
Therefore, we will replace the single theoretical angles above with real world angle ranges. Here is a video of an experiment I conducted to help find these angle ranges.
It is time to link our reference shot angles and reference rectangles to their corresponding reference aims. In linking them, our same angle and rectangle letter labels will now be applied to the reference aims. We will begin with the single-letter labels.
‘A’ Full Ball 0°
Sending the cue ball’s center directly toward the center of the object ball results in a straight shot with a 0° shot angle. This is also commonly called a full-ball shot, because from the perspective of the shooter, the object ball is being fully eclipsed by the cue ball. We will assign the letter ‘A’ to this aim.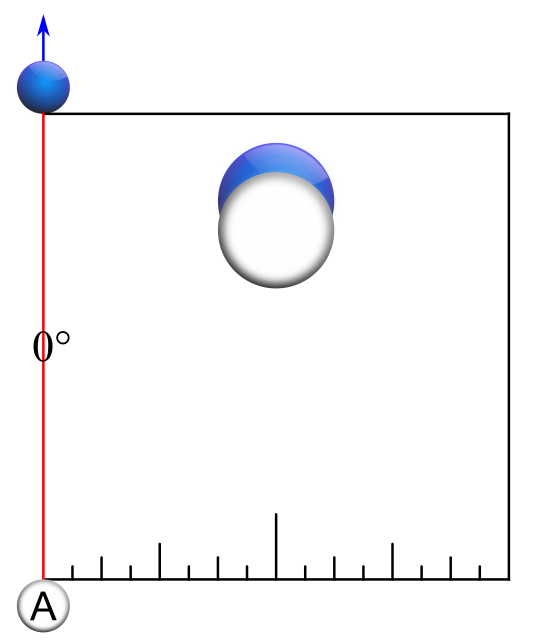
‘B’ 7/8-Ball 7°
Sending the cue ball’s center directly toward a point 1/8 of a ball diameter to one side of the object ball’s center can result in a 7° shot angle. We will assign the letter ‘B’ to this aim.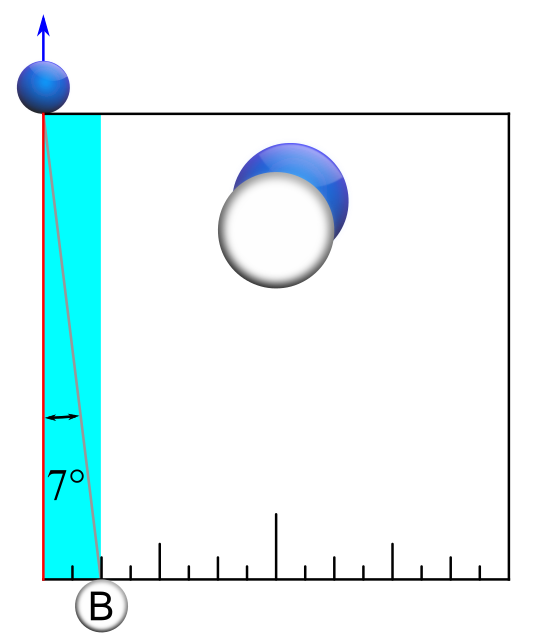
‘C’ 3/4-Ball 14°
Sending the cue ball’s center directly toward a point midway between the object ball’s center and its outer edge can result in a 14° shot angle. We will assign the letter ‘C’ to this aim.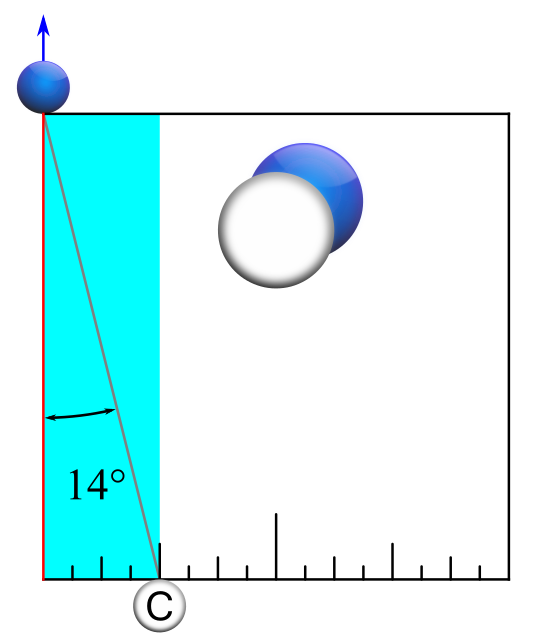
‘D’ 5/8-Ball 21°
Sending the cue ball’s center directly toward a point 1/8 of a ball diameter inside of the object ball’s outer edge can result in a 21° shot angle. We will assign the letter ‘D’ to this aim.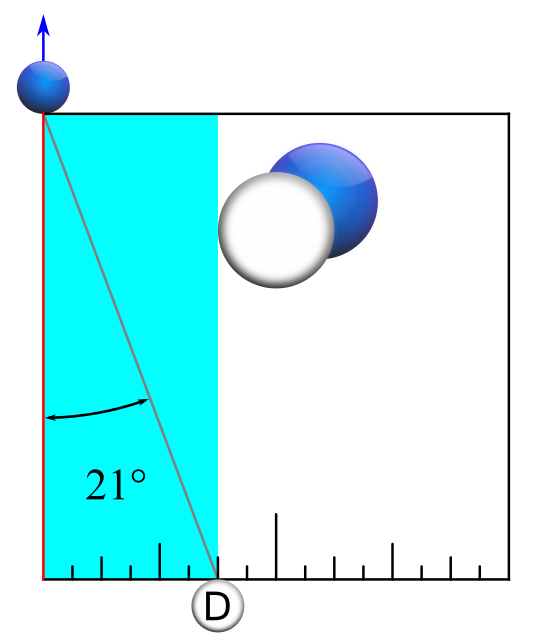
‘E’ 1/2-Ball 27°
Sending the cue ball’s center directly toward the object ball’s outer edge can result in a 27° shot angle. We will assign the letter ‘E’ to this aim.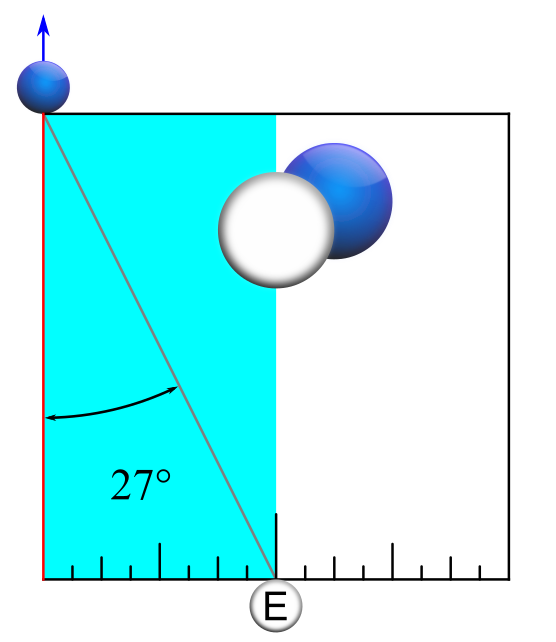
‘F’ 3/8-Ball 37°
Sending the cue ball’s center directly toward a point 1/8 of a ball diameter outside of the object ball’s outer edge can result in a 37° shot angle. We will assign the letter ‘F’ to this aim.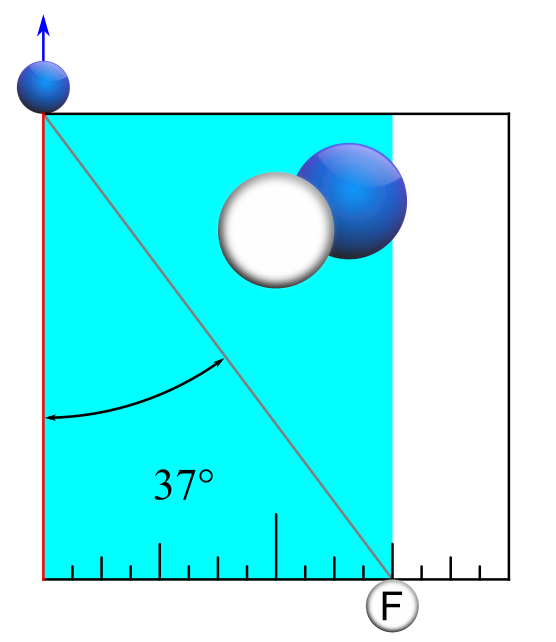
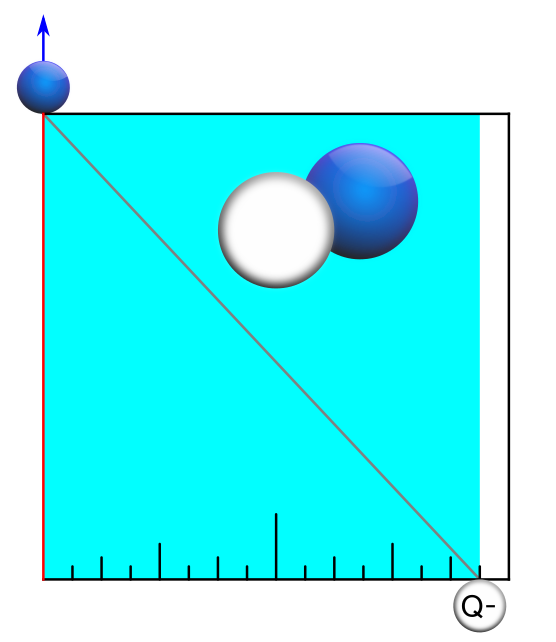
‘Q’ 1/4-Ball 45°
Sending the cue ball’s center directly toward a point 1/4 of a ball diameter outside of the object ball’s outer edge can result in a 45° shot angle. We will assign the letter ‘Q’ to this aim.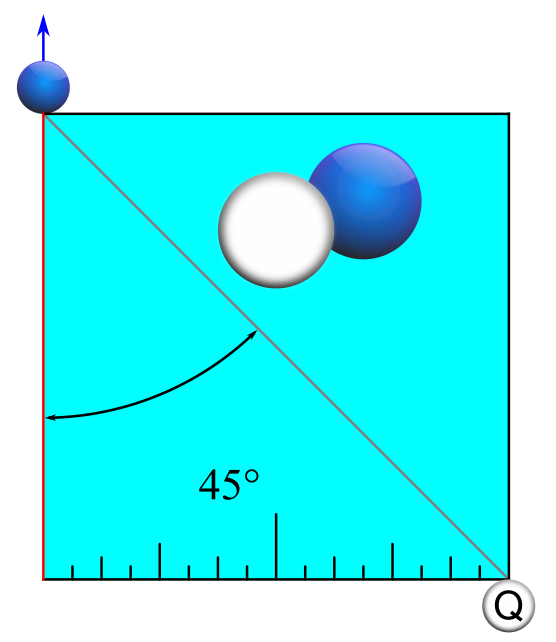
Midway between these single-letter aims lie the aims for our two-letter references. This gives us 13 reference aims for all of our 13 reference angles between 0° and 45°:
So we see that The Master Square is not only useful for finding reference shots, angles, and rectangles but for linking reference aims as well. Each letter label connects a reference angle to a reference rectangle to a reference aim. When we are faced with a shot that lies between two references, we simply aim at a point between two reference aims. Remember that when shots lie between two labeled references, we can add the + and – symbols to our labels, giving us a total of 25 aims to cover all shots from 0° to 45°.
Examples:
The ‘AB’ shot angle is midway between the ‘A’ and ‘B’ reference shots. We therefore aim the center of the cue ball at the 15/16-Ball ‘AB’ aim, which is midway between the full ball ‘A’ reference aim and the 7/8-Ball ‘B’ reference aim: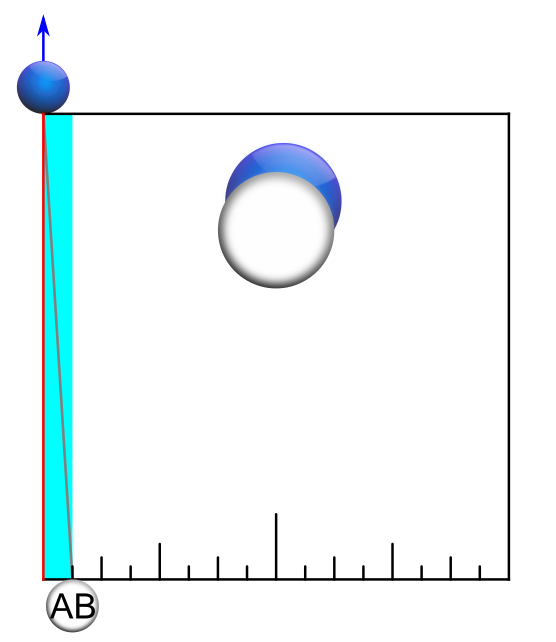
For a shot angle midway between ‘A’ and ‘AB’, we aim midway between the full ball ‘A’ and 15/16 ‘AB’ aims and call the shot ‘A+’: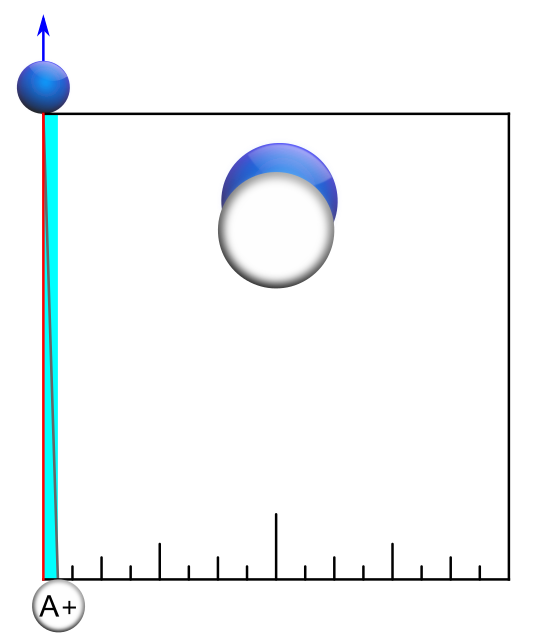
For a shot angle midway between ‘D’ and ‘E’, we aim the center of the cue ball at the 9/16-Ball aim which is midway between the 5/8-Ball ‘D’ reference and the 1/2-Ball ‘E’ reference aims: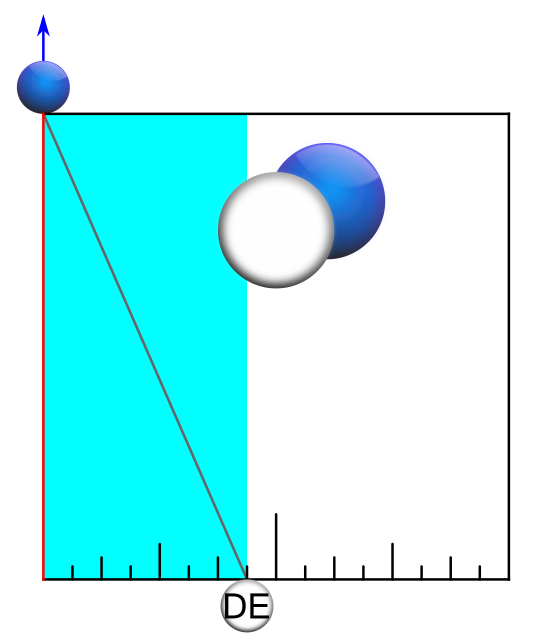
For a shot angle midway between ‘D’ and ‘DE’, we aim midway between the 5/8-Ball ‘D’ reference and the 9/16-Ball ‘DE’ aims and call the shot ‘D+’: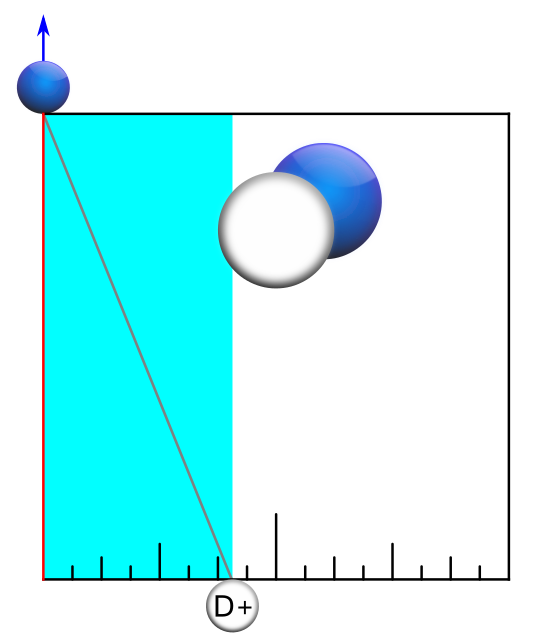
For a shot angle midway between ‘F’ and ‘Q’, we aim the center of the cue ball at the 5/16-Ball ‘FQ’ aim which is midway between the 3/8-Ball ‘F’ reference and 1/4-Ball ‘Q’ reference aims: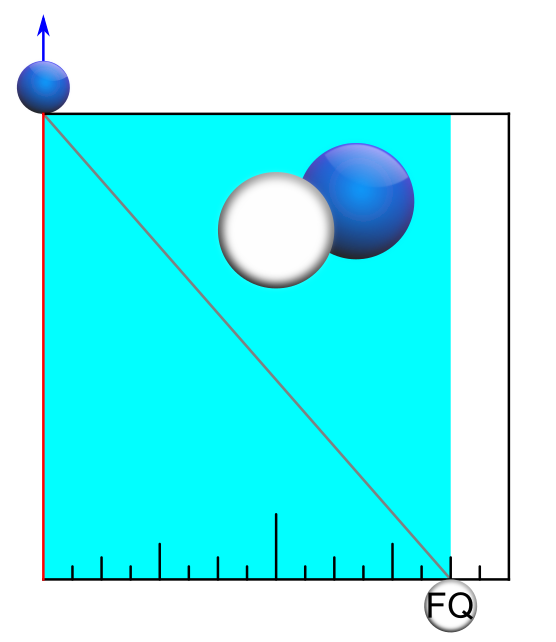
For a shot angle midway between ‘FQ’ and ‘Q’, we aim midway between the 5/16-Ball ‘FQ’ aim and the 1/4-Ball ‘Q’ Reference aim and call the shot ‘Q-‘: