
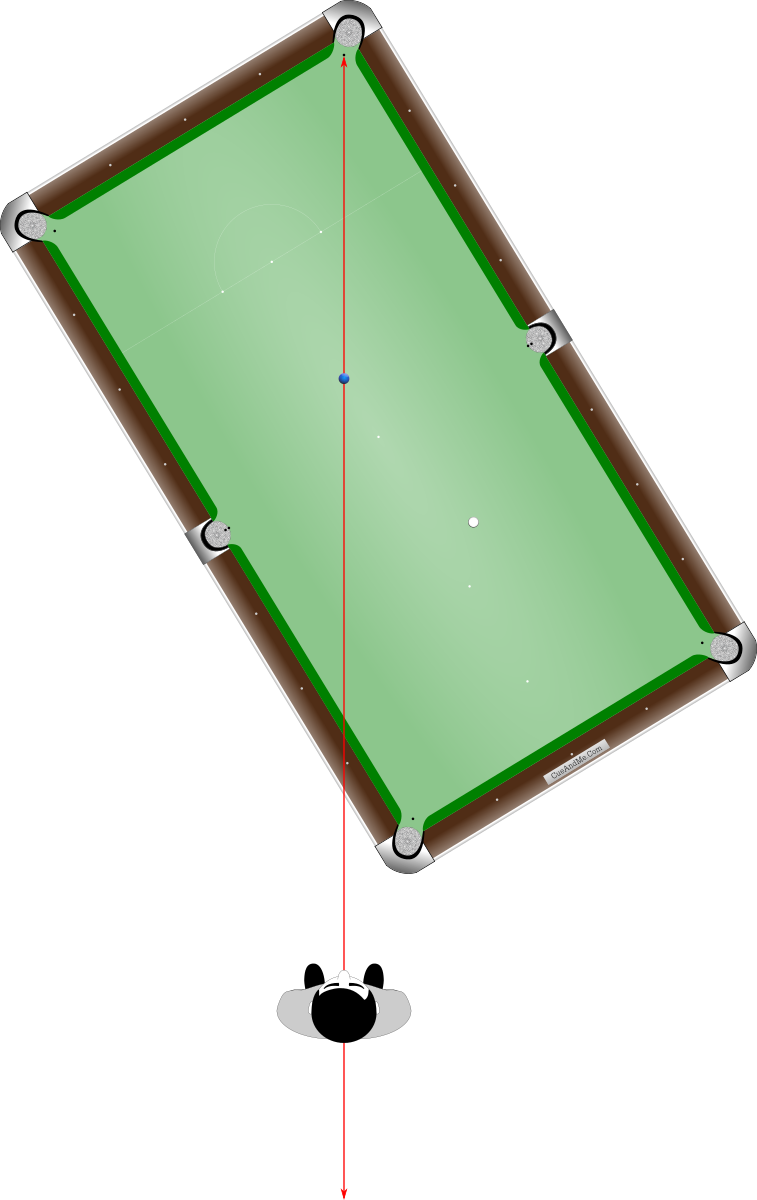
We already learned that the release line is a straight line starting at the center of the pocket (or other target) and drawn through the center of the object ball. If we extend the release line beyond the object ball and beyond the table’s edge so that we are standing with our eyes directly above this line and looking in the direction of the object ball and pocket, we have correctly and precisely positioned ourselves in Position 1.
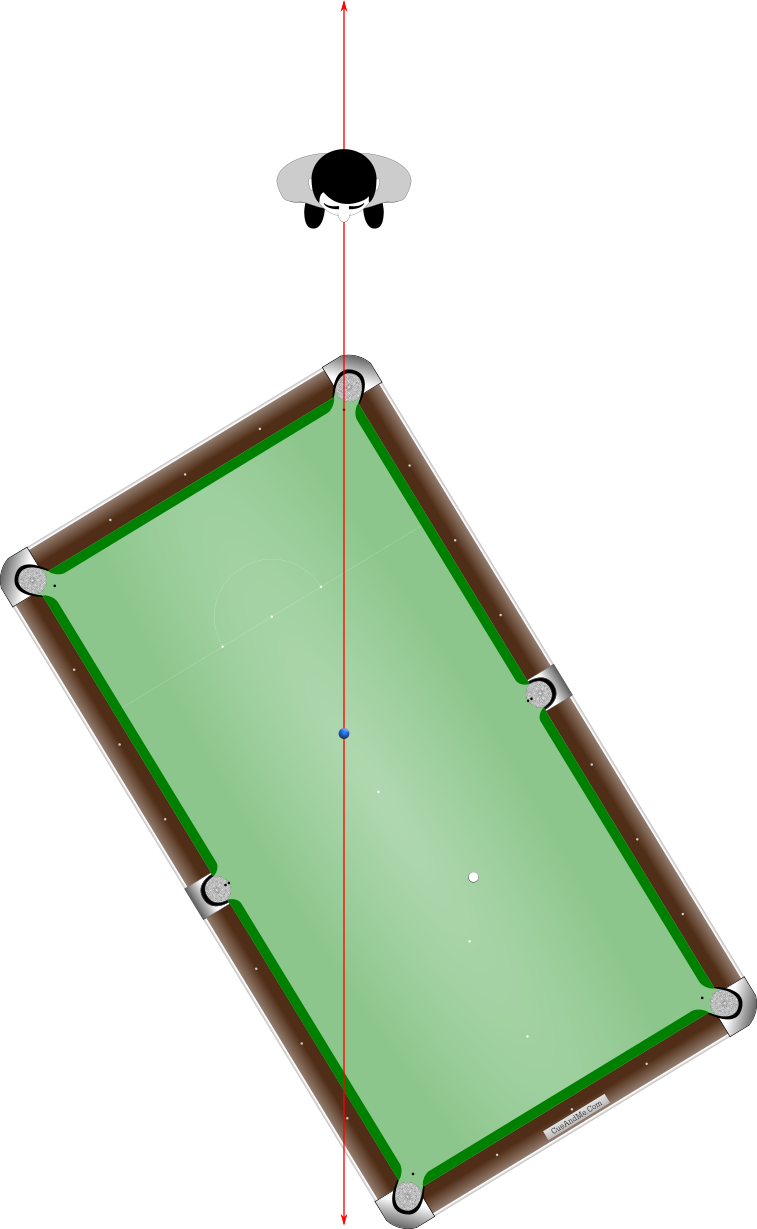
If we extend the release line in the other direction beyond the pocket center and stand so that our eyes are above the release line looking in the direction of the pocket and object ball, we have correctly positioned ourselves for the Position 1-2 variation of Position 1.
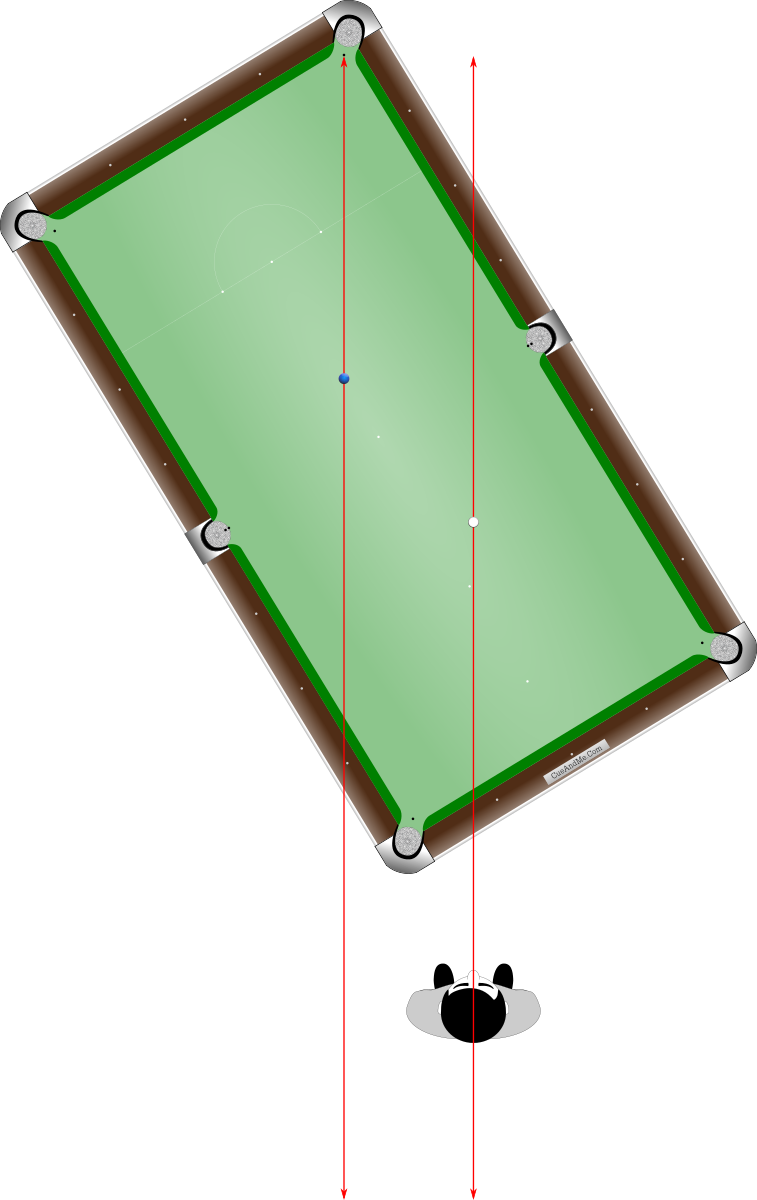
Standing so that our eyes are directly above and looking along a line drawn parallel to the extended release line that also intersects the center of the cue ball places us in the Position 1-3 variation of Position 1.
A straight line starting at the center of the object ball and drawn through the center of the cue ball gives us the shot line for a 0° straight ‘A’ shot. If we extend this ‘A’ shot line beyond the table’s edge and stand so that our eyes are directly above the line and looking in the direction of the cue ball and object ball, we have correctly and precisely positioned ourselves in Position 2.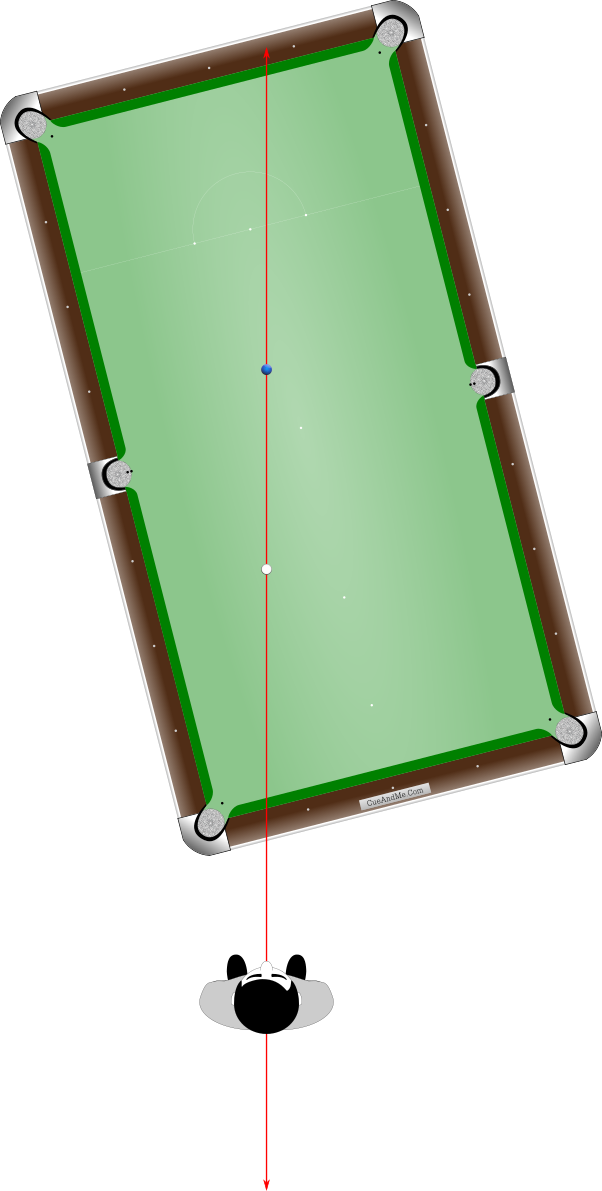
Position 2 can also be called Position 2A. Although we will call them variations, Positions 2A+, 2AB, 2B-, 2B, 2B+, 2BC, 2C-, 2C, etc. up to 2U are actually adjustments to Position 2 that incorporate our reference aims and “in-between” aims. When we learn how to draw the Position 2 patterns, you will see that these adjustments help us to preserve shot geometry and therefore increase our accuracy.
To properly position ourselves for each of these Position 2 aim variations, we simply shift the object ball end of the line. So rather than drawing the line from the center of the object ball through the center of the cue ball, we instead draw the line from the aim point on or near the object ball through the center of the cue ball. This is usually a small adjustment, but as the distance between the object ball and cue ball decreases, these aim adjustments grow larger. We will learn more about this ball distance variable later on.
Examples for shots to the middle pocket:
Position 2C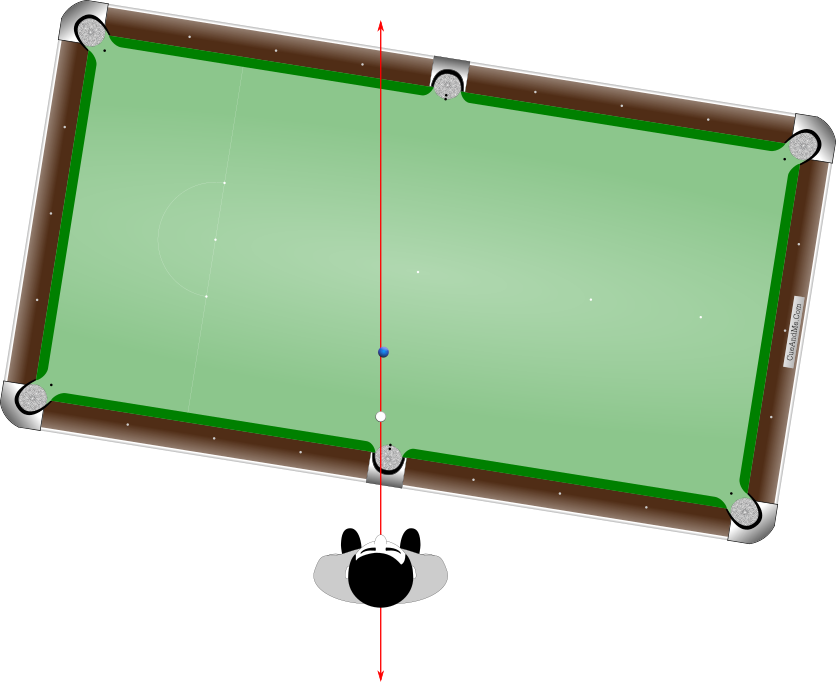
Position 2E
Position 2Q
There are two more standing positions—Position 3 and Position 4—that apply to doubles/banks and cannons/caroms that will also be covered later.
