I suggest that you begin learning the pattern sequences by drawing every line, but eventually you may be able to use a few shortcuts that will take you to the same destinations more quickly.
Half Skip
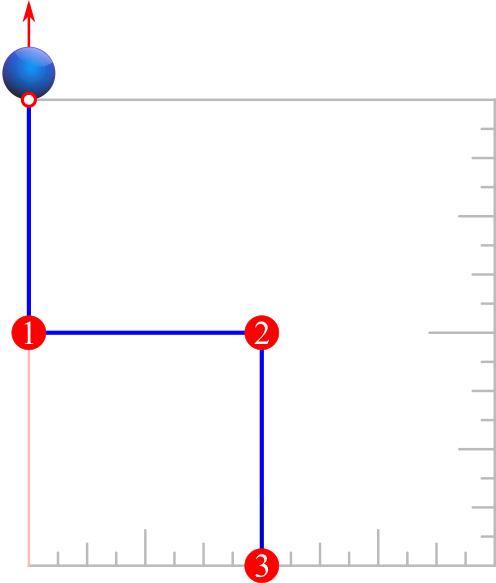
For sequences that begin with a full length line followed by a half length line in the opposite direction, instead of drawing the first line to full length, draw the first line only to where you sense its midpoint to be. You can then skip the second line in the sequence.
Example 1| Sequence 1 of the standard h pattern is four lines: Down, ½ Up, Right, Down. The Half Skip shortcut could shorten it to three lines: ½ Down, Right, Down.
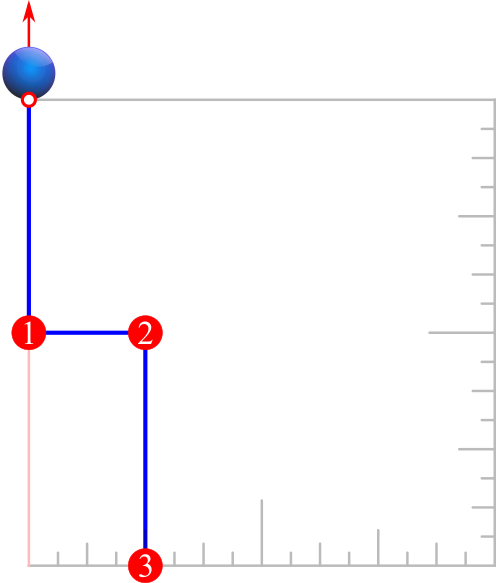
This shortcut can also be used anywhere in a sequence to skip a half length line that follows a full length line.
Example 2| Sequence 1 of the standard Under 45° h sub-pattern to find ‘C’ is five lines: Down, ½ Up, Right, ½ Left, DOWN. The Half Skip shortcut applied twice could shorten it to three lines: ½ Down, ½ Right, DOWN.
Half Skip Up
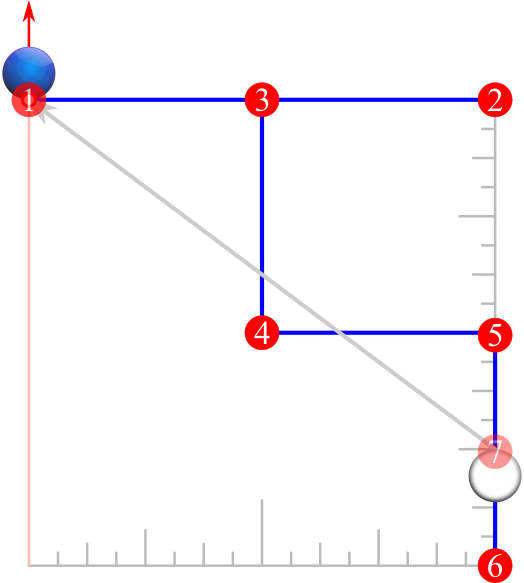
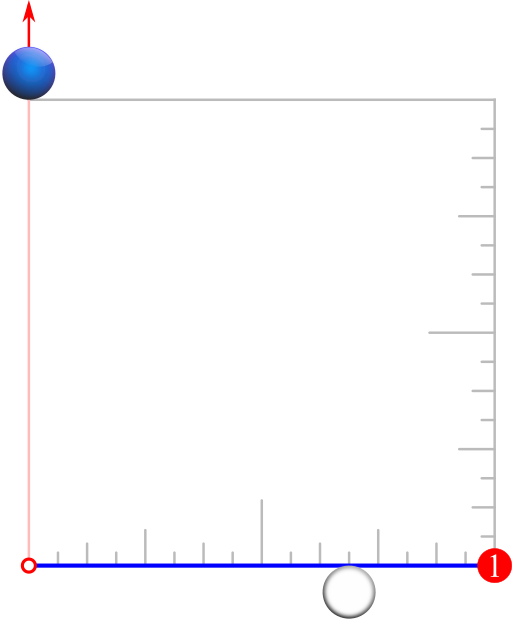
The first line of any standard Position 1 pattern sequence starts at the object ball corner of the Master Square, but if we look to the cue ball we can immediately sense where the end of that first line would be—the near/bottom or for over 45° the far/top intersection. Therefore, we can start our patterns from that point and draw the first line in the opposite direction from there, and applying the Half Skip method above we can essentially skip the first full line.
Example| Sequence 1 of the standard w pattern is five lines: Down, ½ Up, Right, Down, Right. The Half Skip Up shortcut could shorten it to four lines: ½ Up, Right, Down, Right.
Length Sensing
The standard pattern sequences contain many full length lines to be drawn first so that the length of subsequent half length lines can be easily gauged. However, if you’re particularly good at visualization, you can often skip the drawing of a full length line by imagining it while drawing the full length or half length line that follows.
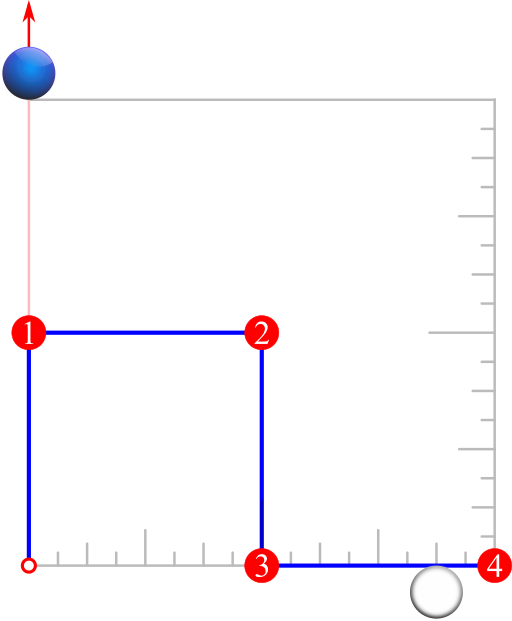
Example| The standard Master L pattern Sequence 1 has two lines of full length: Down, Right. However, you can save time by first sensing the intersection of the near/bottom sides, and from there drawing only the second line (Right) until the length feels to be correct.
Another practical example would be to sense the length of the final line of any sequence rather than drawing it.
Retracing
Feel free to retrace any lines at any time. When following a pattern sequence, until you’re sure that you’ve drawn the proper length and direction of a line, trace and retrace the line back and forth. Tracing a line once in the opposite direction can also be used for repositioning similar to the way that the hL pattern retraces the 2nd line of the standard h pattern for repositioning closer to the cue ball.
Branching
After executing an entire sequence or a portion of a sequence, you may find that the pattern led you too far from the ball to determine the shot label. Rather than starting over with a different pattern, feel free to work from where you are by improvising a new branch off of the current pattern. Simply retain the sense of length of your most recent line and create whatever subsequent lines of equal, half, or even double length are necessary as you travel “off-road” to a closer destination.
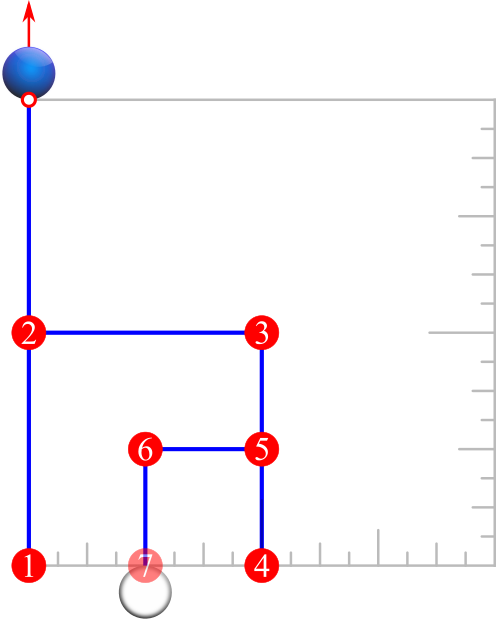
Examples: Say that you have gone well past the cue ball after following the standard h pattern Sequence 1 of Down, ½ Up, Right, Down.

Well, from where you landed at the ‘E’ destination you can continue with ½ Up, Left, Down to arrive at ‘C’.
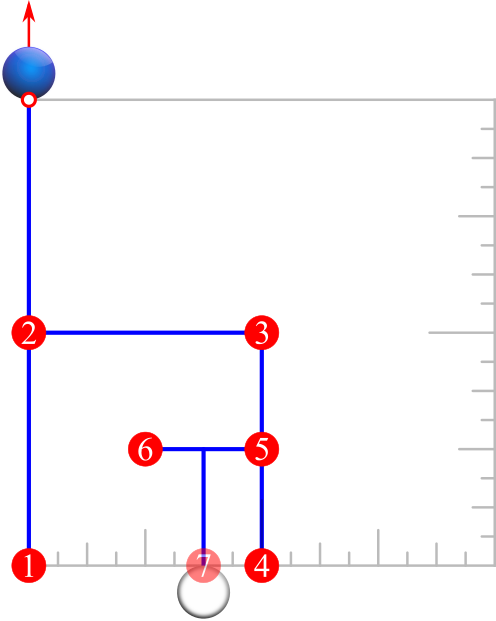
Or ½ Up, Left, ½ Right, DOWN to arrive at ‘D’.
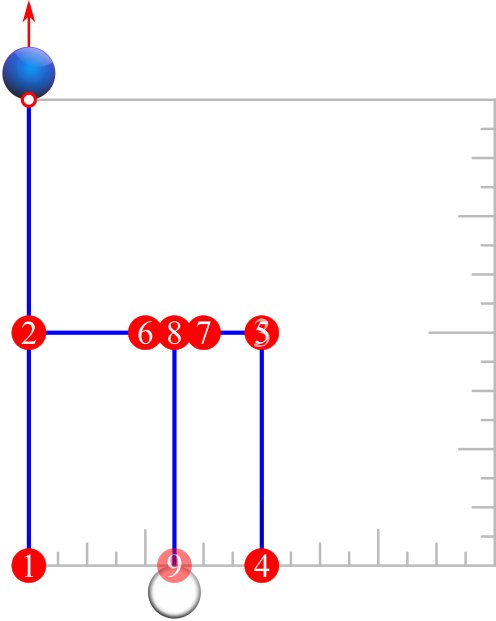
Or ½ Up, Left, ½ Right, ½ Left, DOWN or Up, ½ Left, ½ Right, ½ Left, DOWN to arrive at ‘CD’.
Including Path Line
Drawing the cue ball’s path (from cue ball to object ball in Position 1) or the object ball’s path (from object ball to pocket in Position 2) before or after drawing a pattern is good practice to train us to feel shot angles and associate them with their proper shot labels and shot aims.