It is important to repeatedly practice the reference shots under precisely controlled conditions. You want to become intimately familiar with the aim and exact angle of each reference shot, and the only way to do this is with precise ball placement when setting up your practice shots.
The angles of our reference rectangles are fixed. ‘A’ will always be 0°. ‘B’ will always be 7°. ‘C’ will always be 14°. ‘D’ will always be 21°. ‘E’ will always be 27°. ‘F’ will always be 37°. ‘Q’ will always be 45°. And so on.
Although the reference angles are fixed, the reference aims for those angles are adjustable. We find the appropriate adjustments to the reference aims as we repeatedly practice pocketing each reference shot. Is the aim for ‘C’ truly midway between the object ball’s center and its edge? Is the aim for ‘E’ truly directly at the object ball’s edge? It is important for you to answer these questions for yourself. It is also important for you to discover for yourself whether the aims for each label change with changes in spin, speed and playing conditions.
We want the object ball to be a distance from a pocket when setting up our practice shots. When the object ball is far from a pocket, any errors that we make during our practice will be magnified. This will force us to hone our technique and sharpen our aiming.
These long practice shots will be more difficult than most shots we encounter during actual play, so if we can pot them repeatedly we know that we are truly performing with precision. We need to be challenged during practice. We want to groove the reference shots into our routines and memories so that they become second nature.
When first practicing you may be surprised by how many shots you miss. Precisely setting up a 27° ‘E’ shot and knowing to simply aim at the edge of the object ball should be good enough, right? Well, when the object ball is 5 or more feet away from the pocket, you’ll find that there’s no room for sloppiness. If stroke, aim or alignment is just a bit off, misses come easily.
I suggest striking the cue ball with a medium to medium-soft stroke when first learning these shots. The object ball should not slam hard into the back of the pocket nor should it barely reach the pocket and drop straight downwards. Find a repeatable stroke speed that allows most shots to enter the pocket at a falling angle.

But when you practice the thin cuts on the far side of the Master Square, it will be necessary to increase your stroke speed in order to transfer enough energy to the object ball to get it all the way to the pocket.
I also suggest that the tip of your cue strike about a centimeter above the center of the cue ball and without side spin. This will get the cue ball quickly rolling naturally on its way to the object ball.
Standing behind the shot and before bending over to play it, quietly or mentally “speak” the letter label of the shot. This should help to ingrain the shot’s label and aim into your routine and memory.
Once you’ve found the proper aims using a medium to medium-soft speed and can comfortably and repeatedly pot the reference shots, you can move on to other speeds as well as various amounts of stun, draw and follow spins.
You may find yourself surprised (as I was) by how cue ball speed variations as well as draw and follow spins effect where you must aim to pot the very same reference shot.
Of course practicing side spins would be next, but I encourage you to master the aims for all shots along the cue ball’s vertical center axis before practicing side spins. Side spins can alter release angles drastically as well as introduce cue shaft deflection (squirt) variables, so be patient and don’t jump in too quickly.
There are several ways to accurately place balls for repeated Angle Detective reference shot practice.
The Reference Shot Marker Tool
This is a newly designed printable tool that allows you to mark and place the object ball and cue ball for all of the main references. You will find it in the Angle Detective download folder.
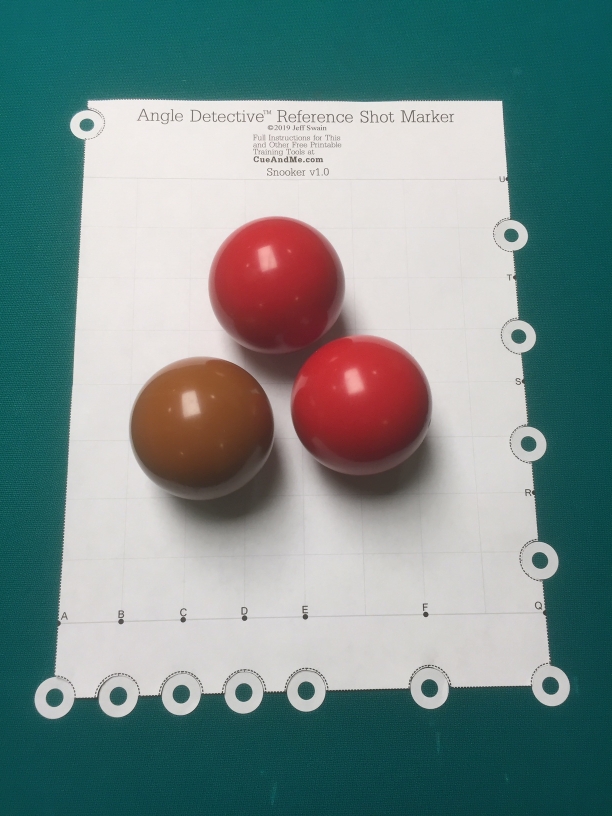
The next page goes over how to prepare and use the Shot Marker tool.
Throtractor
I designed Throtractor specifically for accurately marking the cloth for practice setups of any angle from 0° to 90° with an allowance for up to 5° of throw.
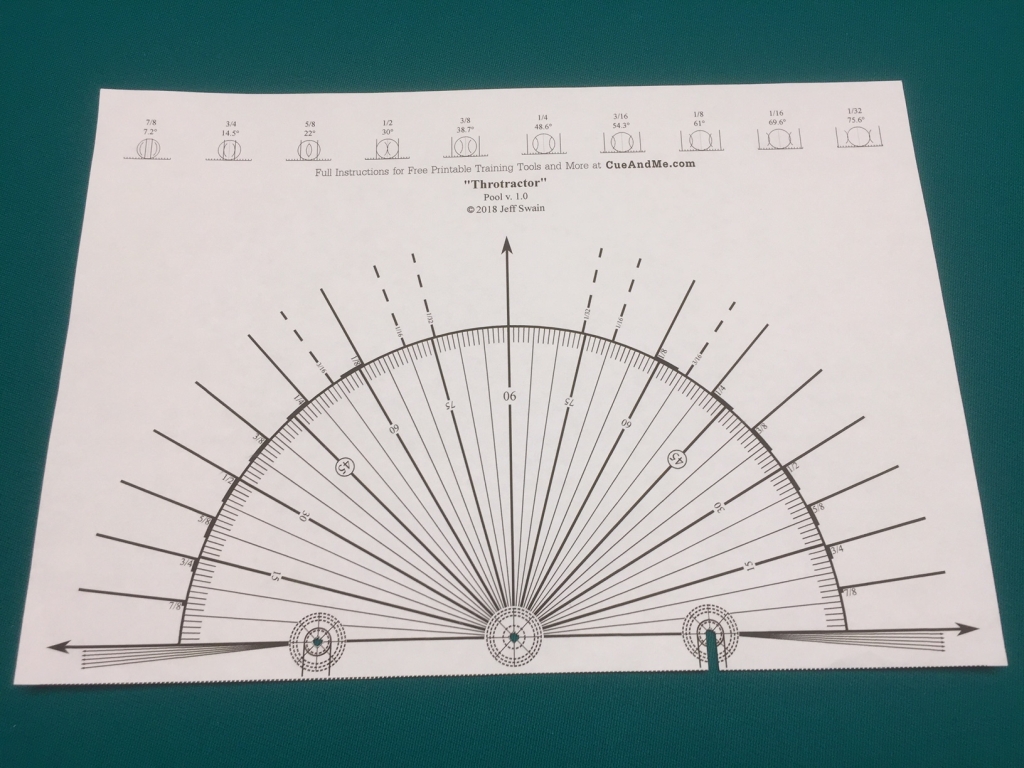
Follow the link below for instructions for preparation and use.
https://cueandme.com/billiard-training-tools/
Here again are the Angle Detective reference shot angles and aims. Simply choose a reference angle, and mark the object ball and cue ball positions using Throtractor. Throtractor allows for the use of one object ball position for several cue ball positions.
Lines of Balls
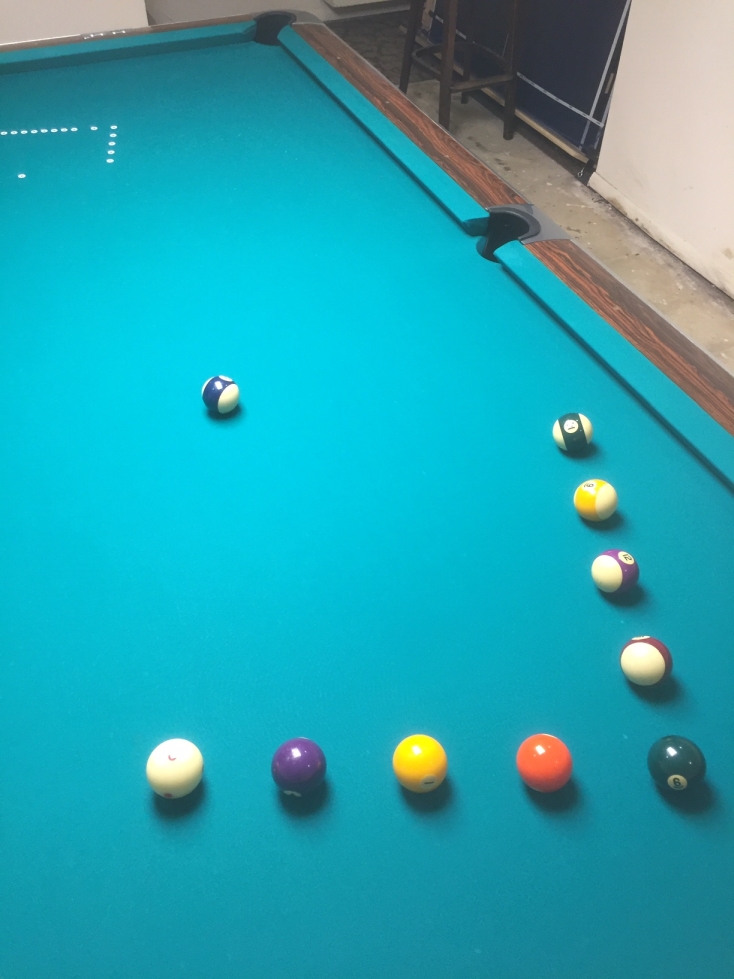
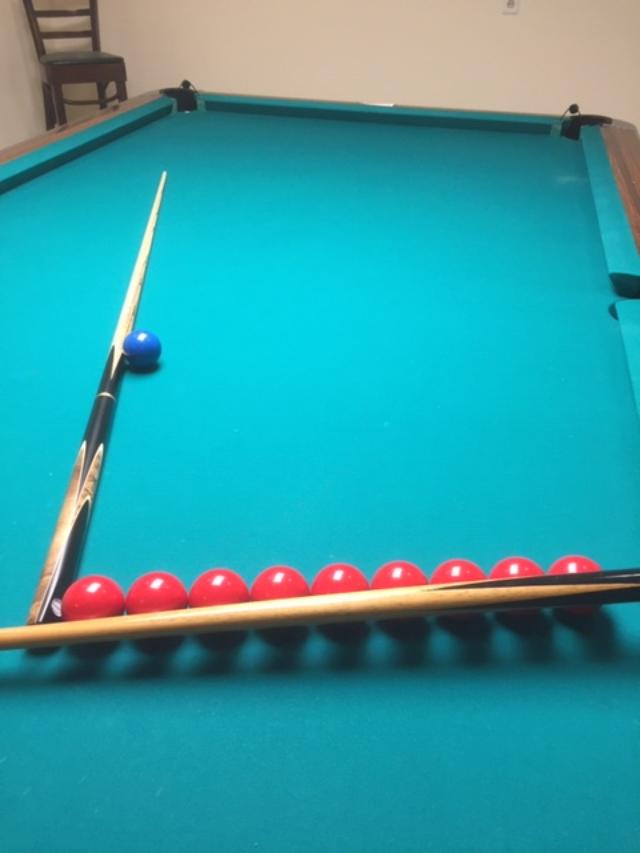
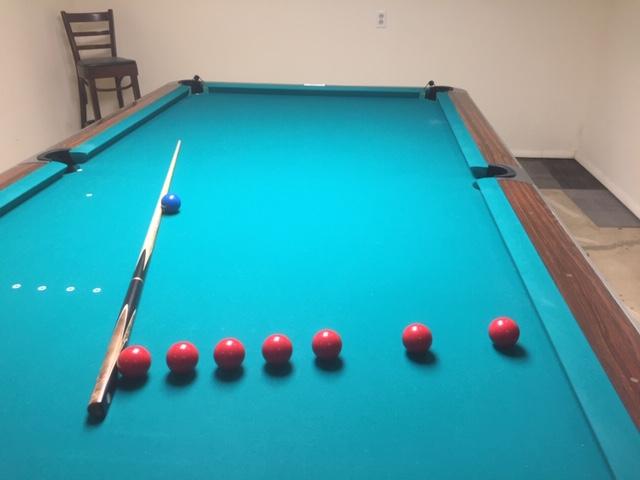
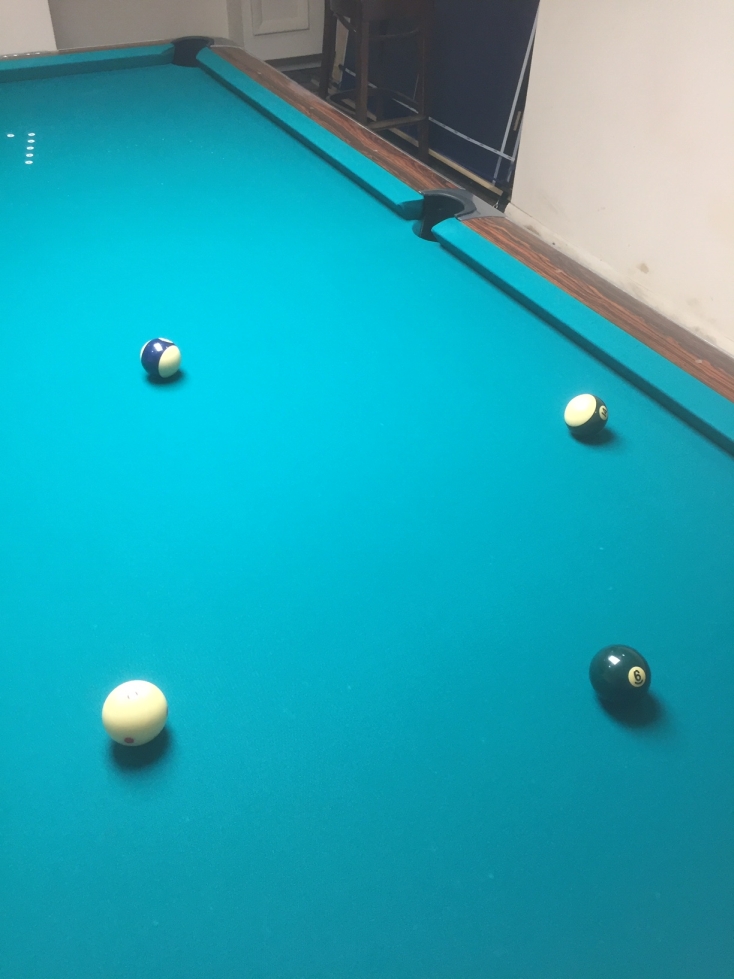
Another way is to align and rotate columns of balls. With a reinforcement label or dot of chalk, powder or removable marking pencil, mark where you’d like the object ball to rest for repeated practice. Use your stick to align an even number of touching balls so that they are all pointing directly at the pocket center with the forward-most ball resting exactly on the mark.
The more balls you use, the larger will be the Master Square as well as the distance from object ball to cue balls. We will look at how to do this with a line of 10 balls.
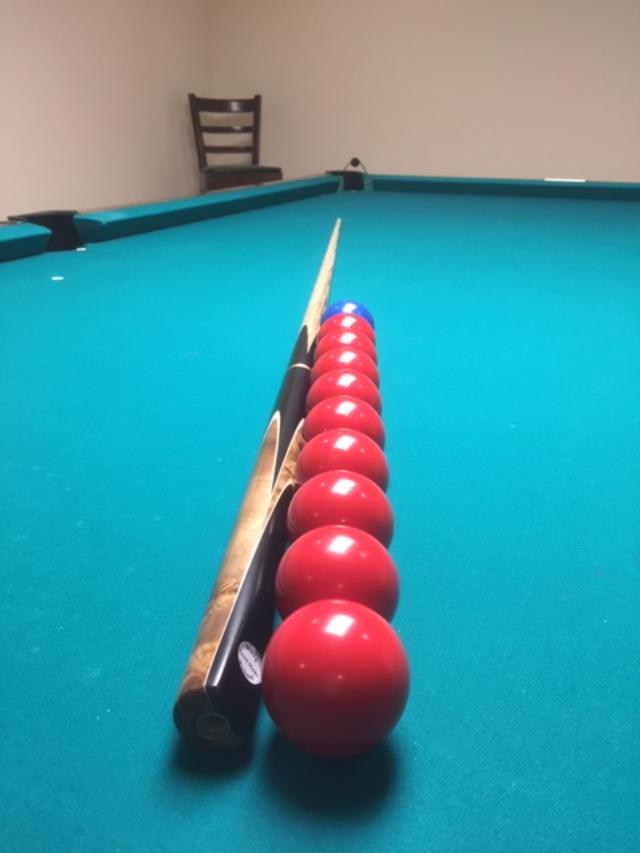
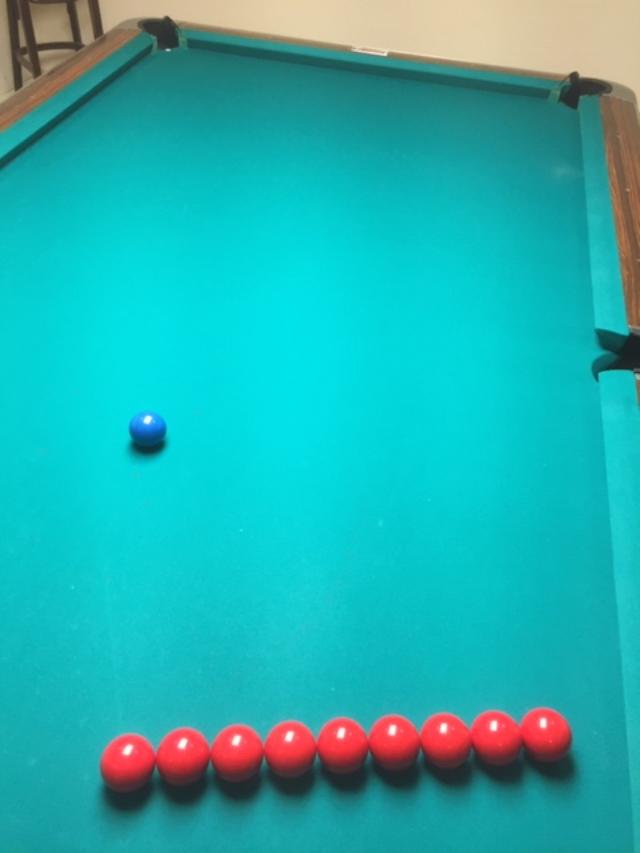
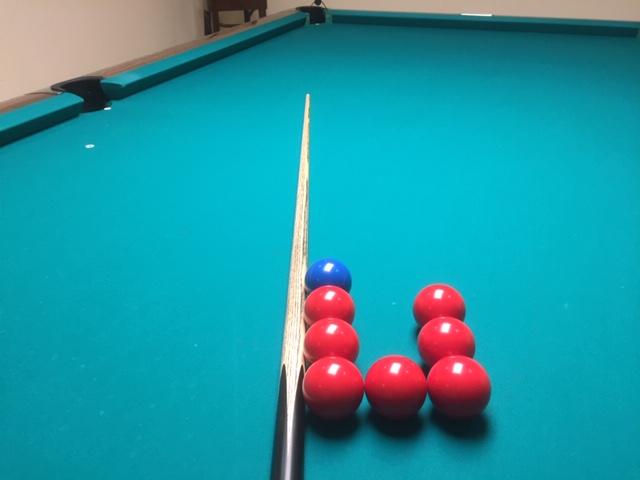
Once the line of 10 balls is pointing at the pocket, carefully remove the inner 8 balls and leave the two end balls in place. The ball nearest the pocket will be the location for the object ball. The other ball will be the location for the ‘A’ cue ball.
Careful not to move the ‘A’ ball, line up the other 8 balls next to the ‘A’ ball but at a right angle to the first line.
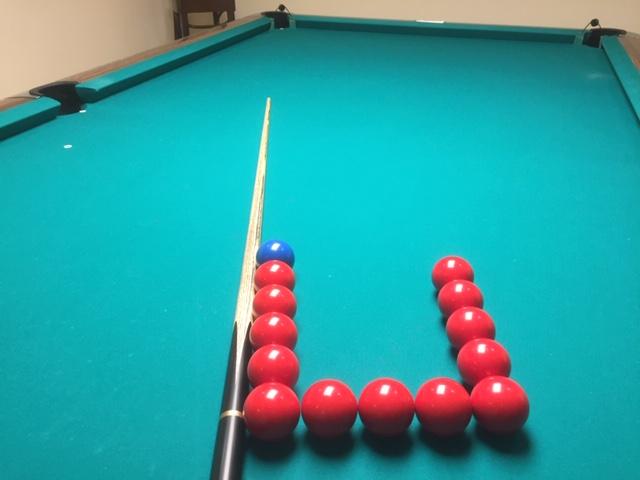
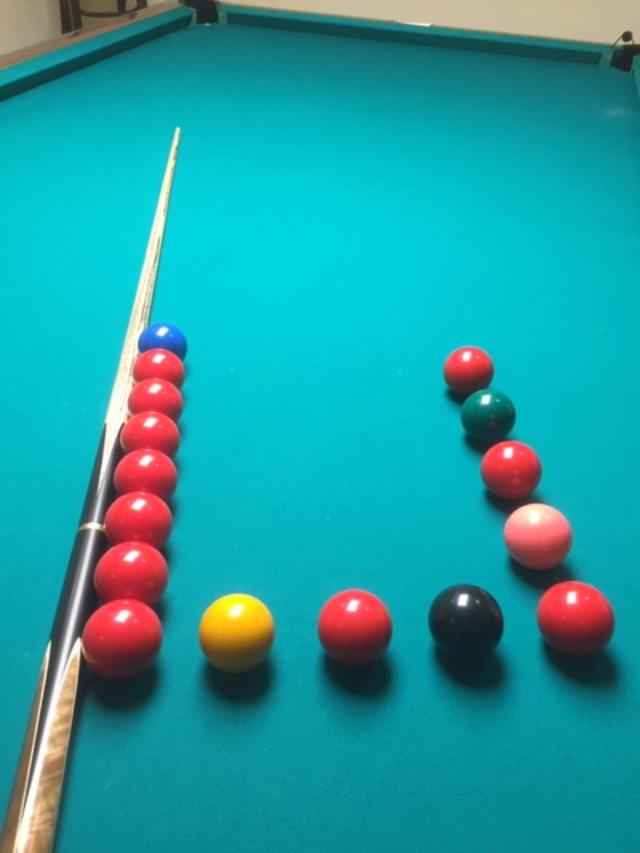
This creates the bottom side of the Master Square with 9 balls in the cue ball positions of ‘A’, ‘B’, ‘C’, ‘D’, ‘E’, ‘EF’, ‘F’, ‘FQ’ and ‘Q’.
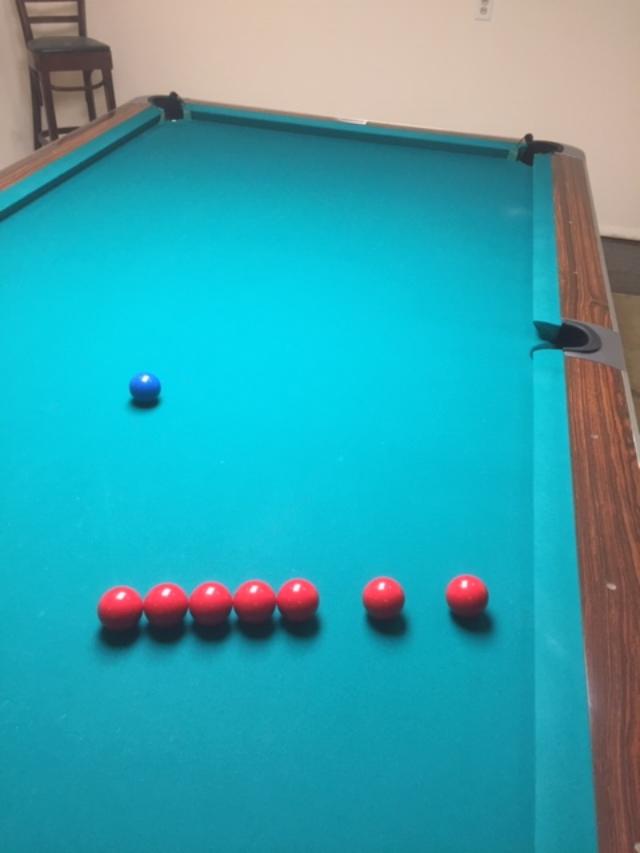
Mark the resting positions of each “cue ball” with a dot of chalk or powder or reinforcement labels, etc.
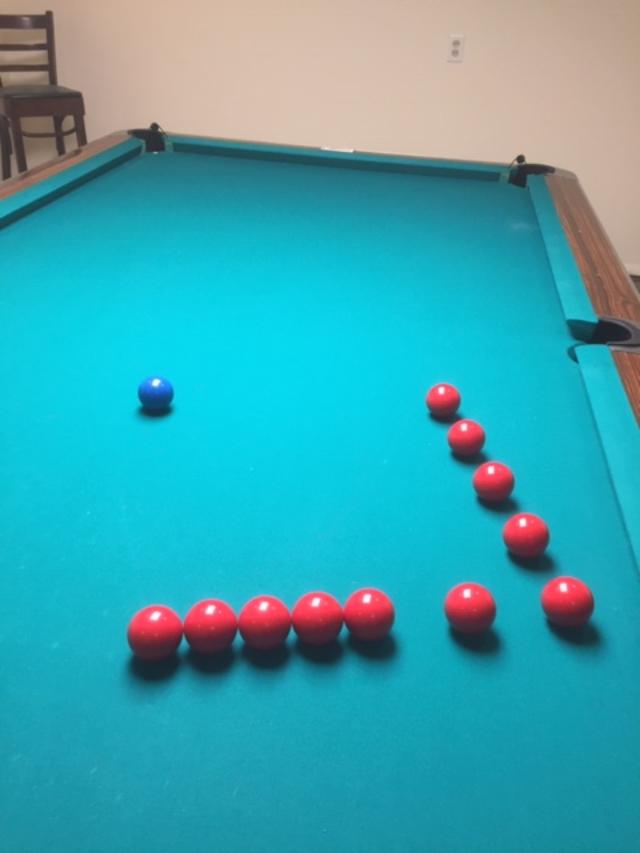
For the far side references of ‘Q’ through ‘U’, simply create another line above ‘Q’ of 8 more balls (8 balls plus the ‘Q’ ball) upward at a right angle to the bottom side. Again mark the resting positions.
Once all of the cue ball positions have been marked, you can remove all balls and begin practicing any of the reference shots or any shots that lie between the marked references.
10 balls work nicely, because each of the 9 balls along the bottom and far sides rests at a single letter or double letter reference. It also leaves a comfortable distance from object ball to cue balls. For pool balls this is about 18 to 25 inches (46 to 64cm) and for snooker balls about 17 to 24 inches (42 to 610cm).
You can also start with lines of 4, 6, 8, 12, 14, or even 16 balls. If you want to set up for practicing situations where balls are very close to one another, you would choose 4 or 6 balls.
If you want to practice shooting from a distance, you could choose 14 or 16 balls. No matter how many balls you choose the angles remain the same; only the distances between object ball and cue balls change.

The reason we use an even number of balls is that once we remove the object ball, the lines become an odd number, and only a line with an odd numbers of balls offers a middle ball (‘E’ or ‘S’) perfectly centered between the end balls. Once you have the end balls and the middle balls marked, you can locate the positions for the rest of the references by marking midway between them and subsequent marks.
You can also use the printable Master Square or bottom square of a cube of chalk using the hovering technique explained in the Application section. First place a mark on the table for the object ball and place a ball on the mark. Then place the ‘A’ ball in line with the object ball and pocket at whatever distance from the object ball you’d like to practice.

Next, eyeball the locations of the ‘Q’ and ‘U’ balls and place them to temporarily complete the square.
Carefully hover the Master Square or chalk bottom square until its near side matches the object ball and ‘A’ cue ball. Move the ‘Q’ and ‘U’ balls until they match the Master Square or chalk square.
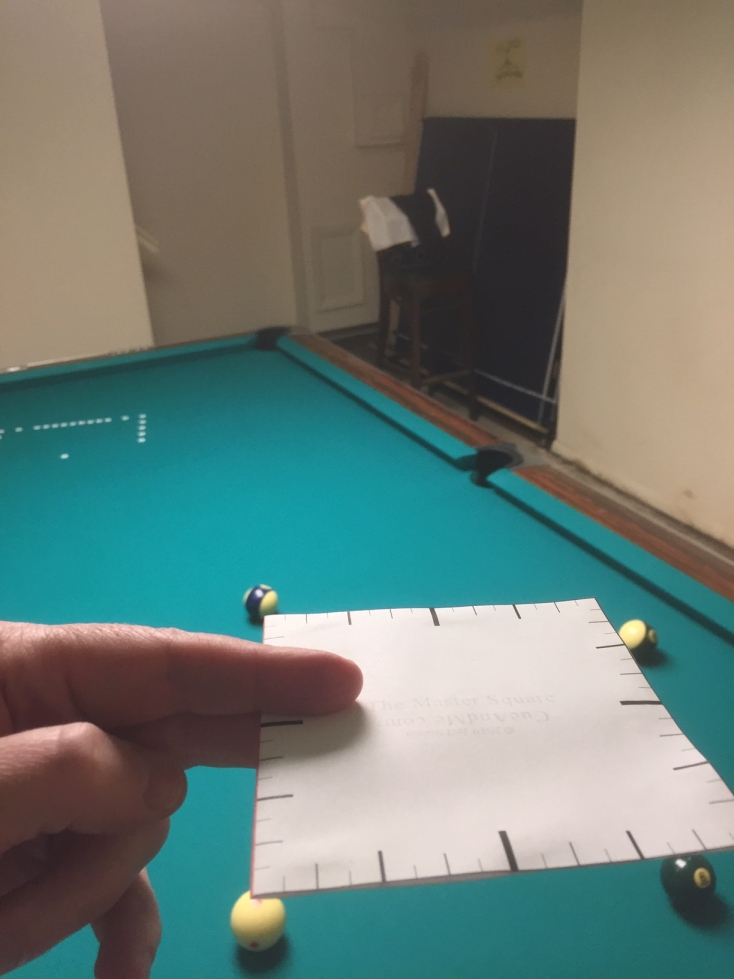
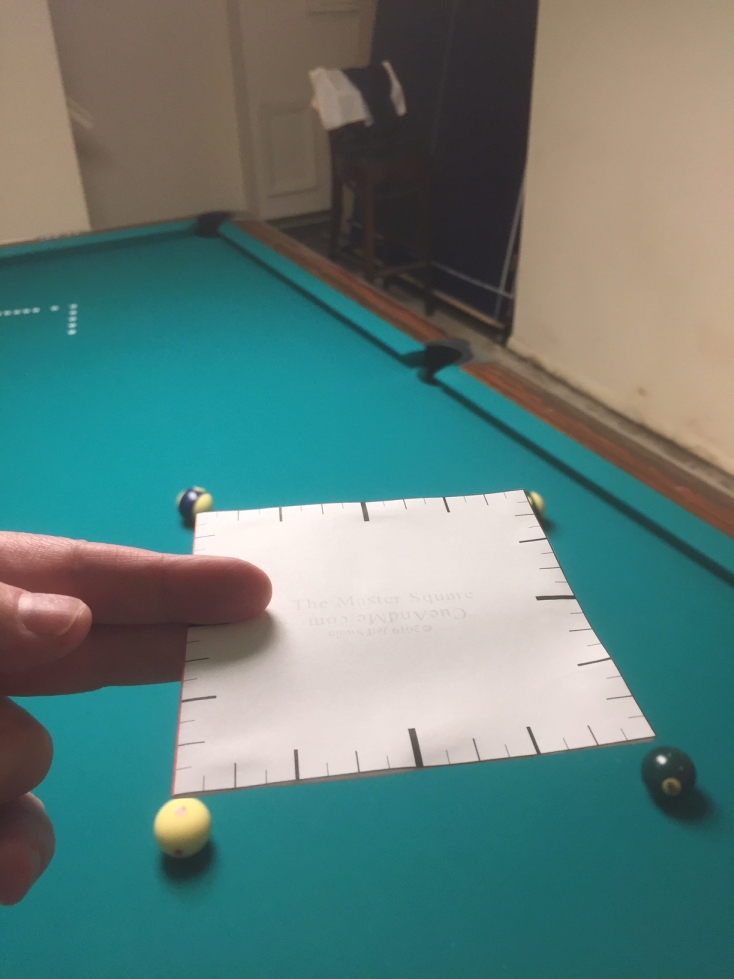
Once you have the corners perfectly placed, you don’t need the Master Square or chalk anymore. You can find and place ‘E’ midway between ‘A’ and ‘Q’ and place ‘S’ midway between ‘Q’ and ‘U’. Continue marking midway at ‘C’ and ‘F’, ‘R’ and ‘T’, then ‘B’ and ‘D’.