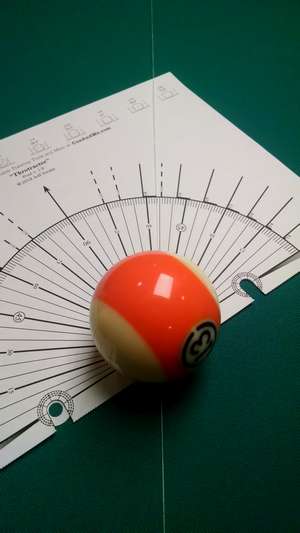
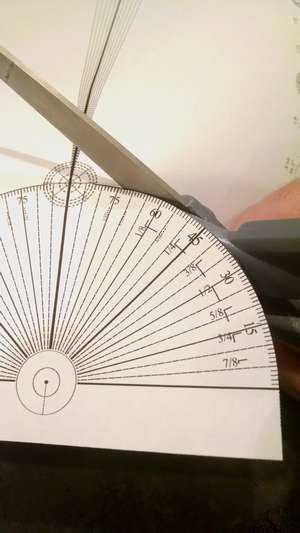
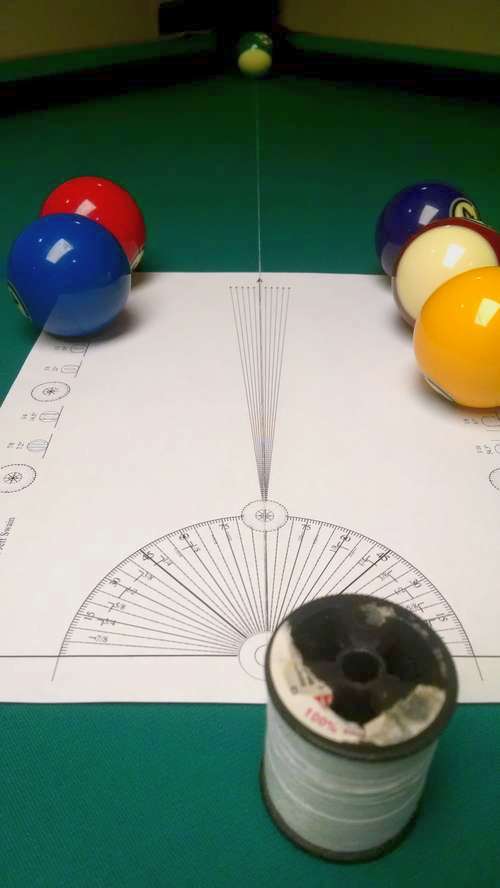
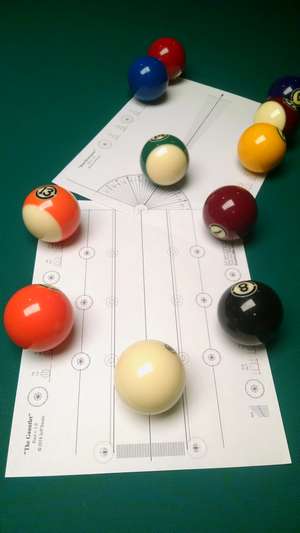
Throtractor: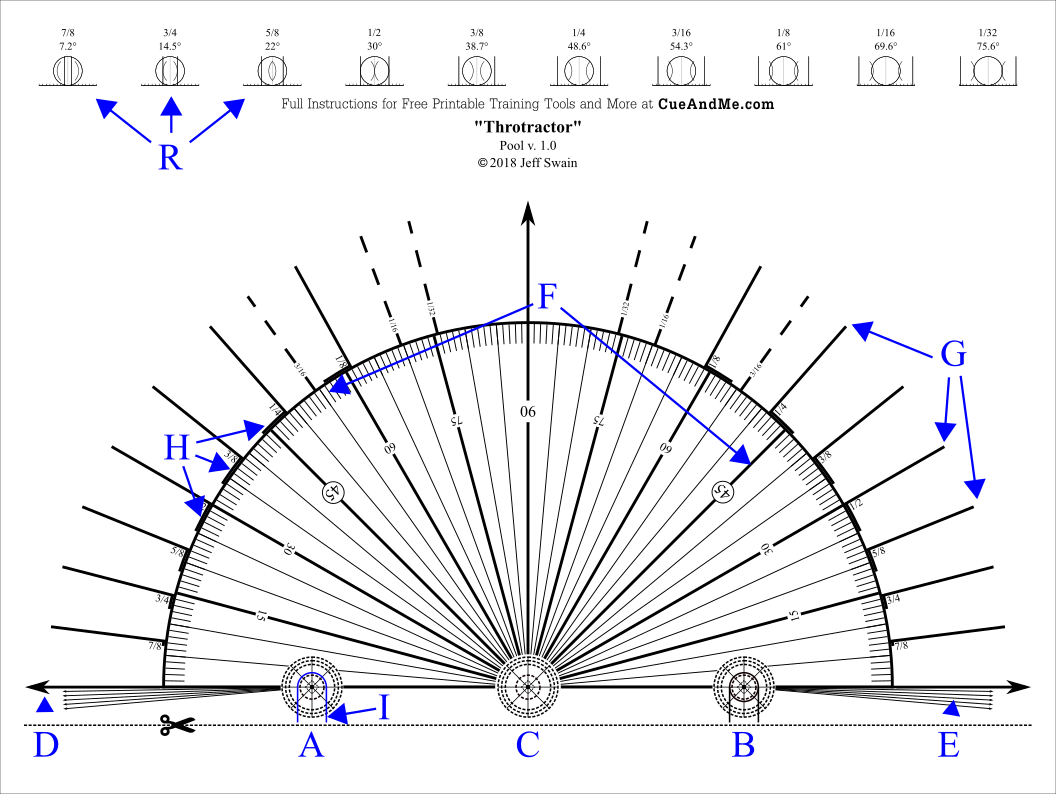
A) The object ball’s Label Placement Object (LPO) when setting up shots that cut to the right
B) The object ball’s LPO when setting up shots that cut to the left
C) The ghost ball’s LPO when setting up all shots
D) Theoretical path of object ball after colliding with cue ball
E) Object ball paths ranging from 0° to 5° to adjust for the effects of throw
F) Protractor angle lines and markings from 0° to 90°
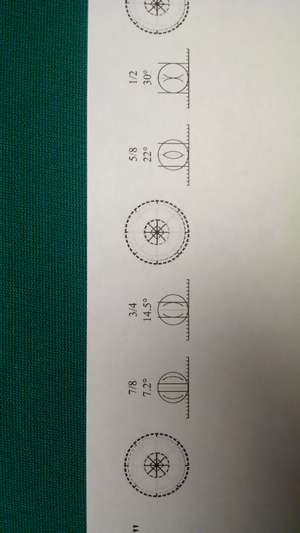
G) Spokes placed at the theoretical angle of the most common ball fractions
H) Angle ranges incorporating the minimum to maximum effects of throw on the most common ball fractions
I) Horseshoe cutout for Throtractor Option B preparation below
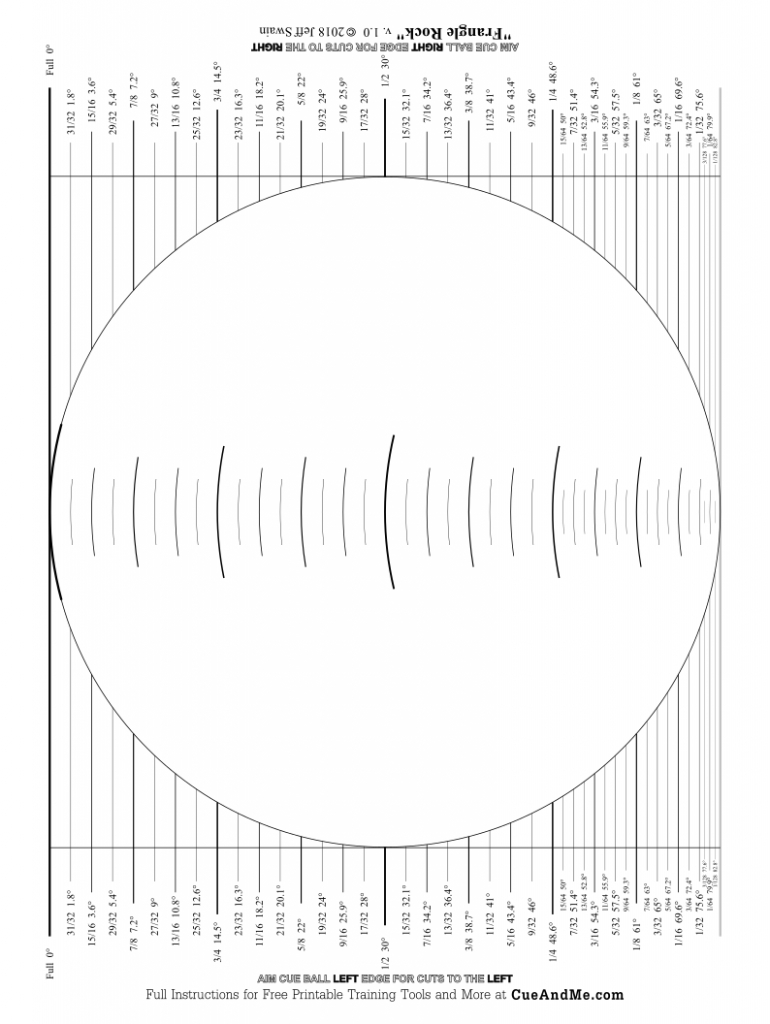
R) Ball fraction angle references showing cue-ball-edge and cue-ball-center aims on object ball
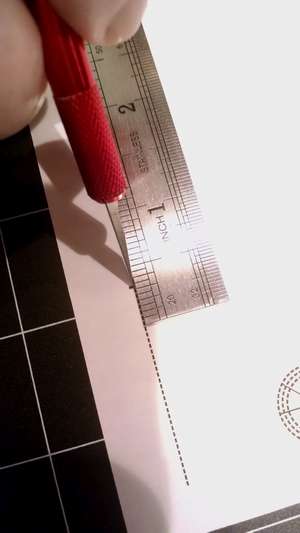
1) Using a hobby knife or scissors, cut off bottom of page along the dashed line.
Option A:
2) Place adhesive hole reinforcement labels at each Label Placement Object (LPO) being very careful to center their inner holes perfectly around the center of the LPO’s.
3) Using a hole puncher, carefully punch holes through the paper at the exact centers of the LPO’s.
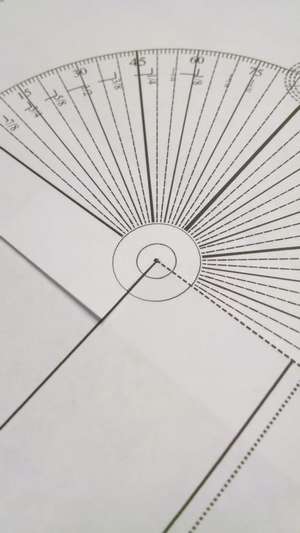
Option B:
2) Carefully place a centered reinforcement label on the middle LPO.
3) Carefully cut out the horseshoe portion of the two remaining LPO’s.

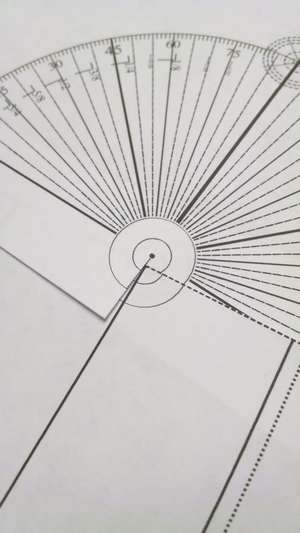
Option C: (This is a great option if using the Throtractor in reverse, where you would first mark the cue ball position and then use the notch in Step 3 to mark the object ball position with chalk, fabric pencil or talcum powder.
2) Carefully place a centered reinforcement label on the middle LPO.
3) Carefully notch out the small diamond around the center dot of the two remaining LPO’s. If using scissors rather than a hobby knife, you can cut from the bottom of the page if you wish, since the paper area below this notch will not be needed.
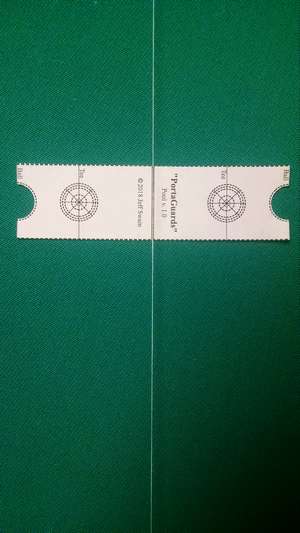
PortaGuards: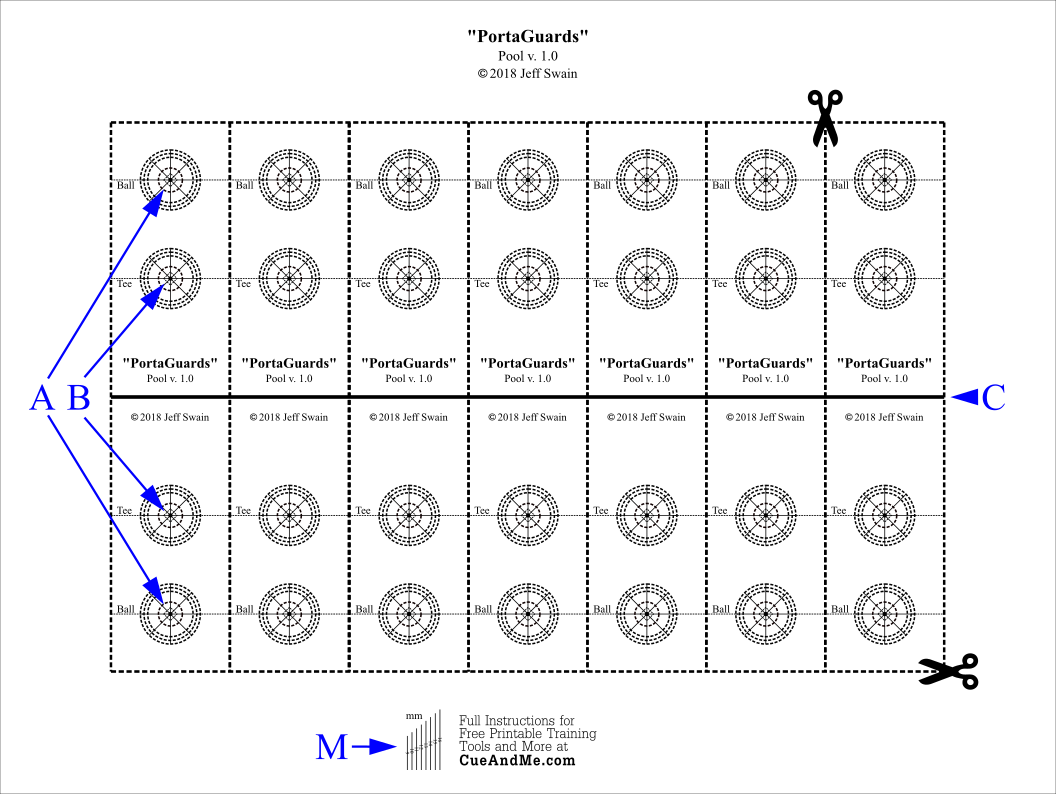
A) Outer LPO’s are for placement of balls to guard the edges of the cue ball’s path
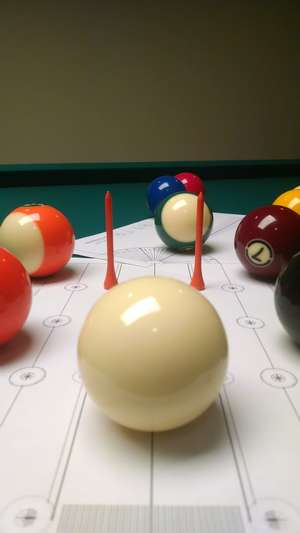
B) Inner LPO’s are for placement of golf tees to guard the edges of the cue ball’s path
C) Center line for centering PortaGuard on table beneath the sewing thread
M) Lines with exact lengths from 9mm to 16mm for checking that the tools were printed at the right sizes. Also for measuring tip and shaft diameters
1) You’ll probably only need one of the seven PortaGuards from the page, so remove one PortaGuard strip by cutting along its dashed rectangle. Optionally, you can leave up to all 7 of them connected to one another. This would allow you to create a channel of obstacles that has up to 7 golf tees or 4 balls on each side of the cue ball’s path.
2) The outer LPO’s are designed for placement of balls. The inner LPO’s are designed for placement of upside-down golf tees. Carefully center and place hole reinforcement labels on the two LPO’s that correspond to whichever obstacles you’ll be using.
3) On both sides, cut off the excess paper edges at the small dotted line that bisects the LPO’s, cutting straight through the labels you placed, leaving half of each label remaining affixed to the PortaGuard strip.
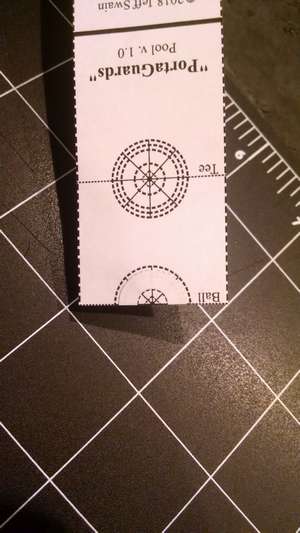
4) Closely cut around the outer circumference of the remaining portion of the labels. This will ultimately leave customized semicircle spaces on both sides of the PortaGuard tool for guiding the placement of the brand of labels you are using.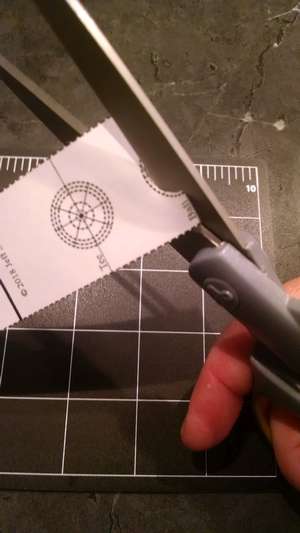

Throtractor:
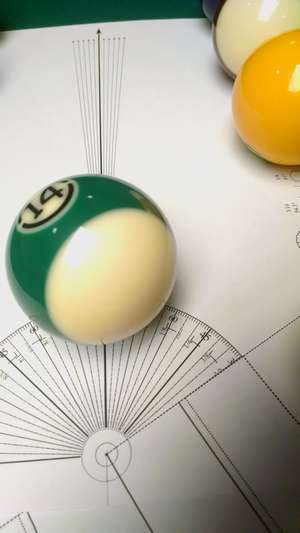
1) Mark the table with a label (or a tiny dot of chalk, fabric pencil, talcum) at the position you want the object ball to be repeatedly placed.
CAUTION and DISCLAIMER: If you are not the owner of the table, be sure to ask the owner if marking the table is allowed! And be sure that the owner knows what effects your chosen marking option might have on the cloth. It is your responsibility to make sure that the chosen marking option will not cause damage to the cloth!
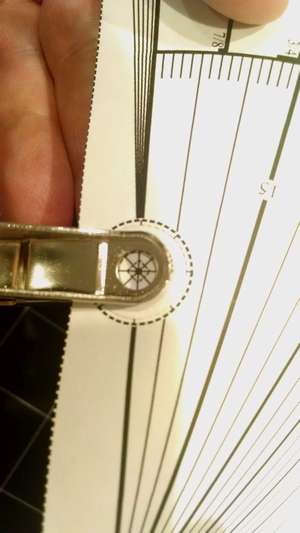
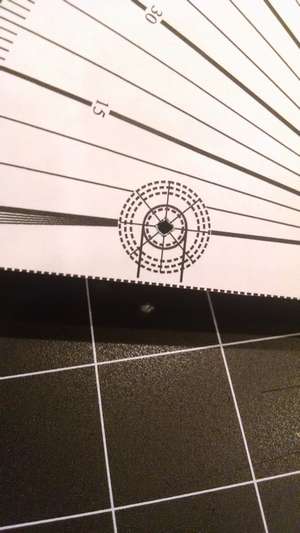
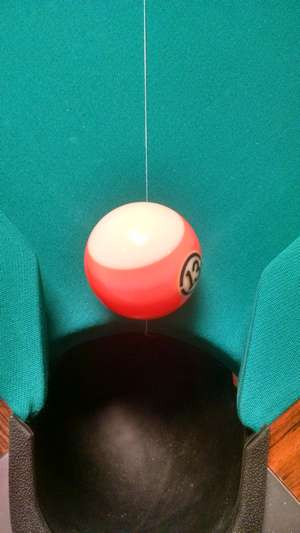
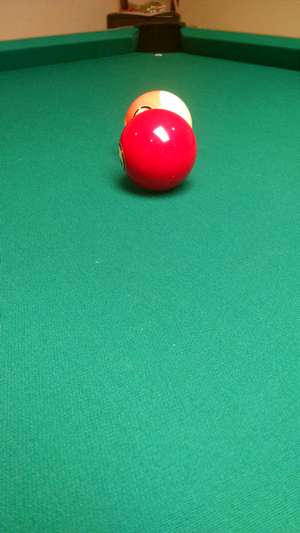
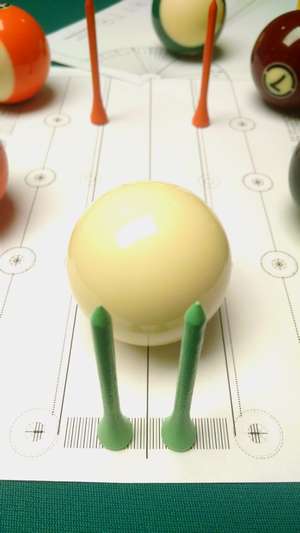
In my limited experience, hole reinforcement label adhesive can create minor discoloration of pool table cloth as shown here.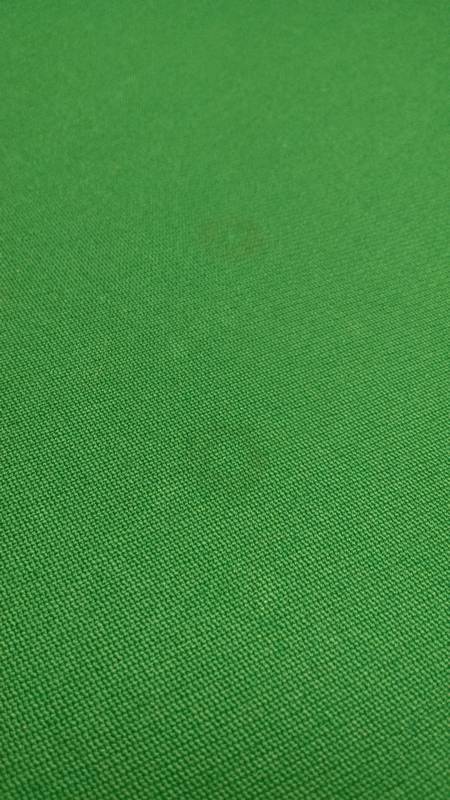
However, I have not used the labels on all pool table cloths, and I do not have access to snooker or carom billiard tables, so I am not familiar with their cloth properties or whether the cloth would be more or less affected by the label adhesive.
Chalk is often used for marking but is not ideal, because it is designed to create friction which could alter the response of the placed balls. But at least chalk is designed to be safe for pool table use.
I have used fabric pencil on pool table cloth, and it marks well but is difficult to remove completely.
I have not tried pool talcum powder for marking, but since it is designed for cue sports, it may be a good option.
2) Have 3 balls handy when positioning the Throtractor. For cuts to the right, center the hole in LPO A over the mark on the table. For cuts to the left, center the hole in LPO B over the mark on the table.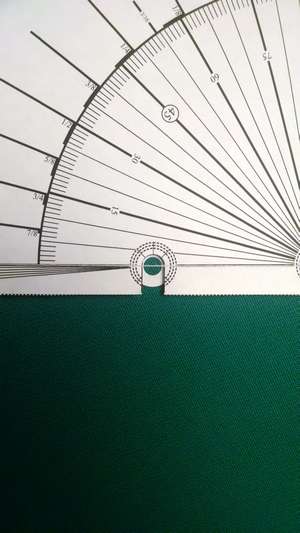
3) Keeping the LPO hole centered over the mark on the table, rotate the Throtractor until the theoretical release line (or your chosen throw angle using the 5 throw lines as guides) is pointing directly at the center of the pocket or target.
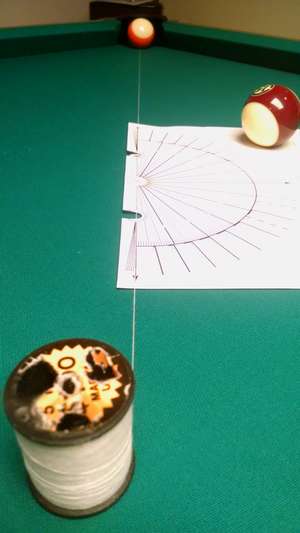
TIP: For additional precision, check the alignment by placing sewing thread beneath a ball at the center of the pocket or target and stretch the thread back to the Throtractor, centering the thread along the chosen Throtractor line and LPO.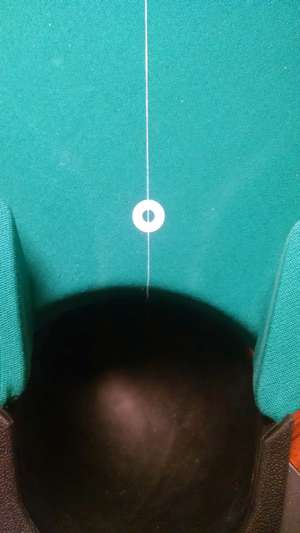
4) Once aligned, fix the Throtractor in place by placing two balls as paperweights anywhere on the same side of the Throtractor as the LPO you used. You may now remove the thread.
5) Decide on a shot angle that you’d like to repeatedly practice, and position the sewing thread so that it lies along this Throtractor angle as well as going through the center of LPO C. Place the third ball on LPO C to fix the thread in place.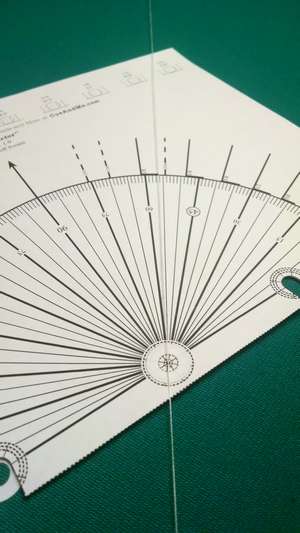
6) Gently pull the thread taut, keeping it centered along your chosen Throtractor angle line, and walk to whatever distance away from the object ball that you would like to mark the cue ball position for repeated practice.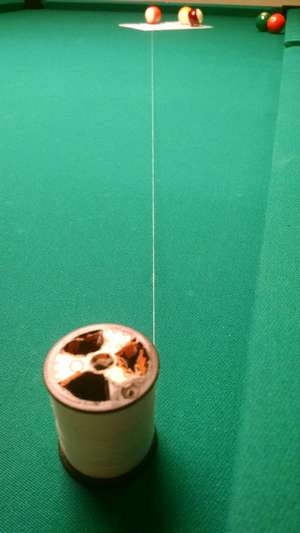
7) Double-checking that the thread is taut and centered along the chosen Throtractor angle line, mark the table directly beneath the thread.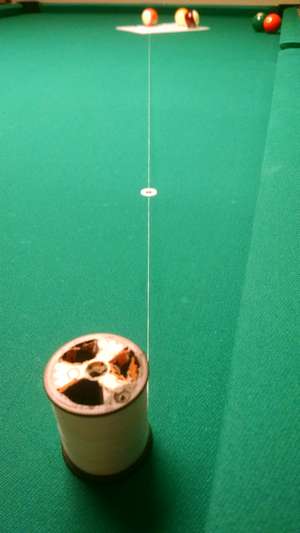
TIP: Leave the thread on its spool for hands-free marking and angle rechecking. The spool can be placed on the table and hold the thread in place, hovering above the table, while your hands are free to mark the position and recheck the angle.
8) The cue ball and object ball positions are now precisely marked for repeated practice of your chosen shot angle. If you would like to use PortaGuards to create obstacles for the edge of the cue ball path, leave everything in place and go directly to the PortaGuards instructions below before moving on to step 9.
9) Repeat steps 5 through 7 for marking cue ball placements for additional angles that will use the already-marked object ball position. Once everything is marked, you can remove the Throtractor, balls, and thread and begin practicing.
Important: When realigning the thread for each new angle, be sure to lift and replace the ball that is holding the thread at the center LPO. Leaving the ball in place while rotating the thread to another angle will give false readings.
TIP: You can also use Throtractor in reverse, marking the object ball after marking the cue ball position; or you can even measure an already fully-marked shot setup to know exactly what angle you’ve been practicing. Simply begin at the cue ball position and stretch the thread back to Throtractor and perform the above steps in reverse order.
TIP: You can use a straight edge or other long straight object if you don’t have thread. Though not as accurate, you can even place a cue stick on the table to point very close to the exact shot angle.
PortaGuards:
IMPORTANT: PortaGuards placed improperly will do more harm than good, so if you choose to use them be sure to take your time and be precise!
1) PortaGuards can be placed at any distance between the cue ball mark and the Throtractor. While the thread remains taut and centered along the chosen Throtractor angle line and cue ball mark, place a PortaGuard strip on the table so that its thick centerline lies beneath and aligns with the thread.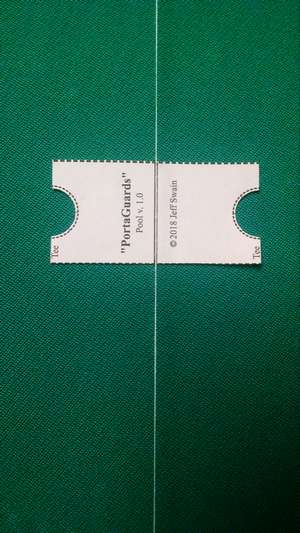
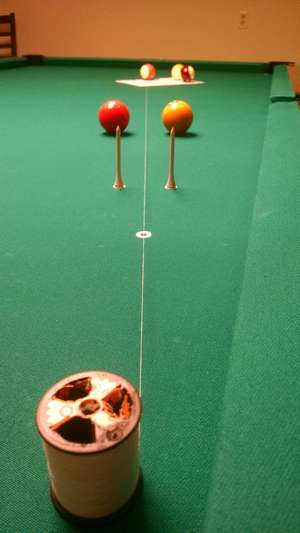
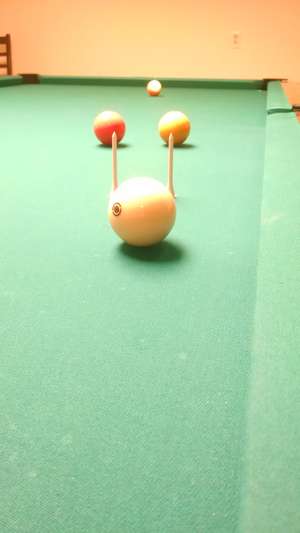
2) Press down on the PortaGuard strip to hold it in place, and guided by the semicircle spaces on either side, carefully place labels on both sides of the thread line.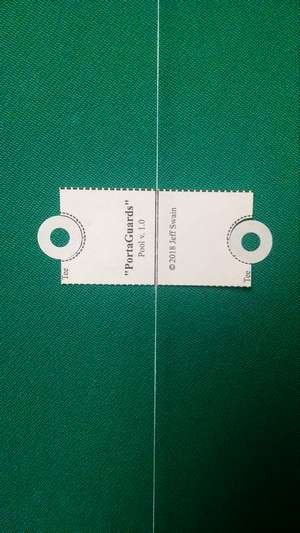

3) The labels are now properly placed to receive either balls or upside-down golf tees to guard the edges of the cue ball’s path on its way to the exact shot angle that was setup using the Throtractor. Balls will automatically sit in the center of the labels, but if using golf tees be sure to center them on the labels when placing them.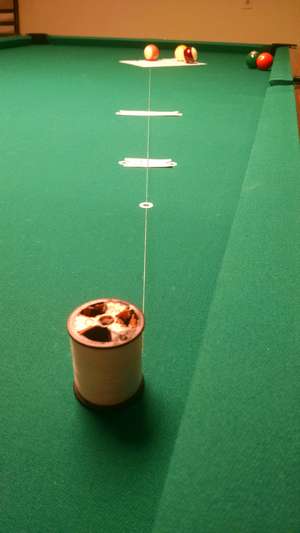
RotoThrotractor: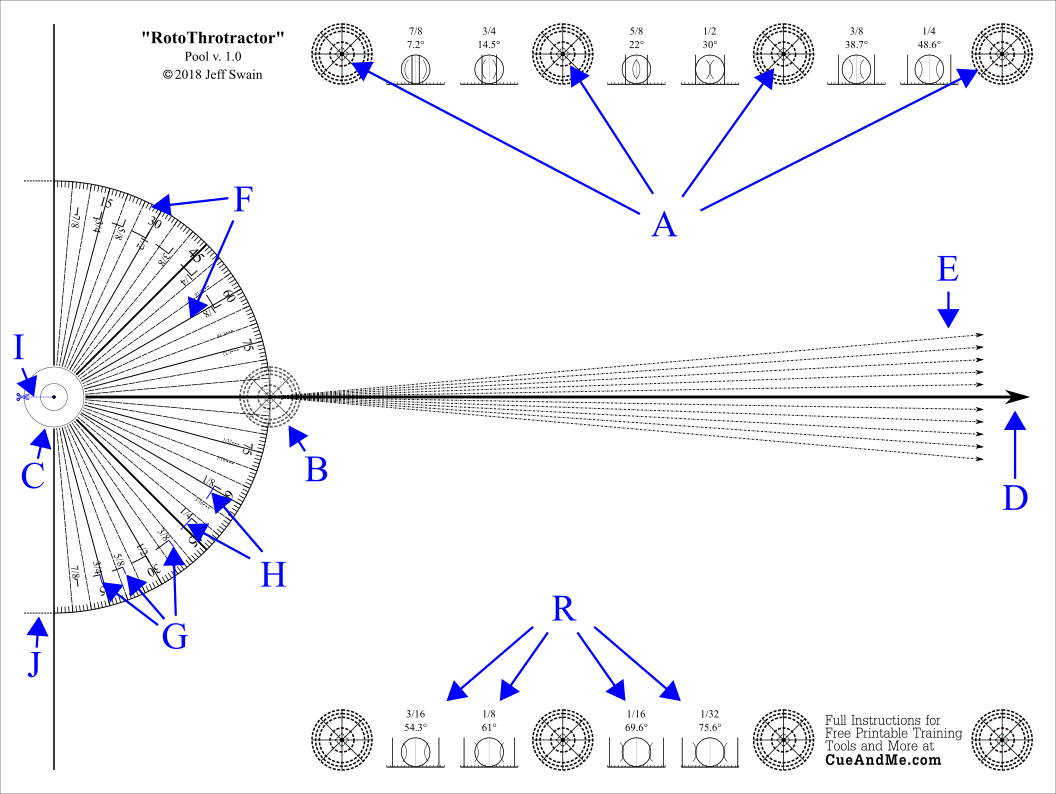
A) Paperweight LPO’s for receiving unused balls to keep paper from moving
B) Object ball LPO
C) Ghost Ball Position (GBP)
D) Theoretical path that the object ball will take after colliding with cue ball
E) Object ball paths ranging from 0° to 5° to adjust for the effects of throw
F) Protractor angle lines and markings from 0° to 90°
G) Markings placed at the theoretical angles of the most common ball fractions
H) Angle ranges incorporating the minimum to maximum effects of throw on the most common ball fractions
I) Dotted line for the slit connection to The Gauntlet or RotoThroBro
J) For optional preparation of tools (Not recommended)
R) Ball fraction angle references showing cue-ball-edge and cue-ball-center aims on object ball
1) Center and place hole reinforcement labels on the 4 LPO’s on each side of the page. Perfectly centering the labels here is not important, because these sections are simply for receiving “paperweights” in the form of unused balls. However, this is the perfect place to practice centering labels on LPO’s.
2) Very carefully center a hole reinforcement label on the LPO at the top of the protractor arc where the arrow-tipped lines converge (at ‘B’ in the image above). It is important to carefully center this label, because it is where the object ball will be repeatedly placed, and all RotoThrotractor measurements are relative to this LPO’s center.
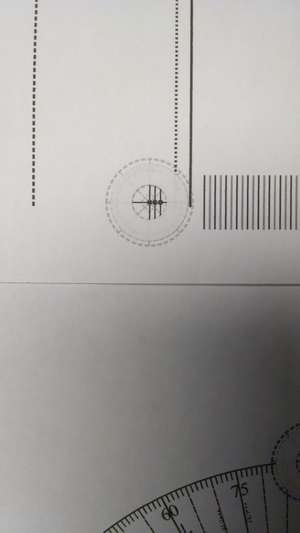
3) The remaining circular object (at ‘C’) contains an inner concentric circle around a central dot and is the Ghost Ball Position (GBP). It is centered exactly one ball’s diameter away from the center of the object ball’s LPO. Very carefully and slowly cut from the edge of the page through the short dotted line (at ‘I’) stopping at the exact center of the GBP’s central dot. This slit is what prepares the connection to either The Gauntlet or RotoThroBro, and it must be the correct length for the tools to align properly.
RotoThroBro: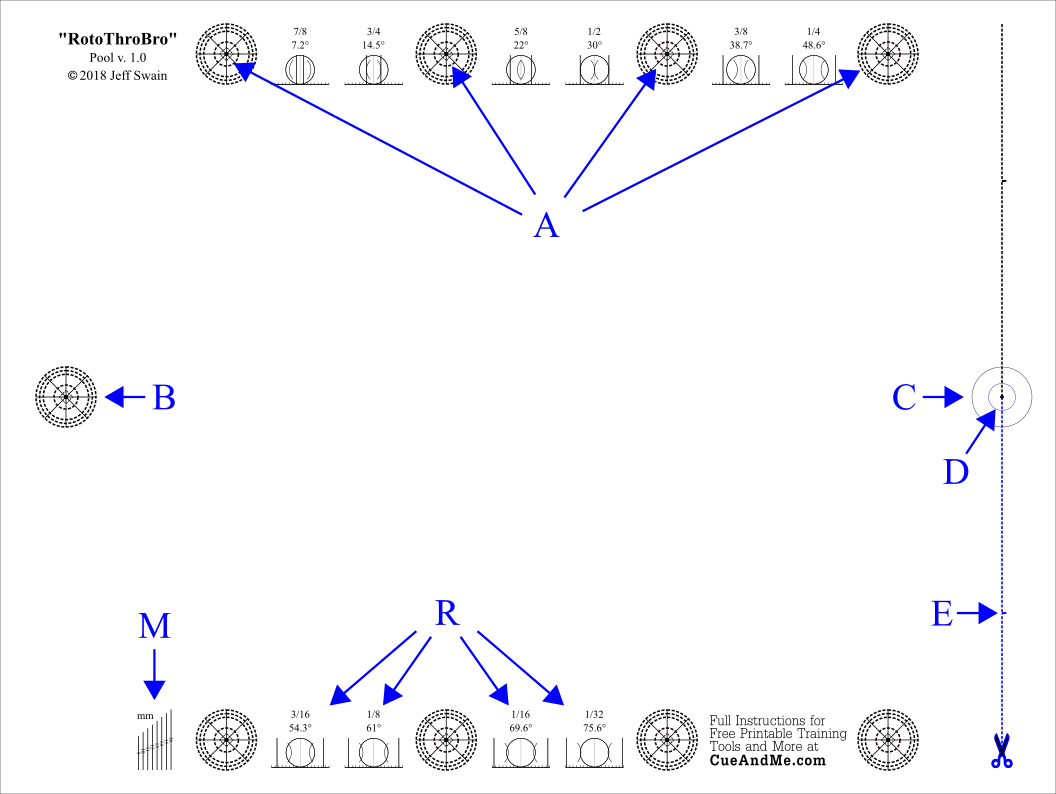
A) Paperweight LPO’s for receiving unused balls to keep paper from moving
B) Cue ball LPO
C) Ghost Ball Position (GBP)
D) GBP inner circle exactly 1/8 of a ball’s diameter
E) For optional preparation of tools (Not recommended)
M) Lines with exact lengths from 9mm to 16mm for checking that the tools were printed at the right sizes. Also for measuring tip and shaft diameters
R) Ball fraction angle references showing cue-ball-edge and cue-ball-center aims on object ball
1) Print two copies. One will be for shots to the left and the other for shots to the right.
2) Center and place hole reinforcement labels on the 4 LPO’s on each side of the page. Perfectly centering the labels here is not important, because these sections are simply for receiving “paperweights” in the form of unused balls. However, this is the perfect place to practice centering labels on LPO’s.
3) Very carefully center and place a hole reinforcement label on the remaining LPO. It is important to carefully center this label, because it is where the cue ball will be repeatedly placed, and this LPO’s center must line up with the GBP’s center across the page in order for the RotoThrotractor angle measurements to remain accurate.
4) Very carefully cut along the dashed line from one edge of the page stopping at the exact center of the GBP’s central dot. This cut is what prepares the connection to RotoThrotractor and must be the correct length. When this and RotoThrotractor’s small slit are cut properly, the outer and inner circles of the GBP on both tools will align perfectly. I recommend that you undercut, connect, check, recut, and repeat until they align properly.
5) Repeat step 4 for the second copy, this time cutting the dashed line from the other side of the page.
The Gauntlet: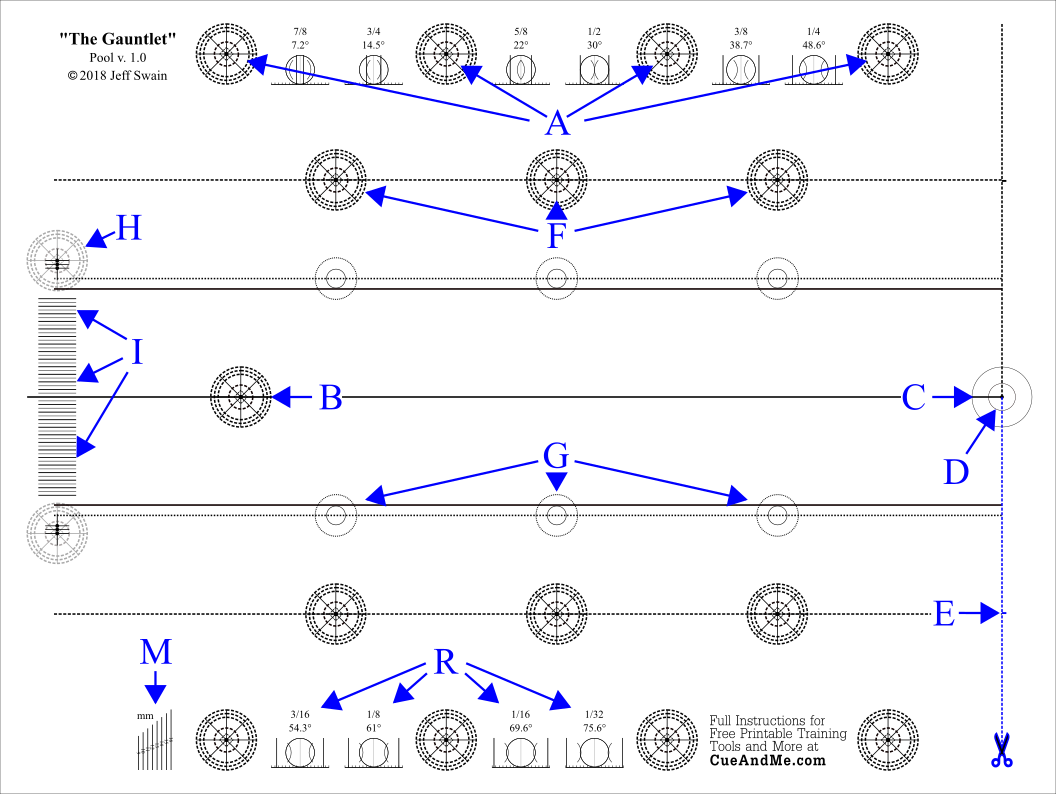
A) Paperweight LPO’s for receiving unused balls to keep paper from moving
B) Cue ball LPO
C) Ghost Ball Position (GBP)
D) GBP inner circle exactly 1/8 of a ball’s diameter
E) For optional preparation of tools (Not recommended)
F) LPO’s for placement of balls to guard edges of cue ball path
G) Circles for placement of golf tees to guard edges of cue ball path
H) LPO’s for optional placement of balls to guard edges of cue shaft path
I) Lines to guide repeatable placement of golf tees to guard edges of cue shaft path
M) Lines with exact lengths from 9mm to 16mm for checking that the tools were printed at the right sizes. Also for measuring tip and shaft diameters
R) Ball fraction angle references showing cue-ball-edge and cue-ball-center aims on object ball
The Gauntlet is essentially RotoThroBro with added features, so all of the above RotoThroBro instructions apply and continue…
6) Very carefully center and place hole reinforcement labels on the LPO’s that lie on the dashed lines. These positions are to receive balls that guard the edges of the cue ball path. Do not place labels on the smaller double-circle objects that lie on the dashed lines closer to the center line. They are for receiving upside-down golf tees that alternatively guard the same edges of the cue ball path.
7) If using golf tees, ignore the two faint LPO’s to either side and behind the cue ball LPO. However, if you’d like to use unused balls to guard the edges of your cue shaft’s path during the stroke, first measure the diameter of your cue in millimeters using the guide lines along the edge of the page off to the side of the paperweights at M. There are three center dots for the faint LPO’s on each side of the cue ball line—outside, middle and inside.
The following are the measurements of the side-to-side space afforded between the guard balls for each label placement. The measurements are dependent upon which game version of The Gauntlet you are using. Choose the placement that is slightly wider than the diameter of your cue’s shaft.
Game Version: Outside, Middle, Inside
Pool: 14.5mm, 12.5mm, 10.5mm
Snooker: 12.5mm, 10.5mm, 8.5mm
Carom: 14.3mm, 12.3mm, 10.3mm
*Below is the optional way to prepare RotoThrotractor, The Gauntlet, and RotoThroBro for a tighter connection, although the steepest angles cannot be played with this option.
1) On RotoThrotrator cut through the dotted lines at the edges of the protractor arc, and continue the cut along the arc stopping no further than the 80 degree mark on each side.
2) On The Gauntlet and RotoThroBro, rather than cutting the dashed line from the edge of the page to the center of the GBP, use a hobby knife and make the same cut to the center of the GBP, but start from the small hash mark at E that is perpendicular to the dashed line.
3) When connecting the tools, this long slit in The Gauntlet or RotoThroBro will accept the RotoThrotractor’s protractor arc for a tighter connection.

1) Point RotoThrotractor’s theoretical object ball release line D (or if you are compensating for the effects of throw, your chosen throw angle using the 5 throw lines E as guides) directly at the center of the pocket or target.
TIP: For additional precision, place sewing thread beneath a ball positioned at the center of the pocket or target, and pull the thread back to the Throtractor to perfectly align it.
2) Place 2 to 6 balls on the paperweight LPO’s to keep the RotoThrotractor from moving while practicing. When playing firm shots or shots with a lot of spin, more paperweights are necessary to keep the tools in place than if playing soft to medium topspin shots.
For cuts to the left, place most balls on the left LPO’s. For cuts to the right place most balls on the right LPO’s. This allows the cue ball enough room to exit after object ball contact.
3) Slide either The Gauntlet or RotoThroBro into the slit on RotoThrotractor’s GBP until fully engaged and the GBP’s circles line up.
4) Rotate either The Gauntlet or RotoThroBro to your chosen shot angle. The shot angle is displayed where the protractor angle on RotoThrotractor meets the dashed line on either The Gauntlet or RotoThroBro.
5) When the shot angle is properly aligned, place 2 to 8 balls on The Gauntlet or RotoThroBro paperweight LPO’s to keep the tool in place while practicing. When playing firm shots or shots with a lot of spin, more paperweights are necessary to keep the tools in place than if playing soft to medium topspin shots.
6) Place the cue ball on the cue ball LPO and an object ball on RotoThrotractor’s object ball LPO and shoot.
7) If using The Gauntlet and you’d like to add cue ball path obstacles, you can either place balls on the ball guard LPO’s at F or place upside-down golf tees centered on the smaller double-circle images at G. I prefer to use golf tees, because they don’t disturb the paperweights if struck and knocked over.
8) If you are using The Gauntlet and you’d like to add cue shaft path obstacles, you can either place balls on the faint LPO’s behind and to either side of the cue ball LPO at H…
9) …Or use the many 10mm lines behind the cue ball LPO at I. They are spaced 1mm apart from one another and can be used as guides for placing and marking upside-down golf tees in various positions to restrict the cue shaft’s path during the stroke.
For striking center ball or other vertical axis points on the cue ball, choose two lines equidistant from the center line and align the edges of the heads of two tees so that they are touching these lines.
For striking the cue ball with side spin, place the tees at two lines so that the shaft is restricted to the right or left of the cue ball’s centerline.
You can mark these lines with pencil for repeatability. You can also place and mark one tee closer to the cue ball and the other further away. This may be useful to find the perfect compensation for the deflection of your particular cue stick when playing sidespin shots. Experiment with this option until you find the correct tee placement.
Example of using the RotoThrotractor system to compensate for throw:
Say you wanted to practice a 1/2-ball soft stun shot, which happens to be a shot that results in maximum throw of nearly 5°. You could set the RotoThrotractor protractor portion to the 1/2-ball theoretical angle of 30° and point the 5° throw line E at center pocket; or you could instead set the protractor angle to 25° and point the theoretical release line D directly at center pocket. Either way, center pocket is 25° away.
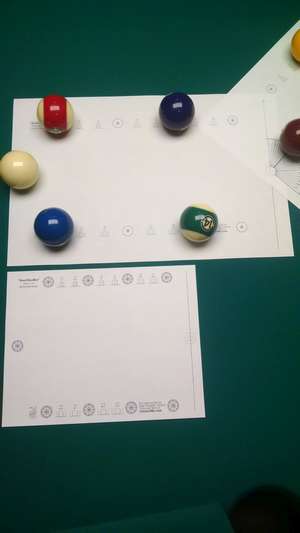
Shown below is the Ledger/A3 version of RotoThrotractor and RotoThroBro alongside the smaller letter/A4 version. If you’d prefer to shoot across a longer page than the letter/A4-sized tools, the Ledger/A3 is an available option. My local printer in the US charges 34 cents per ledger page.